No-Bake S’mores Bars
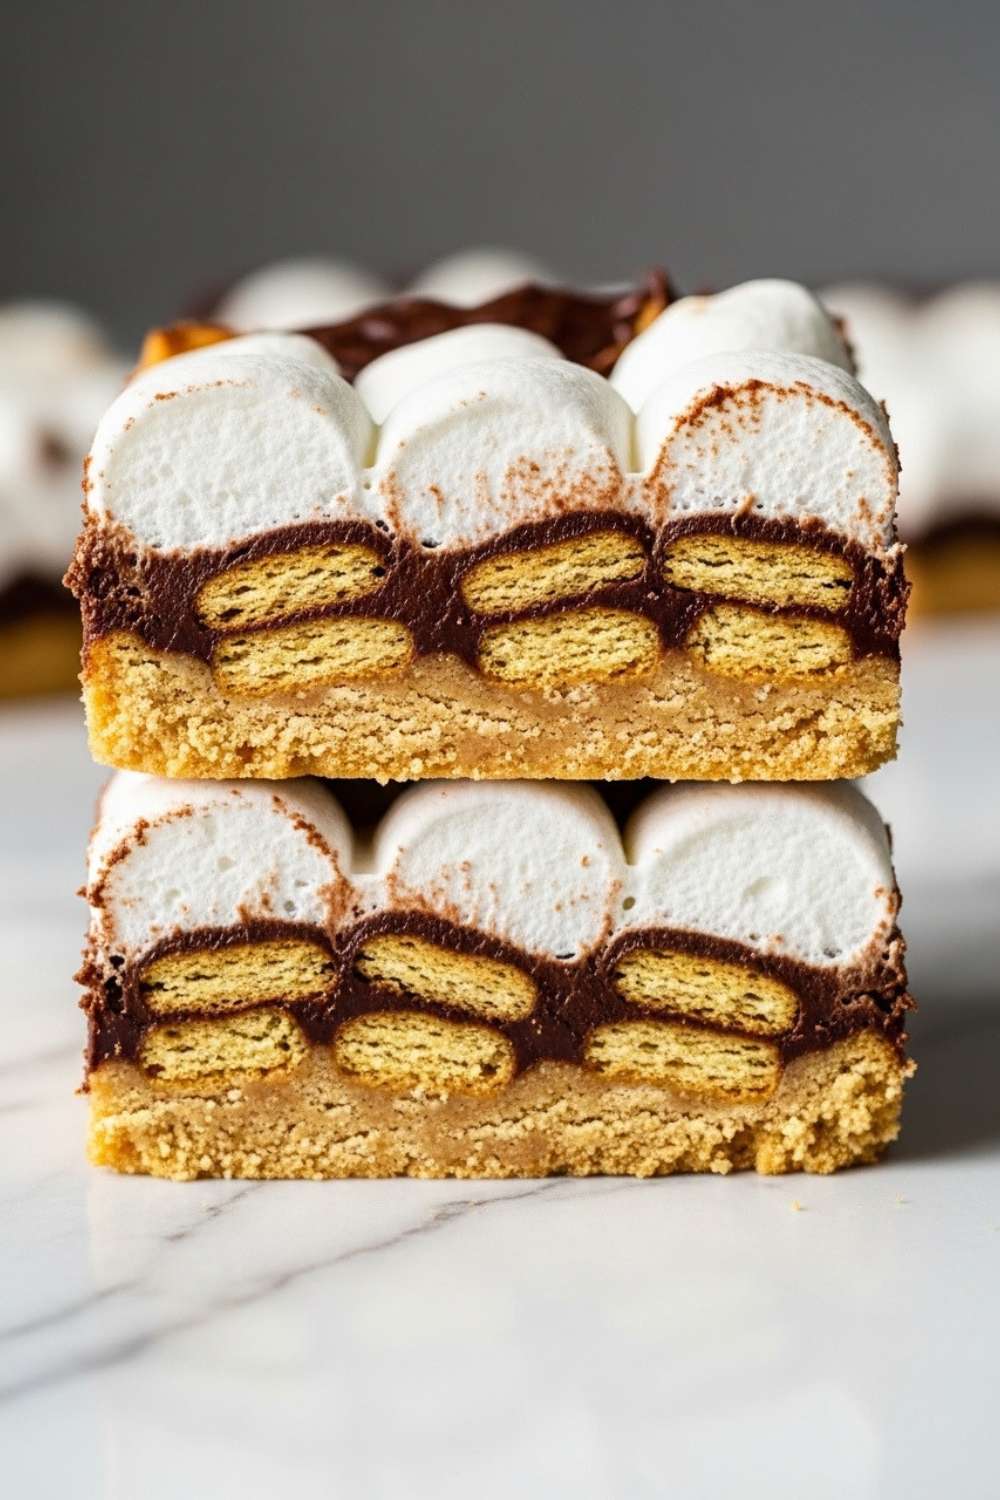
If you are looking for that classic campfire flavor without the sticky fingers and open flames, you’ve found it! These No-Bake S’mores Bars are incredibly rich, perfectly crunchy, and have that iconic gooey marshmallow pull that everyone craves. They come together in minutes and are always the first thing to disappear at any party.
Prep Time: 15 mins | Chill Time: 2 hours | Total Time: 2 hours 15 mins | Servings: 16 bars
Why You Will Love This No-Bake S’mores Bars
- No Oven Required: Keep your kitchen cool while whipping up a professional-grade treat using just your microwave or stovetop.
- The Perfect Texture: You get a satisfying crunch from the graham crackers paired with velvety smooth chocolate and soft, pillowy marshmallows.
- Crowd-Pleaser: It’s a nostalgic flavor profile that kids love and adults find totally irresistible.

What You Need for This No-Bake S’mores Bars
- Graham Crackers: 8–10 oz, roughly chopped into bite-sized chunks.
- Mini Marshmallows: 4 cups (divided for the base and the topping).
- Milk Chocolate Chips: 2 cups (or chopped high-quality chocolate bars).
- Unsalted Butter: 1/2 cup (1 stick).
- Vanilla Extract: 1 teaspoon.
- Pinch of Sea Salt: To balance the sweetness.
Chef Sophie’s Substitution Tip: If you want a more “adult” version of this bar, swap the milk chocolate for dark chocolate (60% cacao) and add a sprinkle of flaky sea salt on top before chilling.
How to Make No-Bake S’mores Bars (Step-by-Step)
- Prepare your pan by lining an 8×8 inch baking dish with parchment paper, leaving a little overhang on the sides so you can easily lift the bars out later.
- Melt the butter and chocolate together in a large microwave-safe bowl in 30-second intervals, stirring in between until the mixture is glossy and smooth.
- Stir in the vanilla extract and a pinch of salt to the melted chocolate mixture.
- Fold in the chopped graham crackers and 3 cups of the mini marshmallows. Toss gently until everything is coated in chocolate, but be careful not to crush the crackers into dust.
- Press the mixture firmly into your prepared pan using a spatula.
- Top with the remaining marshmallows, pressing them lightly into the surface so they stick.
- Chill in the refrigerator for at least 2 hours, or until the chocolate is completely set and firm to the touch.
- Slice into squares using a sharp knife warmed under hot water for clean, professional edges.
Chef Sophie’s Pro-Tips for the Best No-Bake S’mores Bars
- Don’t Over-Melt: When melting chocolate, stop when there are still a few small lumps left and just stir until they disappear. This prevents the chocolate from seizing or becoming grainy.
- The “Toast” Factor: For a truly authentic look, use a kitchen torch to lightly brown the marshmallows on top of the bars after they have set in the fridge.
- Size Matters: Chop your graham crackers into various sizes. Having some larger chunks creates a much more interesting “mosaic” look when you cut into the bars.
How to Serve Your No-Bake S’mores Bars
- The Classic Way: Serve at room temperature so the marshmallows stay soft and stretchy.
- A La Mode: Warm a bar slightly in the microwave for 10 seconds and top with a scoop of vanilla bean ice cream.
- Gourmet Gift: Stack three bars, tie them with baker’s twine, and place them in a clear cellophane bag for a beautiful homemade gift.