Mocha Espresso Protein Bars Recipe

There’s something undeniably comforting about the rich, bold aroma of coffee wafting through the kitchen, especially when it’s paired with chocolate in these Mocha Espresso Protein Bars. I’ll never forget the first time I made these—it was a rainy Portland afternoon, and my coffee-roasting husband, David, was tinkering with a new espresso blend. I decided to steal a bit of his magic for these bars, and let’s just say the result was love at first bite! After years of perfecting the recipe (and a few over-caffeinated mishaps), I’ve crafted a high-protein treat that’s perfect for coffee lovers and busy days alike.
These bars are a favorite at my bakery, Sophie’s Sweet Haven, and they’re a hit with my kids, Emma and Lucas, for a quick snack. With a fudgy texture and a caffeine kick, they’re your morning boost and afternoon pick-me-up in one. Let’s dive into why these bars are so special and how you can make them at home!
Table of Contents
Why Mocha Espresso Protein Bars Are Special
These bars are a coffee lover’s dream, blending the deep, roasty notes of espresso with rich chocolate for a protein-packed snack that feels like a treat. With about 9 grams of protein per bar, they’re perfect for post-workout recovery or when you need a quick energy boost without the coffee shop run.
I love how they double as a breakfast on busy mornings—David swears they pair perfectly with his morning brew! The no-bake prep makes them quick and easy, and the hazelnut crunch adds a delightful texture. After countless batches, I’ve learned that the secret is balancing the espresso powder so it enhances, not overwhelms, the chocolate. Trust me, these bars will have your kitchen smelling like a cozy café and keep you fueled for hours.
Essential Ingredients for Perfect Mocha Espresso Protein Bars
Now, let’s talk ingredients—quality is key for that café-worthy flavor. I’ve tested everything from grocery-store staples to David’s fancy coffee supplies, and good ingredients make all the difference. Here’s what you’ll need and why each matters:
- 1 cup almond butter: The creamy base that gives these bars their fudgy texture. Use natural almond butter (just almonds and salt) to avoid excess oil. I’ve had greasy bars ruin a batch when I used a cheap brand—lesson learned!
- ½ cup maple syrup: This sweetener adds a subtle caramel note that pairs beautifully with espresso. Honey works too, but maple complements the coffee better. I’ve found it keeps the bars moist without being too sweet.
- 1 ½ cups chocolate protein powder: The protein punch! Chocolate-flavored powder enhances the mocha vibe, but vanilla works in a pinch. I use whey or plant-based (about 20g protein per 30g scoop). Pick one you love, as it impacts the flavor.
- 2 tbsp instant espresso powder: The star for that bold coffee kick. Instant espresso dissolves better than ground coffee, giving a smooth flavor. I’ve tried brewed coffee, but it made the bars too wet—stick with powder.
- ¼ cup cocoa powder (unsweetened): Adds depth to the chocolate flavor. Dutch-processed cocoa gives a richer taste, but natural cocoa works too. Sift it if it’s lumpy to keep the bars smooth.
- ¼ cup crushed hazelnuts: These add a nutty crunch that screams “coffeehouse.” Toast them lightly (5 minutes at 350°F) for extra flavor. Swap for almonds or skip for a smoother bar.
- 2 tbsp milk (or plant-based alternative): A splash of milk helps bind the mixture. I use almond milk, but any type works. Adjust if your mixture feels too thick or thin.
Substitutions:
- Almond butter: Cashew or sunflower seed butter for a nut-free option.
- Maple syrup: Honey or agave nectar, though agave is slightly sweeter.
- Protein powder: Vanilla or unflavored protein powder; add a teaspoon of cocoa if using unflavored.
- Espresso powder: Instant coffee powder works, but it’s less intense. Avoid brewed coffee to maintain texture.
- Hazelnuts: Chopped almonds, walnuts, or omit for a smoother bar.
- Milk: Water or any plant-based milk like oat or soy.

Step-by-Step Mocha Espresso Protein Bars Recipe
Here’s the fun part—making these bars! I’m right there with you, sipping a latte and guiding you through. This recipe makes 12 bars and takes about 15 minutes to prep (plus 1 hour to chill). Don’t worry if the mixture looks a bit sticky—mine did too the first time! Here’s how to do it:
- Prepare your pan (2 minutes): Line an 8×8-inch baking pan with parchment paper, leaving overhang on two sides for easy removal. I spritz the pan with cooking spray to keep the parchment in place—saves you from a slippery struggle!
- Mix the wet ingredients (3–4 minutes): In a large mixing bowl, combine 1 cup almond butter, ½ cup maple syrup, and 2 tablespoons milk. Stir with a spatula until smooth and glossy. This takes me about a minute, and the mixture should smell nutty and sweet.
- Add the dry ingredients (4–5 minutes): Add 1 ½ cups chocolate protein powder, 2 tablespoons instant espresso powder, ¼ cup cocoa powder, and ¼ cup crushed hazelnuts to the bowl. Mix until a thick dough forms. It’ll be sticky—use some elbow grease! If it’s too dry (crumbly), add 1–2 teaspoons more milk. If too wet, sprinkle in a tablespoon of protein powder. Plant-based powders might need a touch more liquid, so adjust as needed.
- Press into the pan (3 minutes): Transfer the dough to your lined pan. Press it firmly and evenly using your hands or the back of a measuring cup. Don’t skimp on pressing—this prevents crumbly bars. Smooth the top for a clean finish.
- Chill and slice (1 hour + 5 minutes): Place the pan in the fridge for at least 1 hour to set. Patience is your friend here—I know it’s tempting to sneak a taste, but chilling ensures clean slices. Once set, lift the bars out using the parchment overhang and place them on a cutting board. Cut into 12 even bars (about 2×2 inches each) with a sharp knife, wiping it between cuts for neat edges.
Yield: 12 bars
Prep Time: 15 minutes
Chill Time: 1 hour
Total Time: 1 hour 15 minutes
Estimated Nutrition (per bar): ~210 kcal, ~9g protein (based on standard chocolate whey protein powder and natural almond butter).
Hooked on these Mocha Espresso Protein Bars? Explore more high-protein energy bars in my 7 Best High-Protein Energy Bar Ideas!
Pro Tips for Mocha Espresso Protein Bars Success
After many batches (and a few that tasted like burnt coffee—oops!), here are my top tips to make these bars perfect:
- Measure espresso carefully: Too much can make the bars bitter. Stick to 2 tablespoons, and taste the powder first to gauge strength. I overdid it once, and David still teases me about it!
- Use a good protein powder: Cheap ones can taste artificial and ruin the mocha vibe. Test yours in a smoothie first to ensure you like it.
- Press firmly: Really pack the mixture into the pan to avoid crumbly bars. I use a measuring cup to get it nice and tight.
- Adjust for texture: If the dough feels too sticky, add a tablespoon of protein powder or cocoa. Too dry? A splash of milk helps. I learned this after tossing a crumbly batch!
- Chill fully: The full hour in the fridge is key for clean slices. In a pinch, 30 minutes in the freezer works, but don’t rush it.

Variations and Customizations for Mocha Espresso Protein Bars
These bars are so easy to tweak to your taste. Here are some variations I’ve tried at the bakery and for my family:
- Extra crunch: Add ¼ cup crushed coffee beans or more hazelnuts for a bolder texture. Emma loves the extra crunch!
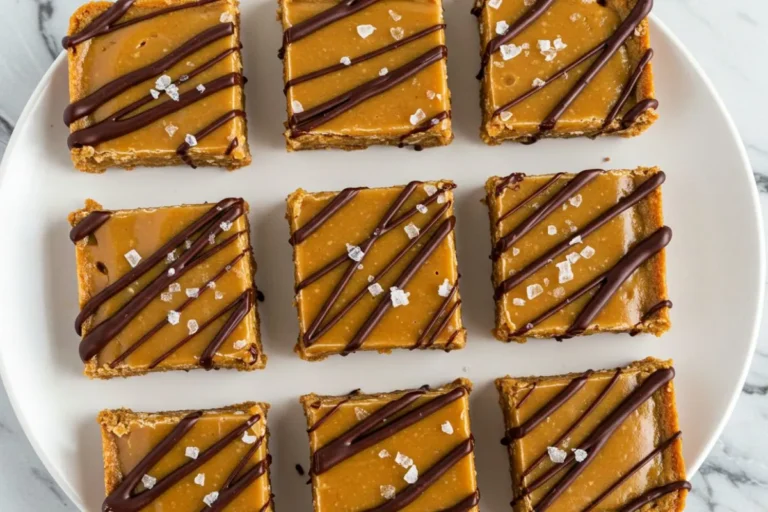
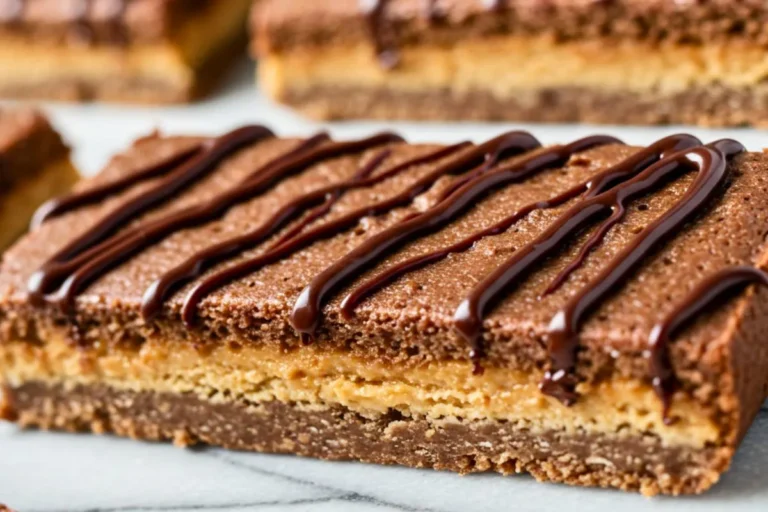
- Chocolate drizzle: Melt ¼ cup dark chocolate chips and drizzle over the top for a decadent finish.
- Vegan version: Use plant-based protein powder, plant-based milk, and agave instead of maple syrup. I’ve made these for vegan customers, and they’re just as fudgy.
- Lower calorie: Reduce almond butter to ¾ cup and add 1 tablespoon milk to adjust texture. Use a low-calorie sweetener like stevia syrup (adjust to taste).
- Nut-free: Swap almond butter for sunflower seed butter and omit hazelnuts for a school-safe option.
Storing and Serving Your Mocha Espresso Protein Bars
These bars store like a dream, making them perfect for meal prep. Keep in an airtight container in the fridge for up to 2 weeks, layered with parchment to prevent sticking. For longer storage, wrap each bar in plastic wrap and freeze for up to 3 months—they thaw beautifully for quick snacks. I learned this after finding a batch in my freezer that still tasted like a coffee shop treat!
For serving, I love wrapping bars in parchment and tying with twine for a rustic, giftable look—perfect for sharing with friends. Pair with a hot latte or David’s espresso for a true mocha experience. For a party, cut into bite-sized pieces and arrange on a platter with coffee beans scattered around for flair. Let them sit at room temperature for 5 minutes before eating for the best fudgy texture. The rich coffee aroma and hazelnut crunch make these bars as inviting as they are delicious!

Mocha Espresso Protein Bars
Ingredients
- 1 cup almond butter
- ½ cup maple syrup
- 1 ½ cups chocolate protein powder
- 2 tbsp instant espresso powder
- ¼ cup cocoa powder unsweetened
- ¼ cup crushed hazelnuts
- 2 tbsp milk or plant-based alternative
Instructions
- Line an 8×8-inch pan with parchment paper.
- Mix almond butter, maple syrup, and milk until smooth.
- Stir in protein powder, espresso powder, cocoa powder, and hazelnuts to form a dough.
- Press dough evenly into the pan.
- Chill for 1 hour, then slice into 12 bars.
Equipment
- 8×8-inch baking pan
- Parchment paper
- Large mixing bowl
- Spatula or wooden spoon
- Measuring cups and spoons
- Sharp knife
- Cutting board
Conclusion
These Mocha Espresso Protein Bars are my love letter to coffee and chocolate, crafted with years of baking know-how and a few caffeine-fueled experiments. They’re the perfect blend of indulgent and healthy, ready to fuel your workouts, busy mornings, or cozy evenings. So, channel your inner barista, slip on your favorite apron (mine’s still dusted with flour from Nonna Rosa!), and whip up a batch. I’d love to see how they turn out—share your creations on TikTok with #EasyWithSophie. Happy baking, and remember: the secret ingredient is always patience!
⚠ Note: Some of the links above are affiliate links. If you click and purchase, I may earn a small commission—at no extra cost to you. Thank you for your support!