Chocolate Peanut Butter Protein Bars Recipe

There’s something magical about the way a Chocolate Peanut Butter Protein Bar hits all the right spots—creamy, fudgy, and just indulgent enough to feel like a treat, but packed with protein to keep you going. I’ll never forget the first time I tried making these at Nonna Rosa’s house. I was twelve, thought I knew everything about baking, and ended up with a sticky mess because I didn’t measure the peanut butter properly.
Let’s just say it was a learning experience! Twenty-two years later, I’ve perfected this recipe, and I’m thrilled to share it with you. These bars are my go-to for a post-workout snack or when my kids, Emma and Lucas, need something quick before school. The combination of rich chocolate and smooth peanut butter is a crowd-pleaser, and the smell alone will have your neighbors knocking! Let’s get into why these bars are so special and how you can make them in your own kitchen.
Table of Contents
Why Chocolate Peanut Butter Protein Bars Are Special
These bars are a dream come true for anyone who loves the classic combo of chocolate and peanut butter. They’re not just delicious—they’re functional, with about 10 grams of protein per bar to fuel your day. I love that they’re versatile enough for a gym bag, a lunchbox, or even a late-night snack (trust me, I’ve snuck one while binge-watching with David!).
The fudgy texture is achieved with natural peanut butter, and the deep chocolate flavor is enhanced by both cocoa powder and a decadent chocolate drizzle. After years of testing, I’ve found that using high-quality ingredients makes all the difference—cheap peanut butter can make the bars too oily, and low-grade protein powder can leave them chalky. Plus, they’re no-bake, so you don’t even need to turn on the oven. Whether you’re a fitness buff or just craving a healthier treat, these bars are a win.
Essential Ingredients for Perfect Chocolate Peanut Butter Protein Bars
Now, let’s talk about the ingredients. I want to emphasize how crucial quality is in this context. I’ve experimented with everything from budget-friendly options to premium brands, and while you don’t need to break the bank, investing in good peanut butter and protein powder will elevate your bars from good to absolutely incredible. Here’s what you’ll need and why each ingredient matters:
- 1 cup creamy peanut butter (natural, no added sugar): The star of the show! Natural peanut butter gives a smooth, rich texture without extra oils or sugars. I’ve found that brands with just peanuts and salt work best—avoid anything with palm oil, as it can make the bars greasy.
- ½ cup honey or maple syrup: This acts as the sweetener and binder. Honey adds a floral sweetness, while maple syrup gives a slightly earthier note. I’ve used both, and they’re equally delicious—choose based on your pantry or preference. If you want a lower-calorie option, you can try a sugar-free syrup, but add a tablespoon of water to keep the texture right.
- 2 cups vanilla protein powder: The protein punch! I use a whey-based vanilla powder (about 20g protein per 30g scoop), but plant-based works too. Just make sure it’s one you enjoy the taste of, as it’ll influence the flavor. I learned the hard way that cheap powders can taste artificial—test yours first!
- ½ cup cocoa powder (unsweetened): This adds deep chocolate flavor without extra sugar. I prefer Dutch-processed cocoa for a smoother taste, but natural cocoa works fine too. Sift it if it’s lumpy to avoid grainy bars.
- ¼ cup dark chocolate chips (melted for topping): The drizzle on top makes these feel decadent. Use at least 70% dark chocolate for a rich flavor that balances the sweetness. You can swap for milk chocolate if you prefer, but it’ll be sweeter.
- ¼ cup rolled oats: These add a bit of chew and structure. Old-fashioned oats are my go-to, but quick oats work in a pinch. Gluten-free oats are great if you’re avoiding gluten.
- Pinch of salt: Don’t skip this! It enhances the flavors and cuts through the sweetness. I forgot salt once (during my infamous wedding brownie disaster), and the bars tasted flat—lesson learned!
Substitutions:
- Peanut butter: Almond or cashew butter works, but they’re slightly less creamy. Sunflower seed butter is great for nut allergies.
- Honey/maple syrup: Agave nectar or date syrup can be used for a vegan option.
- Protein powder: Unflavored or chocolate protein powder can substitute, but you might need to adjust sweetness (add a tablespoon of honey if using unflavored).
- Oats: Swap for crushed nuts or quinoa flakes for a different texture.

Step-by-Step Chocolate Peanut Butter Protein Bars Recipe
Here’s where we get to the fun part—making these bars! I’m going to walk you through this as if I’m right there in your kitchen, sipping coffee and cheering you on. This recipe yields 12 bars and takes about 15 minutes to prep (plus 1 hour to chill). Don’t worry if it looks messy at first—mine did too! Here’s how to do it:
- Prepare your pan (2 minutes): Line an 8×8-inch baking pan with parchment paper, leaving some overhang on the sides for easy removal. I like to give the pan a quick spritz of cooking spray under the parchment to keep it in place—something I learned after wrestling with slippery paper one too many times!
- Mix the wet ingredients (3–4 minutes): In a large mixing bowl, combine 1 cup creamy peanut butter and ½ cup honey (or maple syrup). Stir with a spatula until smooth and fully blended. This usually takes me about a minute. The mixture should look glossy and smell like peanut butter heaven. If your peanut butter is thick, microwave it for 10–15 seconds to soften it slightly.
- Add the dry ingredients (4–5 minutes): Add 2 cups vanilla protein powder, ½ cup cocoa powder, ¼ cup rolled oats, and a pinch of salt to the bowl. Stir until a thick, slightly sticky dough forms. This takes some elbow grease—don’t be afraid to get in there! If the mixture feels too dry (like it’s crumbling), add 1–2 teaspoons of water or milk. If it’s too wet, sprinkle in a tablespoon of extra protein powder. I’ve found that plant-based powders sometimes need a touch more liquid, so adjust as you go.
- Press into the pan (3 minutes): Transfer the dough to your lined pan. Use your hands or the back of a measuring cup to press it firmly and evenly into the pan. Here’s where most people go wrong—don’t skimp on the pressing! You want a compact, even layer to avoid crumbly bars. Smooth the top with a spatula for a polished look.
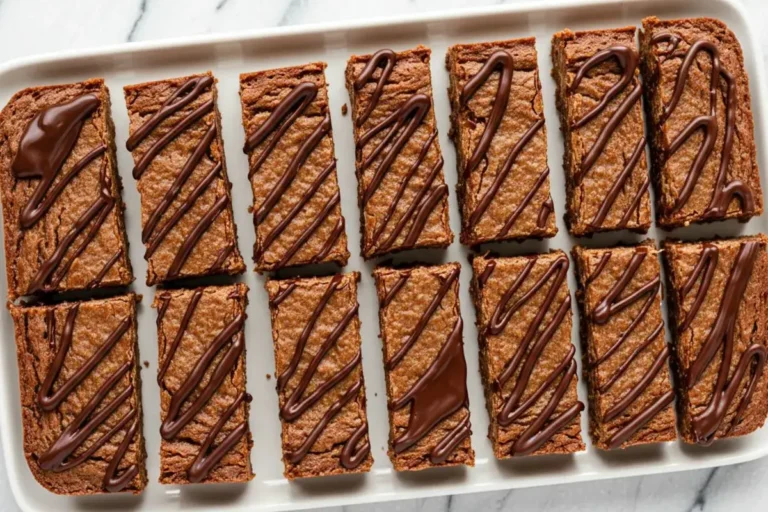
- Add the chocolate drizzle (3 minutes): Melt ¼ cup dark chocolate chips in a microwave-safe bowl in 20-second bursts, stirring between each until smooth (about 60 seconds total). Drizzle the melted chocolate over the bars using a spoon or piping bag for a fancy touch. I like to tell my customers to let the chocolate pool a little—it makes every bite extra decadent.
- Chill and slice (1 hour + 5 minutes): Pop the pan in the fridge for at least 1 hour to set. This is where patience becomes your best friend—I know it’s tempting to dig in early, but chilling ensures clean slices. Once set, lift the bars out using the parchment overhang and place them on a cutting board. Use a sharp knife to cut into 12 even bars (about 2×2 inches each). Wipe the knife between cuts for neat edges.
Yield: 12 bars
Prep Time: 15 minutes
Chill Time: 1 hour
Total Time: 1 hour 15 minutes
Estimated Nutrition (per bar): ~220 kcal, ~10g protein (based on standard whey protein powder and natural peanut butter).
Love these Chocolate Peanut Butter Protein Bars? Discover more tasty high-protein energy bars in my 7 Best High-Protein Energy Bar Ideas!
Pro Tips for Chocolate Peanut Butter Protein Bars Success
After countless batches (and a few flops), here are my top tips to make these bars perfect every time:
- Measure accurately: Too much protein powder can make the bars chalky. Use a kitchen scale for precision (1 cup protein powder is about 120–130g, depending on the brand).
- Check your peanut butter: Stir it well before measuring to incorporate any separated oil. I learned this after a batch came out way too oily—Nonna Rosa would’ve shaken her head!
- Don’t rush the chill: The full hour in the fridge ensures the bars hold together. If you’re in a hurry, 30 minutes in the freezer works, but don’t skip this step.
- Customize the drizzle: For a thicker chocolate layer, double the chocolate chips to ½ cup. For a lighter touch, skip the drizzle and sprinkle with cocoa nibs.
- Troubleshooting: If your bars are crumbly, you likely didn’t press hard enough or used too much dry ingredient. If they’re too soft, add a tablespoon of oats or protein powder next time. Don’t panic if they’re not perfect—mine weren’t either at first!

Variations and Customizations for Chocolate Peanut Butter Protein Bars
The beauty of these bars is how adaptable they are. Here are some variations I’ve tried over the years that my customers and family love:
- Crunchy version: Add ¼ cup chopped peanuts or crushed pretzels for extra texture. Emma loves this version because it’s “crunchy like her favorite cereal.”
- Mocha twist: Stir in 1 tablespoon instant espresso powder with the dry ingredients for a coffee kick. David, my coffee-roasting husband, requests this one constantly.
- Vegan option: Use maple syrup instead of honey, plant-based protein powder, and dairy-free chocolate chips. I’ve made these for vegan friends, and they’re just as fudgy.
- Lower calorie: Reduce peanut butter to ¾ cup and add 2 tablespoons of almond milk to adjust texture. Swap honey for a low-calorie sweetener like stevia syrup (adjust to taste).
- Nut-free: Use sunflower seed butter and skip the drizzle for a school-safe version. Lucas’s preschool loves these!
Storing and Serving Your Chocolate Peanut Butter Protein Bars
These bars store beautifully, which is why I make a double batch for busy weeks. Keep them in an airtight container in the fridge for up to 2 weeks—layer them with parchment paper to prevent sticking. For longer storage, wrap each bar tightly in plastic wrap and freeze for up to 3 months. I learned this trick after forgetting a batch in the freezer and finding they tasted just as good after thawing!
For serving, I love wrapping individual bars in parchment and tying with twine for a homemade gift vibe—perfect for sharing with friends or packing for hikes. Serve with a glass of almond milk or a cup of coffee for a balanced snack. If you’re feeling fancy, cut them into bite-sized pieces and arrange them on a platter for a party. The golden-brown chocolate drizzle and creamy texture make these bars look as good as they taste. Pro tip: Let them sit at room temperature for 5 minutes before eating for the best texture—straight from the fridge, they’re a bit firm.

Chocolate Peanut Butter Protein Bars
Ingredients
- 1 cup creamy peanut butter natural, no added sugar
- ½ cup honey or maple syrup
- 2 cups vanilla protein powder
- ½ cup cocoa powder unsweetened
- ¼ cup dark chocolate chips melted for topping
- ¼ cup rolled oats
- Pinch of salt
Instructions
- Line an 8×8-inch pan with parchment paper.
- Mix peanut butter and honey until smooth.
- Stir in protein powder, cocoa powder, oats, and salt to form a dough.
- Press dough evenly into the pan.
- Melt chocolate chips and drizzle over the top.
- Chill for 1 hour, then slice into 12 bars.
Equipment
- 8×8-inch baking pan
- Parchment paper
- Large mixing bowl
- Spatula or wooden spoon
- Measuring cups and spoons
- Microwave-safe bowl
- Sharp knife
- Cutting board
⚠ Note: Some of the links above are affiliate links. If you click and purchase, I may earn a small commission—at no extra cost to you. Thank you for your support!
Conclusion
These Chocolate Peanut Butter Protein Bars are one of my proudest recipes, born from years of trial, error, and a whole lot of peanut butter love. They’re proof that healthy can be delicious, and I hope they bring as much joy to your kitchen as they do to mine. Whether you’re fueling a workout, treating your kids, or just craving something sweet, these bars have you covered. So, grab your grandmother’s flour-dusted apron (or borrow mine in spirit!) and give this recipe a try. I’d love to hear how it goes—share your creations with me on TikTok using #EasyWithSophie. Happy baking, and don’t forget: the secret ingredient is always patience!