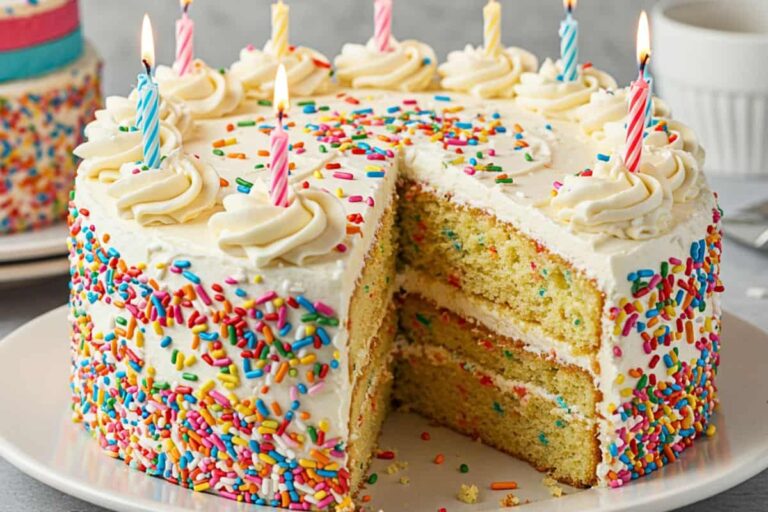
12 Beginner-Friendly Valentine’s Cake Ideas (With Recipes)
Looking for the perfect way to celebrate love this Valentine’s Day? I’ve spent years perfecting Valentine’s cake ideas that look impressive but are actually simple enough for beginners. After making dozens of Valentine’s cakes for my bakery customers and family, I’ve learned what works (and what ends up as a Pinterest fail!). Whether you’re baking for your sweetheart, your kids, or treating yourself, these easy valentines cake recipes will make your celebration extra special without the stress.
Here’s what I love about these recipes—they use straightforward techniques and ingredients you probably already have. No fancy equipment or professional skills required, I promise! Let’s dive into twelve of my favorite homemade Valentine’s cake recipes that’ll have everyone asking for seconds.
Jump to
1. “Hidden Heart” Loaf Cake
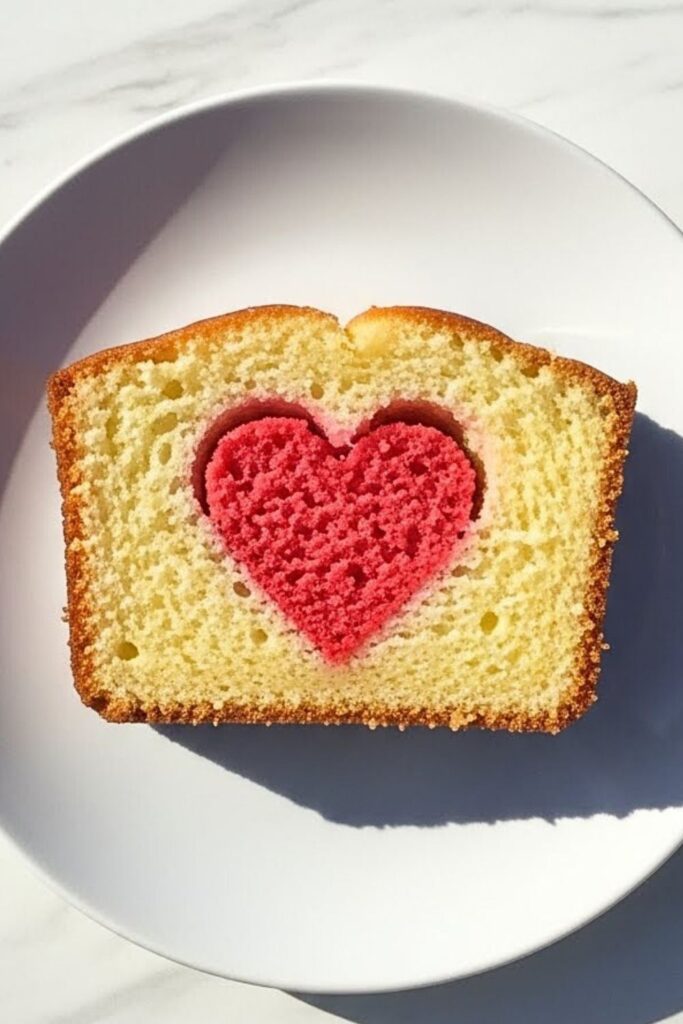
This clever cake reveals a surprise heart shape when you slice it! It’s one of those unique valentine cake designs that looks like magic but uses a simple two-batter technique.
| Prep Time | 20 minutes |
| Bake Time | 50 minutes |
| Servings | 8-10 slices |
| Difficulty | Medium |
| Calories | ~320 per slice |
Essential Equipment:
- 9×5 inch loaf pan – Creates the perfect shape for slicing.
- Heart-shaped cookie cutter – For creating the heart pattern.
- Mixing bowls – You’ll need at least two for this recipe.
Ingredients:
For the vanilla batter:
- 2 cups all-purpose flour
- 1½ cups granulated sugar
- ½ cup unsalted butter, softened
- 3 large eggs
- 1 cup whole milk
- 2 teaspoons vanilla extract
- 2 teaspoons baking powder
- ½ teaspoon salt
For the pink batter:
- Same as above, plus red food coloring
Instructions:
- Preheat your oven to 350°F and grease your loaf pan thoroughly—trust me, you don’t want this beautiful cake sticking!
- Divide your batter in half. Leave one portion vanilla and color the other with red food coloring until you get a pretty pink shade. I usually add the coloring drop by drop because it’s easier to add more than to fix an overly bright cake.
- Here’s where the magic happens: Pour the pink batter into the pan first, then use your heart-shaped cookie cutter to gently press into the center. Pour the vanilla batter around the outside. The batters will naturally separate as they bake.
- Bake for 50-55 minutes until a toothpick comes out clean. Now comes the hardest part—let it cool completely before slicing! I learned this the hard way when I got impatient and ended up with a crumbly mess.
- Slice and watch everyone’s face light up when they see that hidden heart!
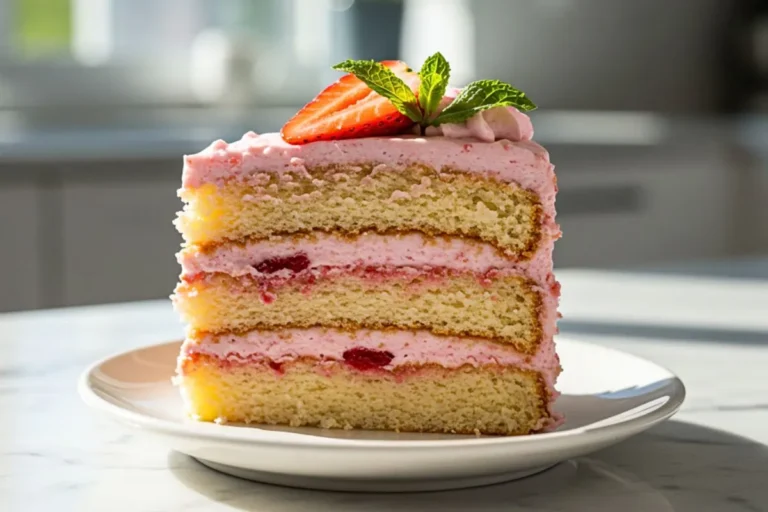
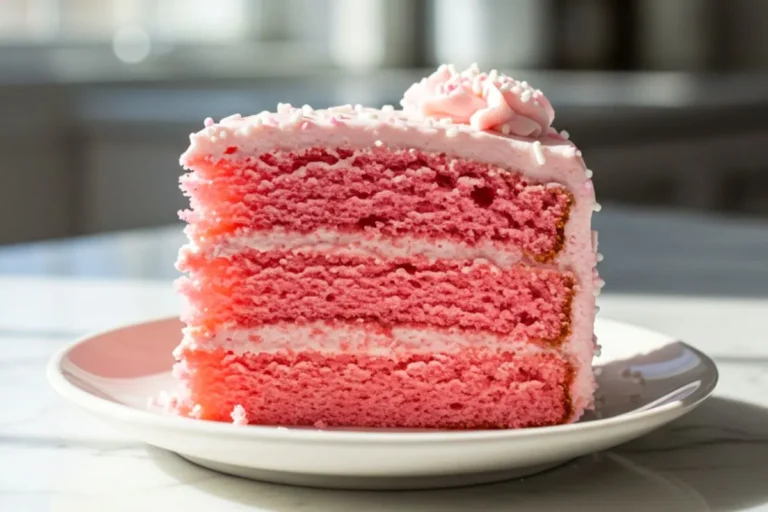
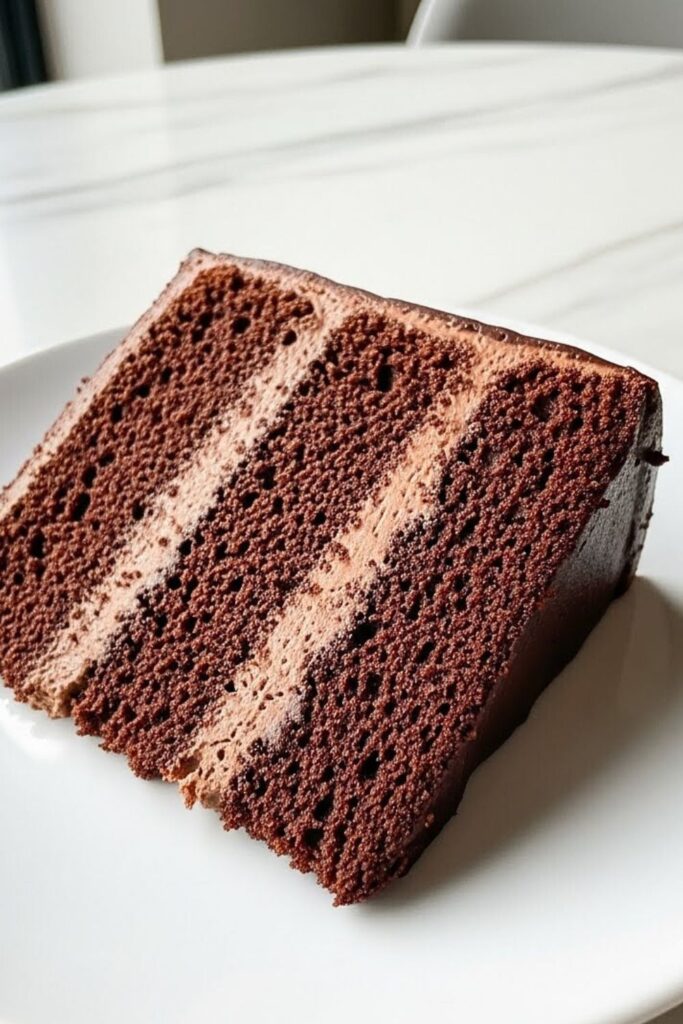
2. Pink Ombré Layer Cake

This stunning gradient cake is actually one of the easiest cakes for beginners! You’re making the same batter four times, just adjusting the food coloring.
| Prep Time | 30 minutes |
| Bake Time | 25 minutes |
| Servings | 12-14 slices |
| Difficulty | Medium |
| Calories | ~380 per slice |
Essential Equipment:
- Four 8-inch round cake pans – For those beautiful layers.
- Offset spatula – Makes frosting so much easier.
- Cake turntable – Not essential but it’ll change your decorating game.
Ingredients:
For each layer (multiply by 4):
- 1½ cups all-purpose flour
- 1 cup granulated sugar
- ⅓ cup vegetable oil
- 2 large eggs
- ½ cup buttermilk
- 1 teaspoon vanilla extract
- 1½ teaspoons baking powder
- ¼ teaspoon salt
- Red food coloring (varying amounts)
For the frosting:
- 2 cups unsalted butter, softened
- 8 cups powdered sugar
- ¼ cup heavy cream
- 2 teaspoons vanilla extract
- Pink food coloring
Instructions:
- Make four separate batches of batter. For the ombré effect, leave one batch white, add 2 drops of red coloring to the second, 5 drops to the third, and 8 drops to the fourth. This gradual increase creates that gorgeous gradient effect I’m obsessed with!
- Bake each layer in a preheated 350°F oven for 22-25 minutes. The smell alone will have your neighbors knocking! Let them cool completely—I usually bake these the night before.
- While layers cool, make your buttercream. Beat butter until fluffy (about 3 minutes), then gradually add powdered sugar. Add cream and vanilla, then tint with pink coloring to match your darkest layer.
- Stack your layers from darkest on bottom to lightest on top, spreading frosting between each. Frost the outside with a thin crumb coat first, chill for 15 minutes, then add your final frosting layer.
- For a clean finish, use your offset spatula to smooth the sides while rotating on your turntable. This is my go-to trick when I want that bakery-perfect look!
3. Red Velvet Sheet Cake with White Chocolate Curls
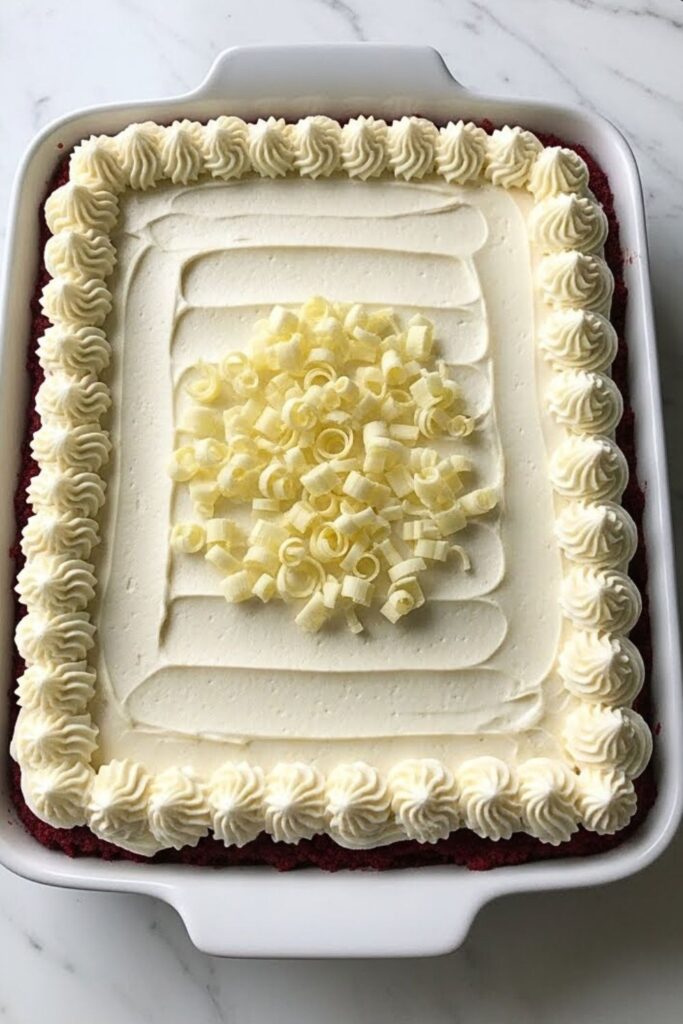
Sheet cakes are my secret weapon for feeding a crowd without the fuss of layer cakes. This easy valentines cake delivers on both flavor and presentation.
| Prep Time | 15 minutes |
| Bake Time | 30 minutes |
| Servings | 20-24 squares |
| Difficulty | Easy |
| Calories | ~290 per square |
Essential Equipment:
- 9×13 inch baking pan – The workhorse of any baker’s kitchen.
- Vegetable peeler – For making those elegant chocolate curls.
Ingredients:
- 2½ cups all-purpose flour
- 1½ cups granulated sugar
- 3 tablespoons cocoa powder
- 1 teaspoon baking soda
- 1 teaspoon salt
- 1½ cups vegetable oil
- 1 cup buttermilk
- 2 large eggs
- 2 tablespoons red food coloring
- 1 teaspoon vanilla extract
- 1 teaspoon white vinegar
For the frosting:
- 16 oz cream cheese, softened
- ½ cup unsalted butter, softened
- 4 cups powdered sugar
- 1 teaspoon vanilla extract
- White chocolate bar for curls
Instructions:
- Preheat oven to 350°F and grease your pan. In a large bowl, whisk together flour, sugar, cocoa powder, baking soda, and salt.
- In another bowl, combine oil, buttermilk, eggs, food coloring, vanilla, and vinegar. Here’s the thing—that vinegar reacts with the baking soda to give you the fluffiest texture. Don’t skip it!
- Pour wet ingredients into dry and mix until just combined. Don’t worry if there are a few small lumps—overmixing is where most people go wrong with red velvet.
- Bake for 28-32 minutes. The cake should spring back when lightly touched. Let it cool completely in the pan before frosting.
- Beat cream cheese and butter until smooth, then gradually add powdered sugar and vanilla. Spread over cooled cake. Use your vegetable peeler to create white chocolate curls by running it along the edge of a room-temperature chocolate bar. Scatter the curls on top for that wow factor!
4. Chocolate Box Cake
This playful design uses actual boxed chocolates as decoration—it’s like two gifts in one! One of my most requested unique valentine cake designs for good reason.
| Prep Time | 20 minutes |
| Bake Time | 35 minutes |
| Servings | 12-16 squares |
| Difficulty | Easy |
| Calories | ~420 per square |
Essential Equipment:
- 8×8 inch square pan – Creates that perfect box shape.
- Piping bag with round tip – For the ribbon detail.
Ingredients:
- 1¾ cups all-purpose flour
- 2 cups granulated sugar
- ¾ cup cocoa powder
- 2 teaspoons baking soda
- 1 teaspoon baking powder
- 1 teaspoon salt
- 2 large eggs
- 1 cup strong brewed coffee, cooled
- 1 cup buttermilk
- ½ cup vegetable oil
- 1 teaspoon vanilla extract
For decoration:
- 3 cups chocolate buttercream
- Red gel food coloring
- 1 box of assorted chocolates (like Ferrero Rocher or truffles)
- Red ribbon
Instructions:
- Preheat oven to 350°F. Grease and line your square pan with parchment paper—I swear by this technique for easy removal!
- Mix flour, sugar, cocoa powder, baking soda, baking powder, and salt in a large bowl. In another bowl, whisk eggs, coffee, buttermilk, oil, and vanilla. The coffee intensifies the chocolate flavor without making it taste like coffee, trust me on this one!
- Combine wet and dry ingredients, mixing until smooth. The batter will be thin—that’s exactly what we want for a moist cake.
- Bake for 32-37 minutes until a toothpick inserted in the center comes out clean. Cool completely.
- Frost the top and sides with chocolate buttercream. Take about ½ cup of buttercream and tint it red for the ribbon. Pipe two lines across the cake to look like ribbon, then pipe a bow in the center. Arrange your boxed chocolates on top. After years of testing, I’ve found that slightly pressing them into the frosting helps them stay put!
5. Heart-Shaped Pull-Apart Cupcake Cake
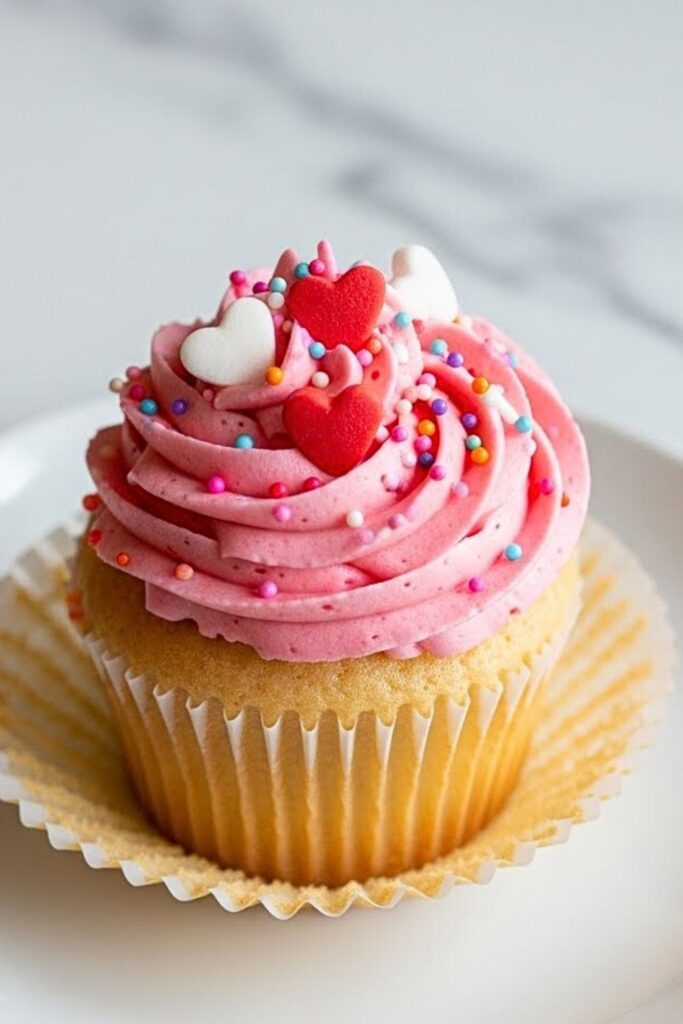
This is perfect when you want the fun of individual cupcakes but the presentation of a cake. My kids absolutely go crazy for this one!
| Prep Time | 25 minutes |
| Bake Time | 18 minutes |
| Servings | 24 cupcakes |
| Difficulty | Easy |
| Calories | ~280 per cupcake |
Essential Equipment:
- Cupcake pans – You’ll need two standard 12-cup pans.
- Large piping tip – For that beautiful swirled frosting.
Ingredients:
- Your favorite vanilla or strawberry cupcake recipe (for 24 cupcakes)
- 4 cups buttercream frosting
- Pink and red food coloring
- Sprinkles and heart candies
Instructions:
- Bake 24 cupcakes according to your favorite recipe. Let them cool completely before assembling.
- Arrange cupcakes in a heart shape on a large board or platter. You’ll need about 13 cupcakes for the outline and 11 to fill the center. I like to sketch the pattern first on paper!
- Divide your buttercream into three bowls—leave one white, tint one light pink, and one darker pink or red.
- Pipe frosting on each cupcake, alternating colors to create a gradient effect across the heart. Start from the top and work your way around—this is where most people go wrong by trying to frost randomly.
- Add sprinkles and candy hearts while the frosting is still soft. The best part? Everyone gets their own perfectly portioned piece!
6. “Love Letter” Sheet Cake
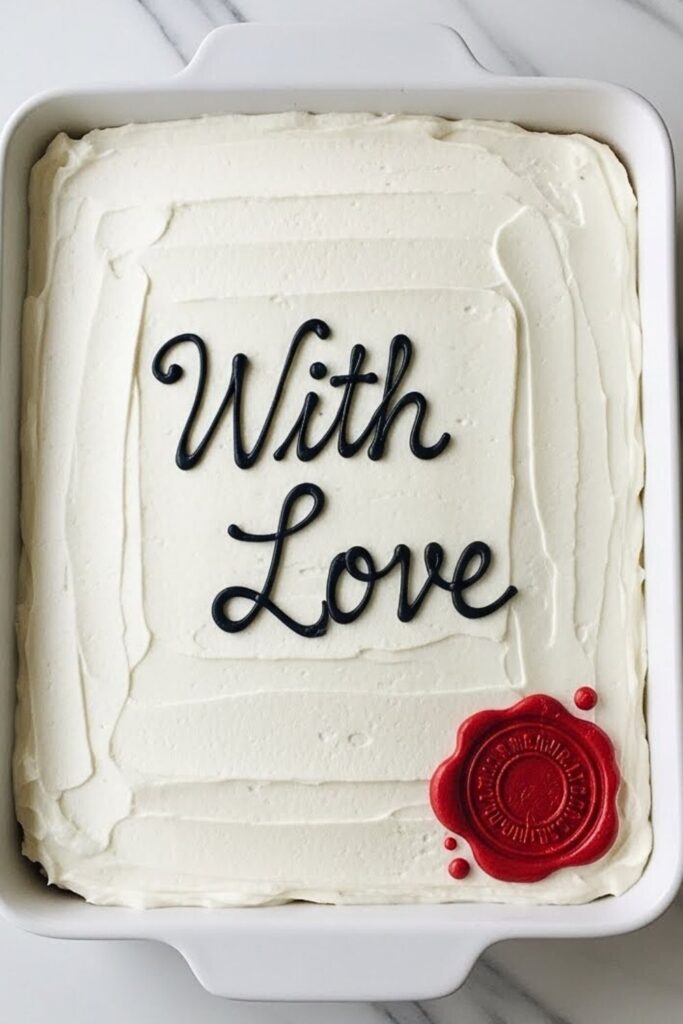
This elegant homemade Valentine’s cake recipe looks like a vintage love letter—so romantic and surprisingly simple to create!
| Prep Time | 20 minutes |
| Bake Time | 30 minutes |
| Servings | 20-24 squares |
| Difficulty | Easy |
| Calories | ~310 per square |
Essential Equipment:
- 9×13 inch pan – Your trusty sheet cake pan.
- Small round piping tip – For the writing effect.
Ingredients:
- 2½ cups all-purpose flour
- 2 cups granulated sugar
- 1 cup unsalted butter, softened
- 4 large eggs
- 1 cup whole milk
- 2 teaspoons vanilla extract
- 1 tablespoon baking powder
- ½ teaspoon salt
For decoration:
- 4 cups vanilla buttercream
- Black and red gel food coloring
- Edible gold leaf or gold sprinkles (optional)
Instructions:
- Preheat your oven to 350°F and prepare your pan. Mix flour, sugar, baking powder, and salt together.
- In a separate bowl, cream butter until fluffy, then add eggs one at a time. Alternate adding dry ingredients and milk, starting and ending with dry. This usually takes me about 8-10 minutes of mixing.
- Bake for 28-32 minutes until golden and springy to touch. Cool completely before frosting.
- Frost the entire cake with white buttercream, smoothing it as best you can. Don’t worry if it’s not perfect—mine never is on the first try!
- Reserve ¼ cup of frosting and tint it with black food coloring. Use a small piping tip to write a love letter message across the cake in cursive. Keep it simple—”With Love,” “Forever Yours,” or “XOXO” work beautifully. Add a red “wax seal” using red frosting in one corner. I promise you, it’s easier than it looks!
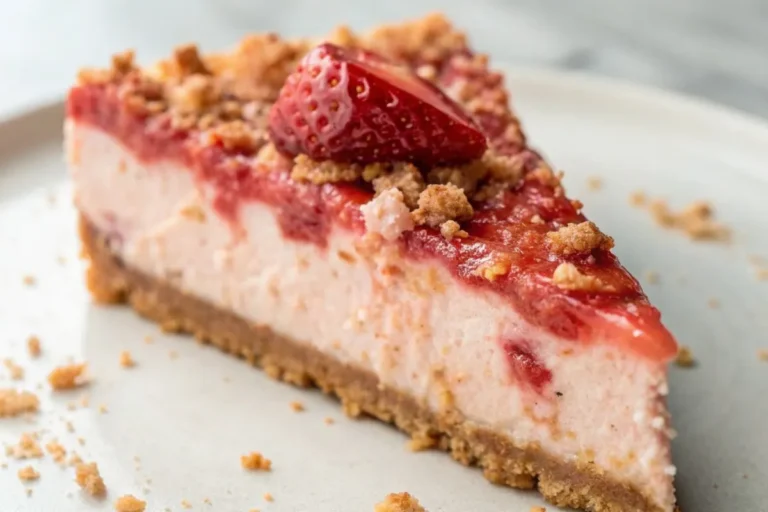
7. Strawberry Poke Cake with Whipped Topping
This is my go-to when I need something that feeds a crowd and can be made ahead. The easy valentines cake that never fails me!
| Prep Time | 15 minutes |
| Bake Time | 30 minutes |
| Servings | 20-24 squares |
| Difficulty | Easy |
| Calories | ~260 per square |
Essential Equipment:
- 9×13 inch pan – Essential for this recipe.
- Wooden spoon handle – For poking holes (yes, really!)
Ingredients:
- 1 box white cake mix (plus required ingredients)
- 1 package (3 oz) strawberry gelatin
- 1 cup boiling water
- ½ cup cold water
- 8 oz whipped topping
- 2 cups fresh strawberries, sliced
- Pink sprinkles
Instructions:
- Bake the cake according to package directions in your prepared 9×13 pan. While it’s still hot from the oven, use the handle of a wooden spoon to poke holes all over the cake—about 1 inch apart. This is where the magic happens!
- Dissolve strawberry gelatin in boiling water, then stir in cold water. Carefully pour the gelatin mixture over the hot cake, making sure it seeps into all those holes. I learned this the hard way—pour slowly or it’ll overflow!
- Refrigerate for at least 3 hours or overnight. The gelatin creates these beautiful pink pockets throughout the cake.
- Spread whipped topping over the cooled cake and arrange sliced strawberries on top. Add pink sprinkles for extra Valentine’s flair.
- Keep refrigerated until serving. This little trick will change everything for you—the cake actually gets better the next day as the flavors meld together!
8. Champagne-Infused White Bundt Cake
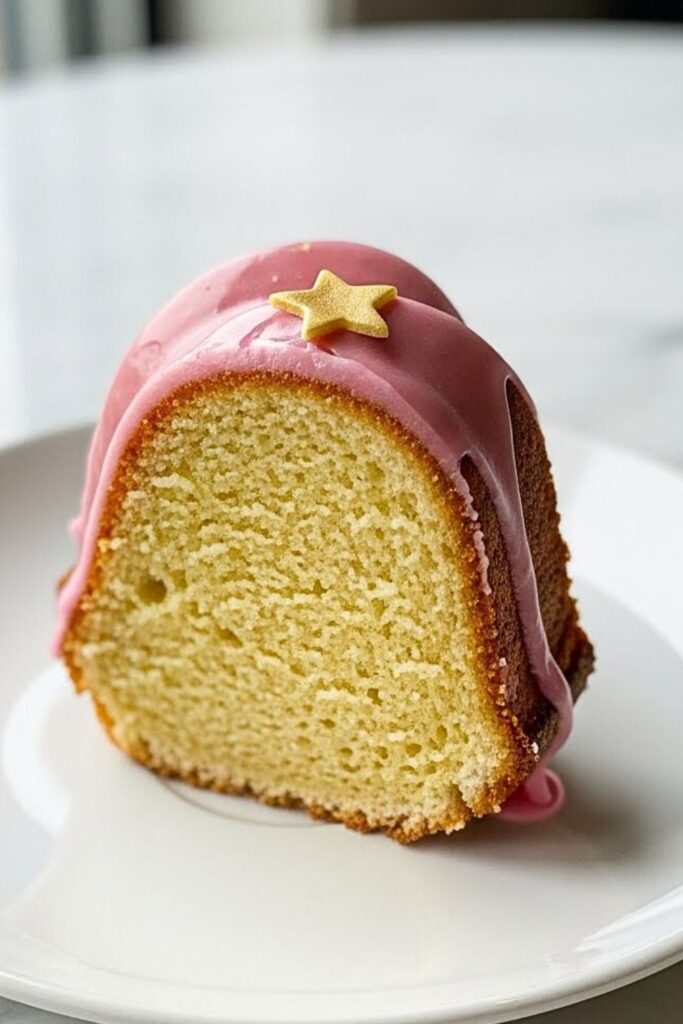
For a more sophisticated celebration, this elegant bundt cake brings subtle champagne flavor that’s perfect for grown-up Valentine’s Day.
| Prep Time | 15 minutes |
| Bake Time | 50 minutes |
| Servings | 12-14 slices |
| Difficulty | Easy |
| Calories | ~340 per slice |
Essential Equipment:
- 10-inch bundt pan – Creates that stunning shape.
- Pastry brush – For applying the glaze.
Ingredients:
- 3 cups all-purpose flour
- 2 cups granulated sugar
- 1 cup unsalted butter, softened
- 4 large eggs
- ¾ cup champagne (or sparkling wine)
- ¼ cup whole milk
- 2 teaspoons vanilla extract
- 1 tablespoon baking powder
- ½ teaspoon salt
For the glaze:
- 2 cups powdered sugar
- 3-4 tablespoons champagne
- Pink food coloring (optional)
- Edible gold stars or sprinkles
Instructions:
- Preheat oven to 325°F. Generously grease and flour your bundt pan—and I mean generously! After making every mistake in the book, I’ve learned that you can never use too much grease on a bundt pan.
- Cream butter and sugar until light and fluffy (about 4 minutes). Add eggs one at a time, beating well after each addition.
- Combine flour, baking powder, and salt. Mix champagne and milk together. Alternate adding dry ingredients and champagne mixture to the butter mixture, beginning and ending with dry ingredients.
- Pour the mixture into the prepared pan and bake for 48-53 minutes. The cake should pull away slightly from the sides and a toothpick should come out clean.
- Cool in pan for 15 minutes, then invert onto a wire rack. Here’s where patience becomes your best friend—if you try to unmold too early, it’ll stick! For the glaze, whisk powdered sugar and champagne until smooth, tint pink if desired, and drizzle over cooled cake. Top with edible decorations.
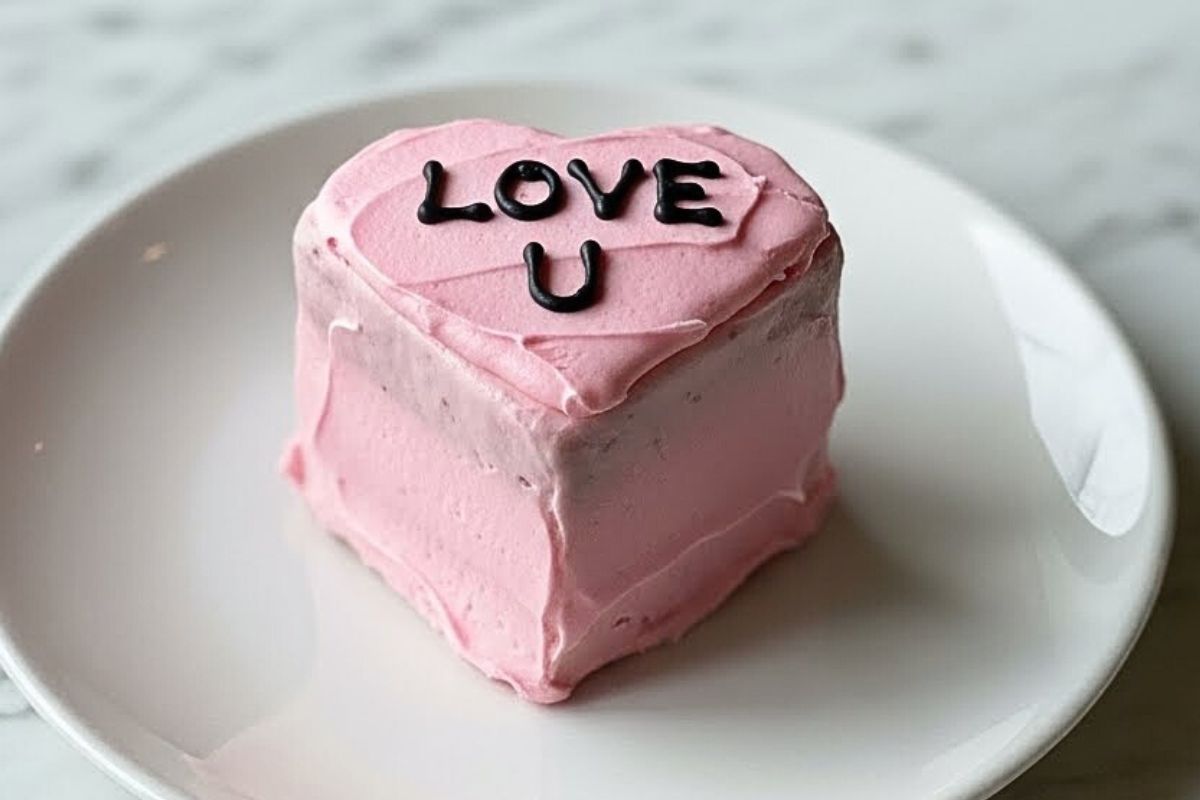
9. Conversation Heart Mini Cakes
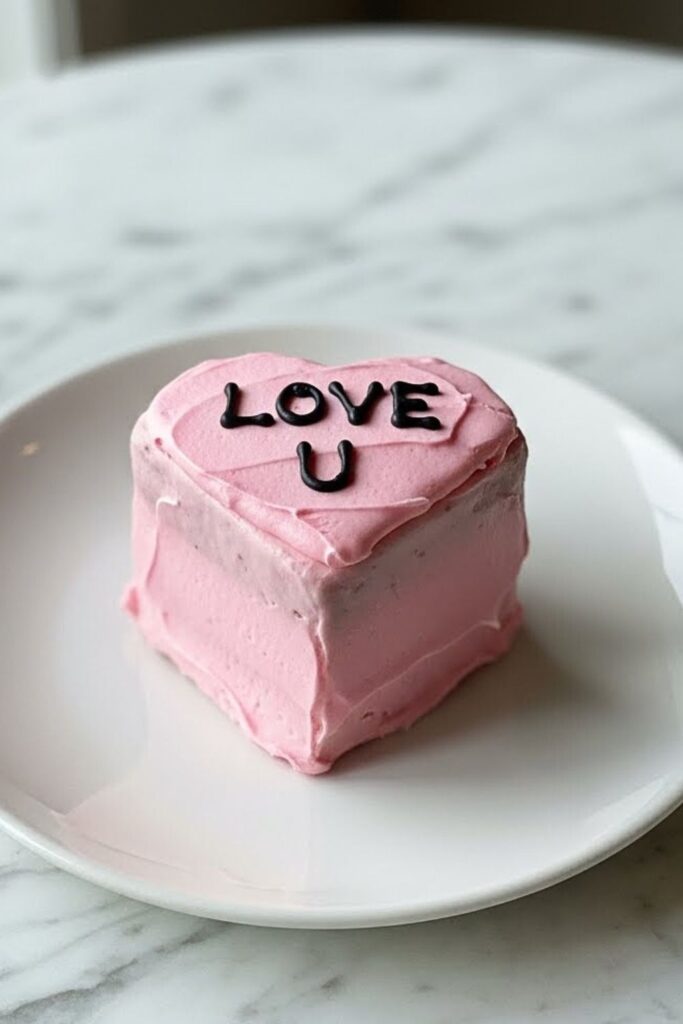
These adorable individual cakes look just like those classic Valentine’s candies! One of my most unique valentine cake designs that’s perfect for a party.
| Prep Time | 30 minutes |
| Bake Time | 20 minutes |
| Servings | 12 mini cakes |
| Difficulty | Medium |
| Calories | ~280 per cake |
Essential Equipment:
- Square mini cake pans or molds – Creates those perfect candy shapes.
- Letter stamps or piping tips – For the messages.
Ingredients:
- 2 cups all-purpose flour
- 1½ cups granulated sugar
- ½ cup unsalted butter, softened
- 3 large eggs
- ¾ cup buttermilk
- 2 teaspoons vanilla extract
- 2 teaspoons baking powder
- ½ teaspoon salt
For decoration:
- 4 cups vanilla buttercream (divided into portions)
- Food coloring (pink, purple, yellow, green, orange)
- Black food coloring for writing
Instructions:
- Preheat oven to 350°F. Grease your mini cake pans thoroughly—these little cakes are notorious for sticking if you’re not generous with the grease!
- Mix all cake ingredients until smooth and divide evenly among 12 mini pans. Bake for 18-22 minutes until springy to touch.
- Once cooled, trim the tops flat if needed. Now here’s where it gets fun!
- Divide buttercream into five bowls and tint each a different pastel shade—pink, purple, yellow, green, and orange, just like the real candies.
- Frost each cake in a different color, smoothing the sides as much as possible. Use black food coloring to pipe short messages like “BE MINE,” “SWEET,” “LOVE U,” or “CUTE” on top. I like to tell my customers that imperfect lettering makes them look even more authentic!
10. Chocolate Ganache “Drip” Cake with Fresh Raspberries
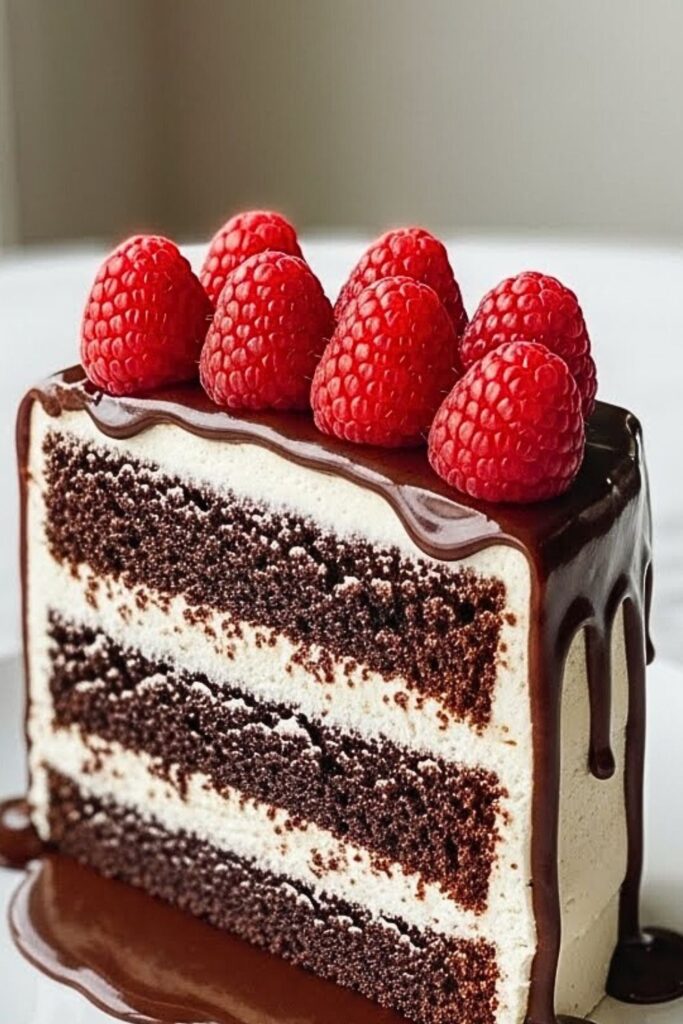
That dramatic chocolate drip looks professional but I swear by this technique—it’s actually foolproof with the right temperature!
| Prep Time | 25 minutes |
| Bake Time | 30 minutes |
| Servings | 10-12 slices |
| Difficulty | Medium |
| Calories | ~410 per slice |
Essential Equipment:
- Two 8-inch round pans – For those beautiful layers.
- Squeeze bottle or spoon – For creating the drip.
Ingredients:
For the cake:
- 2 cups all-purpose flour
- 2 cups granulated sugar
- ¾ cup cocoa powder
- 2 teaspoons baking soda
- 1 teaspoon baking powder
- 1 teaspoon salt
- 2 large eggs
- 1 cup strong coffee
- 1 cup buttermilk
- ½ cup vegetable oil
- 1 teaspoon vanilla extract
For the ganache:
- 1 cup heavy cream
- 8 oz dark chocolate, chopped
- 2 tablespoons butter
For filling and topping:
- 2 cups vanilla buttercream
- 2 cups fresh raspberries
- Fresh mint leaves
Instructions:
- Preheat oven to 350°F. Prepare your pans with parchment circles—this is what separates good bakers from great ones when it comes to layer cakes!
- Mix all dry ingredients together. In another bowl, whisk eggs, coffee, buttermilk, oil, and vanilla. Combine wet and dry ingredients until smooth.
- Divide batter between pans and bake for 28-32 minutes. Cool completely before assembling.
- For the ganache, heat cream until just simmering, pour over chopped chocolate and butter, let sit for 2 minutes, then stir until smooth. Let it cool to about 90°F—trust me on this temperature, it’s the secret to perfect drips!
- Stack layers with buttercream and raspberries between them. Frost the outside with a thin layer of buttercream. Pour ganache over the top, using a spoon or squeeze bottle to create drips around the edges. Top with more raspberries and mint leaves. Even on my worst baking days, this never fails me!
11. Pink Velvet Marble Cake
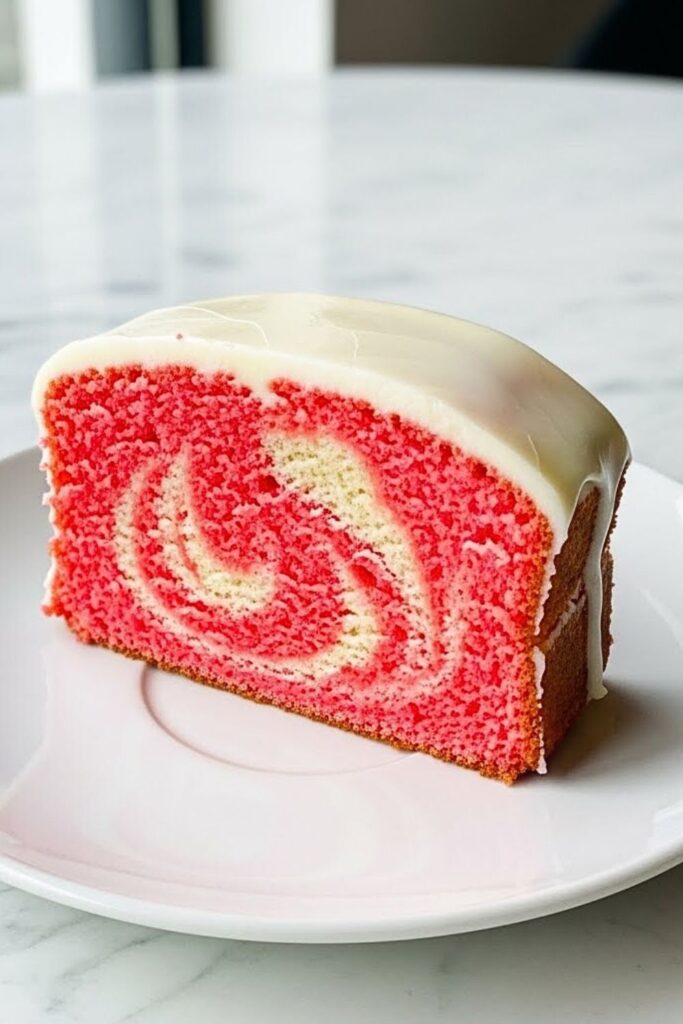
This gorgeous marbled effect combines pink velvet and vanilla for a stunning cake for beginners that looks incredibly complex!
| Prep Time | 20 minutes |
| Bake Time | 35 minutes |
| Servings | 12-14 slices |
| Difficulty | Easy |
| Calories | ~330 per slice |
Essential Equipment:
- 10-inch bundt pan – Ideal for showcasing the marble pattern.
- Butter knife – For creating the marble swirl
Ingredients:
Pink velvet batter:
- 1½ cups all-purpose flour
- 1 cup granulated sugar
- ½ cup unsalted butter, softened
- 2 large eggs
- ½ cup buttermilk
- 1 tablespoon cocoa powder
- 1 tablespoon red food coloring
- 1 teaspoon vanilla extract
- 1 teaspoon baking powder
- ¼ teaspoon salt
- ½ teaspoon white vinegar
Vanilla batter:
- 1½ cups all-purpose flour
- 1 cup granulated sugar
- ½ cup unsalted butter, softened
- 2 large eggs
- ½ cup buttermilk
- 1 teaspoon vanilla extract
- 1 teaspoon baking powder
- ¼ teaspoon salt
For the glaze:
- 1½ cups powdered sugar
- 3 tablespoons milk
- ½ teaspoon vanilla extract
Instructions:
- Preheat oven to 350°F and thoroughly grease your bundt pan. Make two separate batters following the instructions for each.
- Pour about ⅓ of the vanilla batter into the prepared pan, then add about ⅓ of the pink velvet batter on top. Continue alternating until both batters are used up.
- Use a butter knife to gently swirl the batters together—insert the knife and make figure-eight motions throughout the pan. Don’t overmix or you’ll lose that beautiful marble effect! This is what I learned the hard way after three practice cakes.
- Bake for 33-38 minutes until a toothpick comes out clean. Cool in pan for 15 minutes before inverting.
- Mix glaze ingredients until smooth and drizzle over the cooled cake. The contrast between pink and white makes every slice a work of art!
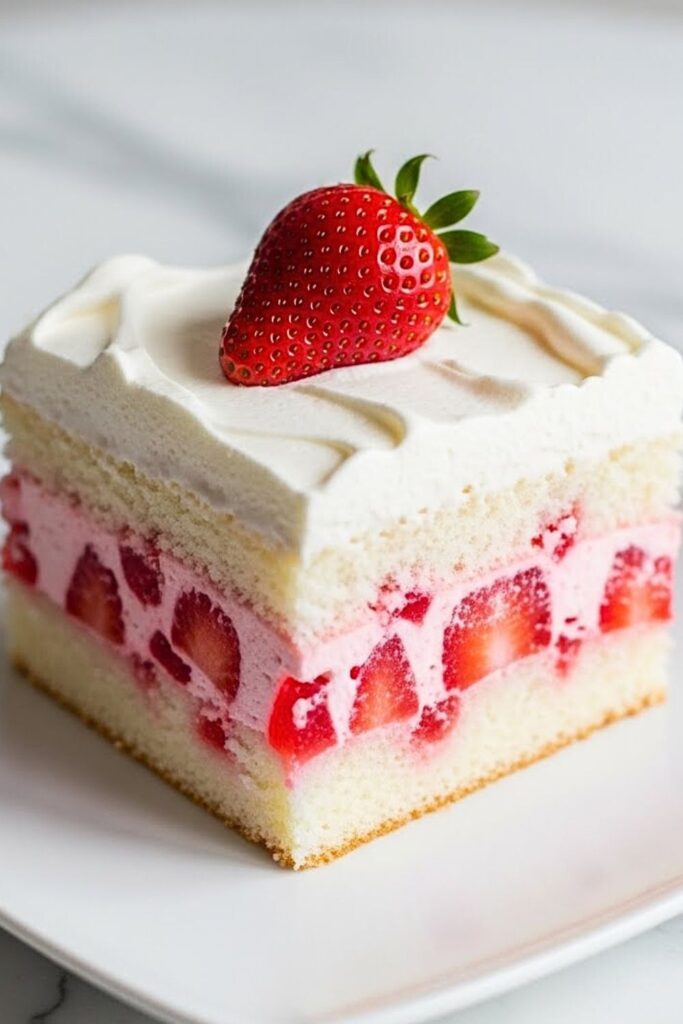
12. Naked Strawberry Layer Cake with Edible Flowers
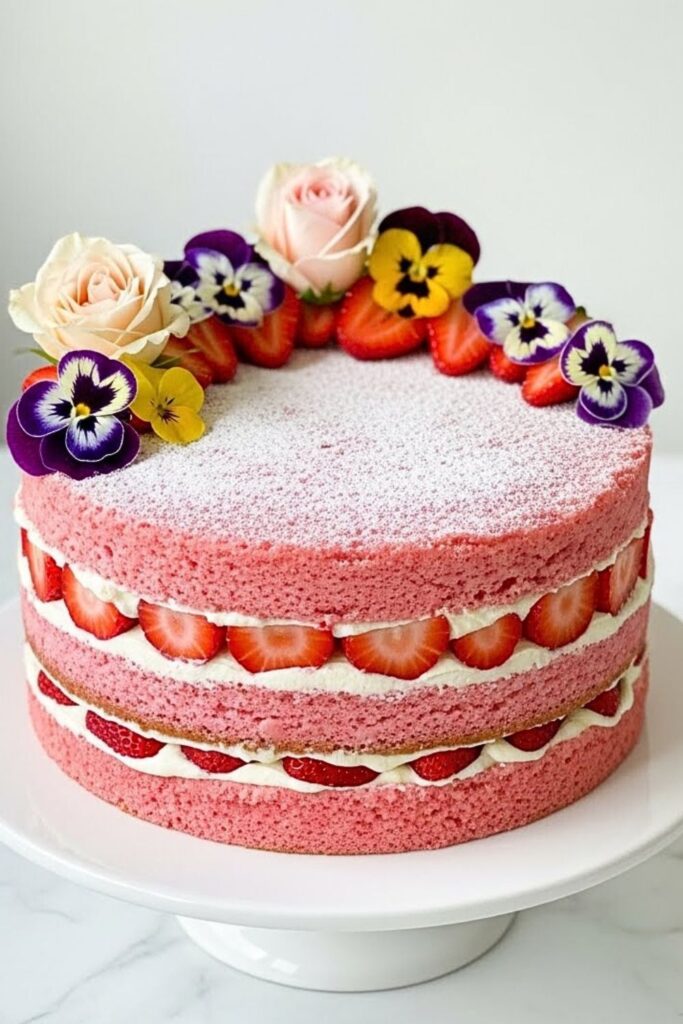
This rustic “naked” cake style is actually the most forgiving for beginners—imperfections are part of its charm! My absolute favorite homemade Valentine’s cake recipe.
| Prep Time | 25 minutes |
| Bake Time | 25 minutes |
| Servings | 10-12 slices |
| Difficulty | Medium |
| Calories | ~350 per slice |
Essential Equipment:
- Three 8-inch round pans – For those gorgeous layers.
- Offset spatula – Makes the rustic frosting effect easier.
Ingredients:
For the cake:
- 3 cups all-purpose flour
- 2 cups granulated sugar
- 1 cup unsalted butter, softened
- 4 large eggs
- 1 cup whole milk
- ½ cup pureed fresh strawberries
- 2 teaspoons vanilla extract
- 1 tablespoon baking powder
- ½ teaspoon salt
- Red food coloring (optional, for deeper pink color)
For the filling and decoration:
- 2 cups vanilla buttercream
- 2 cups fresh strawberries, sliced
- Edible flowers (roses, pansies, or violets)
- Powdered sugar for dusting
Instructions:
- Preheat oven to 350°F. Prepare three 8-inch round pans with parchment paper circles—I wish someone had told me this when I was starting out, it makes such a difference!
- Cream butter and sugar until fluffy (about 4 minutes). Add eggs one at a time, then mix in strawberry puree and vanilla.
- Combine flour, baking powder, and salt. Add to butter mixture alternating with milk. The batter will be pale pink naturally, or you can add a few drops of food coloring for a deeper shade.
- Divide evenly among pans and bake for 23-27 minutes. Cool completely on wire racks.
- For the naked effect, spread a thin layer of buttercream between layers, adding sliced strawberries. Apply minimal frosting to the outside—you should see the cake layers peeking through. Top with fresh strawberries and edible flowers. Dust lightly with powdered sugar just before serving. You’ll want to make this again and again!
More Related Recipes
Looking for more Valentine’s inspiration? Check out these collections:
- 10 Beginner-Friendly Valentine’s Cookie Recipes – Perfect for gifting or parties
- 13 No-Bake Thanksgiving Desserts
- 14 Classic European Winter Desserts to Try at Home
Conclusion
These twelve Valentine’s cake ideas prove that impressive doesn’t have to mean complicated! Whether you choose the playful pull-apart cupcake cake for kids, the elegant champagne bundt for date night, or the stunning naked strawberry cake for a special gathering, you’re creating something made with love. My family goes crazy for these every February, and I’m betting yours will too. The best part? Each recipe teaches you techniques you’ll use again and again in your baking journey. So grab your mixing bowls, preheat that oven, and let’s make this Valentine’s Day extra sweet. Your kitchen will smell like heaven, and the smiles on everyone’s faces will make it all worthwhile!