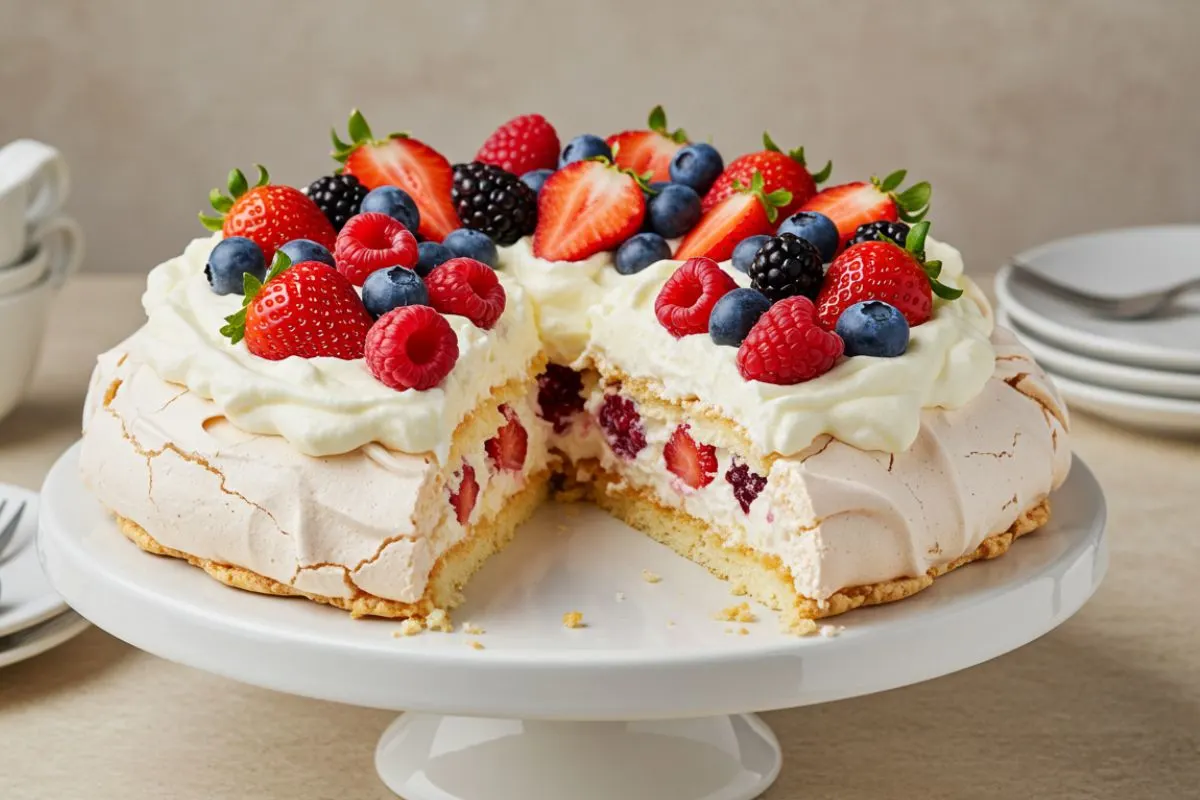
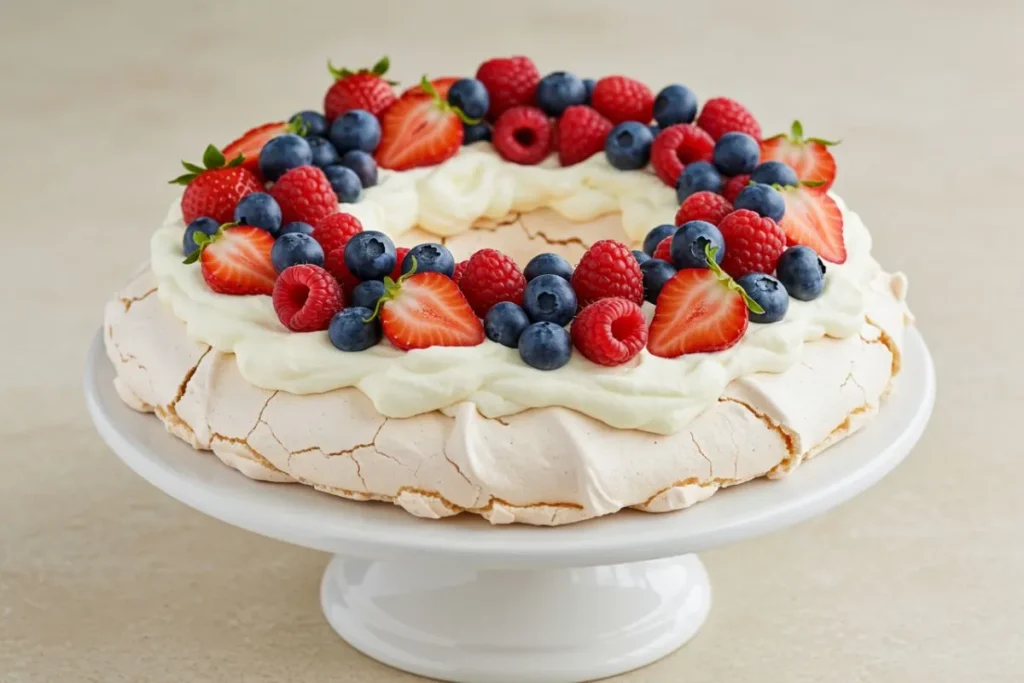
Stunning Pavlova Wreath with Berries
There’s something utterly magical about a pavlova wreath, especially when it’s adorned with a cascade of vibrant berries. I still remember the first time I attempted a pavlova at Nonna Rosa’s house when I was about fifteen. I was so eager to impress her with my newfound baking skills that I overwhipped the meringue and ended up with a sad, cracked mess.
Oh, the lessons we learn in the kitchen! Fast forward to today, after years of perfecting this dessert at my bakery, Sophie’s Sweet Haven, I can confidently say that this stunning pavlova wreath with berries is a showstopper worth mastering. It’s light, naturally gluten-free, and the perfect balance of crisp meringue, soft marshmallowy center, fluffy whipped cream, and tart-sweet berries. Whether you’re hosting a holiday gathering or a summer soirée, this dessert will have everyone reaching for their phones to snap a picture before diving in. Let’s get started, shall we?
Jump to
Why a Stunning Pavlova Wreath with Berries is Special
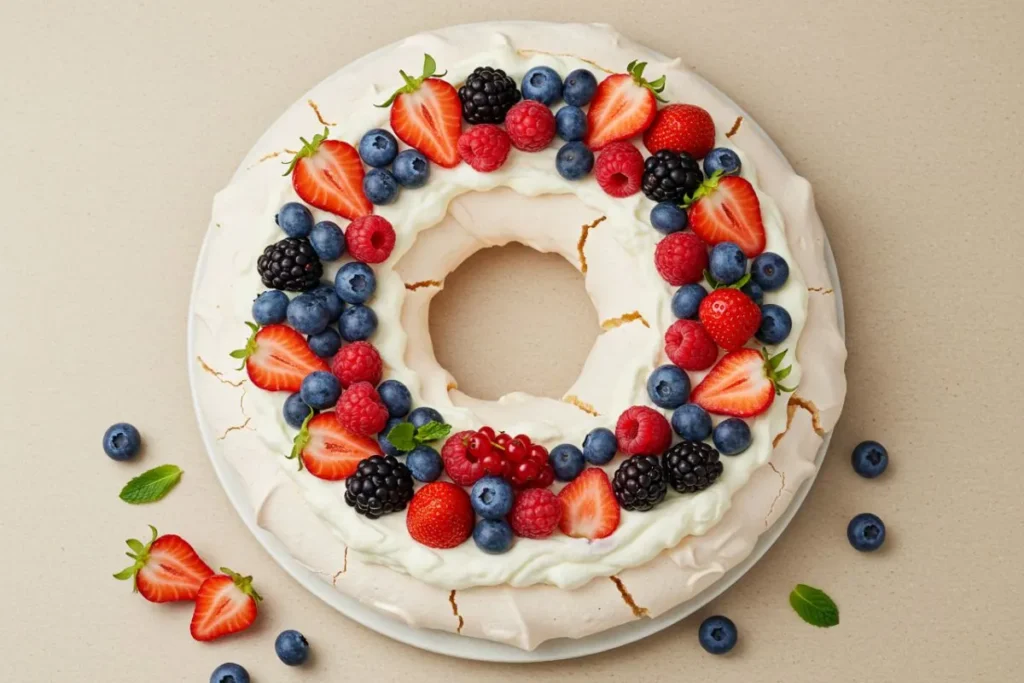
The pavlova wreath is more than just a dessert—it’s a celebration on a plate. Named after the Russian ballerina Anna Pavlova, this dessert is meant to be as light and graceful as her performances. What makes the wreath version so special is its shape: a delicate ring of meringue that looks like a crown, ready to be decorated with clouds of whipped cream and a tumble of seasonal berries.
The contrast of textures is pure magic—the crisp outer shell gives way to a soft, marshmallow-like interior that melts in your mouth. Then you’ve got the creamy richness of whipped cream and the burst of juicy berries that add just the right amount of tartness to balance the sweetness.
I love making this for holiday gatherings because it feels festive yet effortless. The wreath shape evokes the coziness of winter holidays, but swap in summer berries, and it’s just as perfect for a backyard barbecue. Plus, it’s naturally gluten-free, which means everyone at the table can enjoy it. Trust me on this one—once you master the meringue, you’ll be whipping up stunning pavlova wreaths with berries for every occasion.
Essential Ingredients for a Perfect Stunning Pavlova Wreath with Berries
Let’s talk ingredients, because quality makes all the difference here. I’ve tested this recipe countless times (and had my fair share of flops!), so I know exactly what you need to create that perfect pavlova wreath.
- Egg Whites (4 large, about 120g): The backbone of your meringue. Make sure they’re at room temperature for maximum volume, and don’t let even a speck of yolk sneak in—fat is the enemy of a fluffy meringue. I learned this the hard way when I ruined a batch right before a big party!
- Granulated Sugar (1 cup, 200g): Fine sugar dissolves better in the meringue, creating that glossy, stable texture. I’ve tried caster sugar, and it works beautifully too if you have it on hand.
- Cornstarch (1 tsp): This little secret helps create that soft, marshmallowy center. Don’t skip it!
- White Vinegar or Lemon Juice (1 tsp): Acid stabilizes the meringue and keeps it from collapsing. I prefer vinegar for a neutral flavor, but lemon juice works if that’s what you’ve got.
- Vanilla Extract (1 tsp): A splash of good-quality vanilla adds warmth to the meringue. I use my favorite brand from the farmers market, but any pure vanilla extract will do.
- Heavy Cream (1 ½ cups, 360ml): For the whipped cream topping. Make sure it’s cold for the best results. If you’re dairy-free, coconut cream is a great substitute—just chill it overnight first.
- Powdered Sugar (2 tbsp): To sweeten the whipped cream without making it grainy. You can adjust to taste, but I find this amount perfect.
- Mixed Berries (2-3 cups): Strawberries, raspberries, blueberries, and blackberries are my go-to mix. Fresh is best for that vibrant pop, but frozen (thawed and drained) can work in a pinch. In spring, I love adding sliced strawberries; in summer, peaches make a dreamy addition.
- Optional: Fresh Mint or Edible Flowers: For that extra wow factor. A few mint leaves or edible pansies make your stunning pavlova wreath with berries look like it came straight out of a magazine.
Pro tip: Always double-check that your mixing bowl and whisk are squeaky clean. Any grease can deflate your meringue faster than my daughter Emma running toward a batch of fresh cookies!
Step-by-Step Stunning Pavlova Wreath with Berries Recipe
Now, here’s where the fun begins. This recipe makes one 10-inch pavlova wreath, serving about 8-10 people. Don’t worry if it feels like a lot of steps—I’ll be right here with you, sharing all the tricks I’ve learned over the years.
- Preheat and Prep
Preheat your oven to 250°F (120°C). Line a baking sheet with parchment paper and draw a 10-inch circle with an 8-inch circle inside it to guide your wreath shape. (I use a plate and a bowl as templates—works like a charm!) Flip the parchment over so the pencil marks are on the bottom. - Whip the Meringue
In a large, clean mixing bowl, beat the egg whites on medium speed until soft peaks form—this usually takes me about 2-3 minutes. Gradually add the granulated sugar, a tablespoon at a time, while beating on high speed. This step takes patience—don’t rush it! Keep beating until the meringue is glossy and holds stiff peaks, about 8-10 minutes. Rub a bit between your fingers; it should feel smooth, not grainy. If it’s grainy, keep whipping. - Add Stabilizers
Sprinkle the cornstarch, vinegar, and vanilla extract over the meringue and gently fold them in with a spatula. Don’t overmix here—you want to keep all that air you worked so hard to whip in. The mixture should look silky and hold its shape. - Shape the Wreath
Spoon the meringue onto the parchment, following the circle guide to form a wreath shape. You can spread it with a spatula for a rustic look or pipe it using a star tip for a more polished design. I like to make mine about 1 ½ inches high with a slight dip in the center to hold the cream and berries. Don’t worry if it looks messy at first—mine did too! - Bake Low and Slow
Bake the meringue at 250°F (120°C) for 1 hour and 15 minutes, until the outside is crisp and slightly cream-colored. Turn off the oven and let the meringue cool completely inside with the door slightly ajar—this prevents cracking. It usually takes about 2 hours. I know it’s tempting to peek, but trust me, leave that oven door alone! - Whip the Cream
In a chilled bowl, whip the heavy cream and powdered sugar until soft peaks form, about 3-4 minutes. Be careful not to overwhip—you want it billowy, not stiff. If I’m feeling fancy, I add a tiny splash of vanilla here too. - Assemble the Wreath
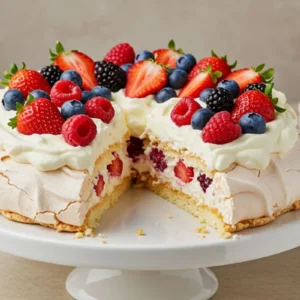
Once the meringue is completely cool, carefully transfer it to a serving platter. (I’ve cracked a few in my day, so go slow!) Spread the whipped cream over the top, filling the center dip. Arrange the berries generously, letting them spill over the edges for that abundant, festive look. Garnish with mint leaves or edible flowers if you’re using them. - Serve Immediately
This beauty is best served right away to keep the meringue crisp. Slice it like a cake or scoop it for a more rustic presentation. The smell alone will have your guests gathering around!
Pro Tips for Stunning Pavlova Wreath with Berries Success
After years of tweaking this recipe, here are my top tips to make your pavlova wreath a masterpiece:
- Room Temperature Eggs: Cold egg whites don’t whip as well. Let them sit out for 30 minutes before starting.
- Low Humidity: Meringue hates moisture. If it’s a rainy day, your pavlova might get sticky. I’ve found running a dehumidifier in the kitchen helps.
- Parchment is Your Friend: Don’t skip the parchment paper—it prevents sticking and makes transferring easier.
- Don’t Skimp on Whipping Time: I can’t tell you how many times I’ve rushed the meringue and ended up with a dense result. Patience is the secret ingredient here.
- Taste Your Berries: Not all berries are created equal. If they’re too tart, sprinkle a tiny bit of sugar on them and let them sit for 10 minutes before topping the wreath.
My daughter Emma loves “helping” with this step—she usually sneaks a few berries while I’m not looking! It’s those little kitchen moments that make baking so special.
Variations and Customizations for Stunning Pavlova Wreath with Berries
One of the best things about a pavlova wreath is how versatile it is. Here are a few ways I’ve switched it up over the years:
- Tropical Twist: Swap berries for mango, kiwi, and passion fruit. Add a sprinkle of toasted coconut for a summery vibe.
- Chocolate Lover’s Dream: Drizzle melted dark chocolate over the whipped cream before adding the berries. I did this for David’s birthday, and he’s still talking about it!
- Winter Citrus: Use segmented oranges, blood oranges, and pomegranate seeds for a vibrant winter version. A touch of lemon zest in the whipped cream adds a nice zing.
- Mini Wreaths: Pipe individual-sized wreaths (about 4 inches across) for a cute, single-serving option. These are perfect for dinner parties.
- Nutty Crunch: Sprinkle crushed toasted almonds or hazelnuts over the whipped cream for extra texture. Nonna Rosa would approve of this nod to her biscotti!
Feel free to make it your own—baking is all about creating memories, not just following a recipe.
Storing and Serving Your Stunning Pavlova Wreath with Berries
Pavlova is best enjoyed fresh, but you can prep parts ahead to save time. The meringue base can be baked up to 2 days in advance and stored in an airtight container in a cool, dry place. Don’t refrigerate it—moisture is the enemy! Whipped cream and berries should be added just before serving to keep the meringue crisp.
If you have leftovers (rare in my house!), store them in the fridge, loosely covered, for up to a day. The meringue will soften, but it’s still delicious. I like to serve mine with a pot of coffee—David’s latest roast pairs perfectly with the sweet-tart flavors.
For presentation, place the wreath on a large platter and surround it with extra berries or greenery for that holiday vibe. It’s a dessert that begs to be the centerpiece, so let it shine!
Recipe Summary
Stunning Pavlova Wreath with Berries
Ingredients
- 4 large egg whites room temperature
- 1 cup 200g granulated sugar
- 1 tsp cornstarch
- 1 tsp white vinegar or lemon juice
- 1 tsp vanilla extract
- 1 ½ cups 360ml heavy cream, cold
- 2 tbsp powdered sugar
- 2-3 cups mixed fresh berries strawberries, raspberries, blueberries, blackberries
- Optional: fresh mint leaves or edible flowers for garnish
Instructions
- Preheat oven to 250°F (120°C). Line baking sheet with parchment; draw 10-inch circle with 8-inch inner circle.
- Beat egg whites to soft peaks, gradually add sugar, whip to stiff peaks (8-10 min).
- Fold in cornstarch, vinegar, and vanilla.
- Spoon or pipe meringue into wreath shape on parchment.
- Bake 1 hr 15 min, cool in oven 2 hrs with door ajar.
- Whip cream with powdered sugar to soft peaks.
- Spread cream on cooled meringue, top with berries and optional garnish.
- Serve immediately.
Equipment
For detailed step-by-step instructions, check out the full recipe above.
Troubleshooting
- Cracked Meringue? Don’t panic! A few cracks are normal, and the whipped cream will hide them. Next time, try cooling it more slowly in the oven.
- Weeping Meringue? This happens if the sugar isn’t fully dissolved. Make sure to whip until it’s smooth and glossy.
- Soggy Base? Assemble just before serving, as the cream can soften the meringue over time.
Equipment
- Stand mixer or hand mixer
- Large mixing bowl
- Baking sheet
- Parchment paper
- Piping bag with a star tip (optional, for shaping)
⚠ Note: Some of the links above are affiliate links. If you click and purchase, I may earn a small commission—at no extra cost to you. Thank you for your support!
Conclusion
There’s nothing quite like the moment you set a stunning pavlova wreath with berries on the table. The golden meringue, fluffy cream, and vibrant berries create a dessert that’s as beautiful as it is delicious. I love how this recipe brings back memories of baking with Nonna Rosa and now creating new ones with Emma and Lucas in our cozy Portland kitchen. Whether you’re a seasoned baker or trying your first pavlova, I hope this recipe brings a little joy to your table. So, grab those egg whites, channel your inner patience, and create something truly spectacular. Happy baking, friends!
Related Recipes You’ll Love
If you enjoyed this Pavlova Wreath with Berries, here are three more delightful dessert recipes to try: