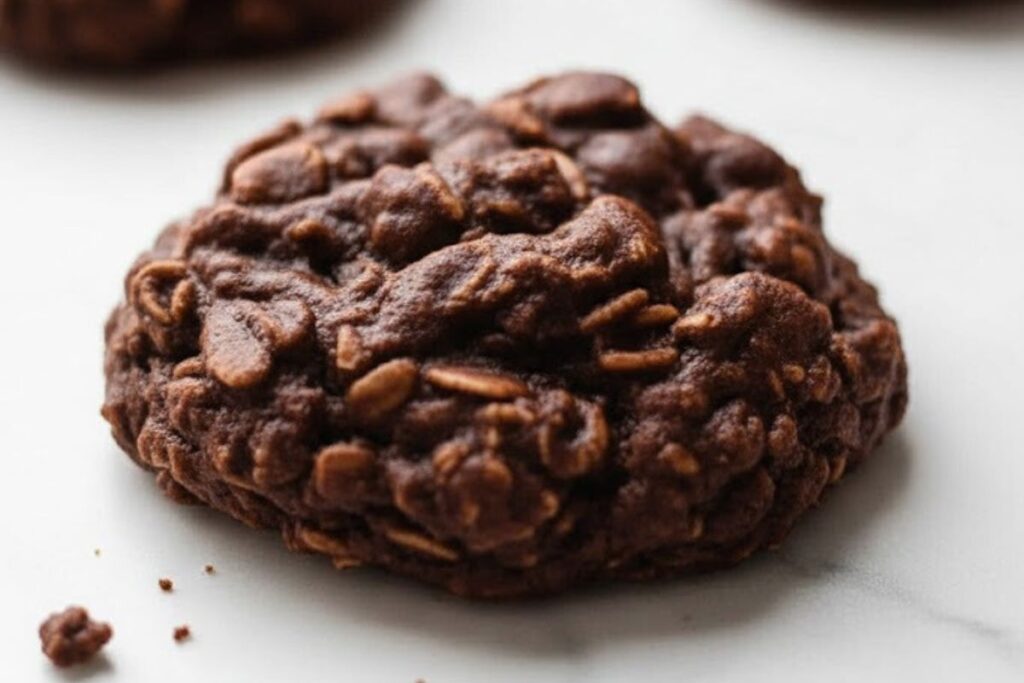
The Best No-Bake Chocolate Peanut Butter Cookies
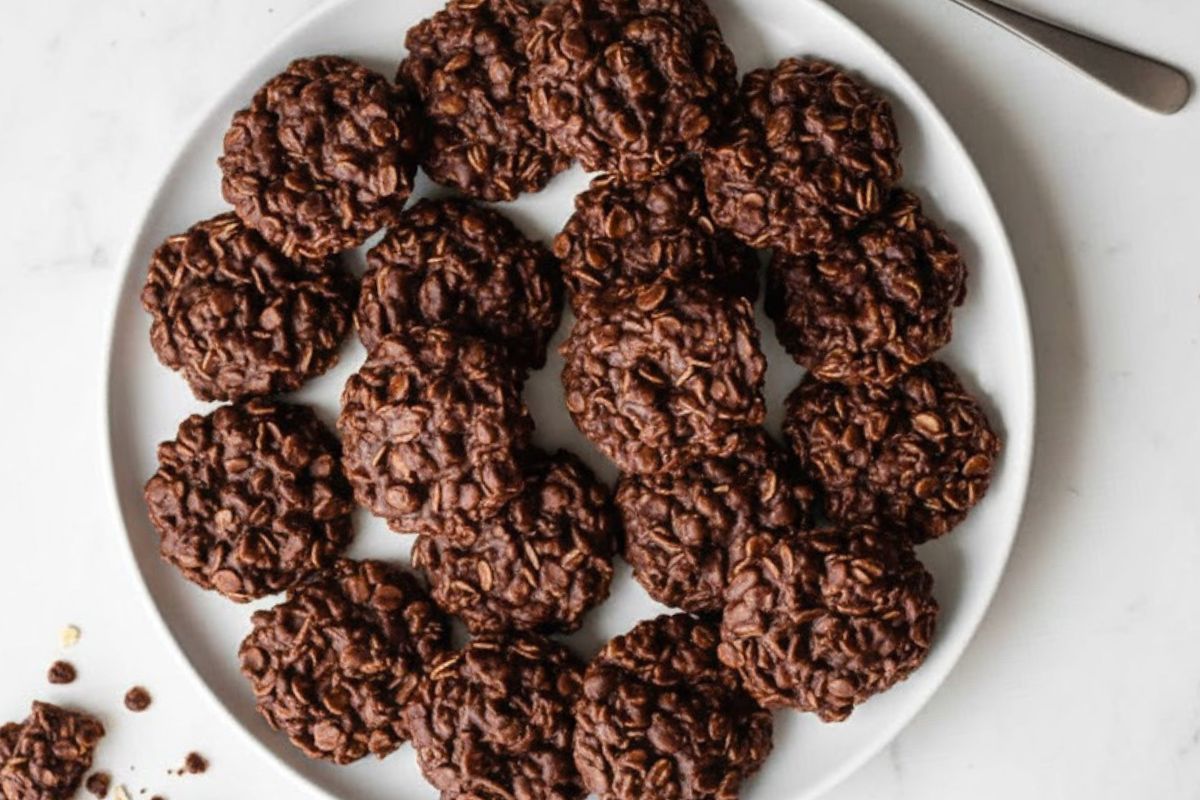
So, I’ll never forget the first time I tried to make these no-bake chocolate peanut butter cookies with Emma. She was four, it was the middle of July, and turning on the oven felt like absolute torture. I thought, “There has to be a better way to satisfy our cookie cravings without heating the entire house!” That’s when Nonna Rosa’s voice echoed in my head – she used to make something similar during the hot Italian summers. After about fifteen test batches (yes, really – David didn’t complain once!), I’ve perfected this recipe. The smell of chocolate and peanut butter melting together, that satisfying texture of chewy oats, and the best part? No oven required! These come together in just 15 minutes of active work, and I promise, if you can boil water, you can absolutely master these no-bake chocolate peanut butter cookies.
Jump to
| Prep Time | Refrigeration | Total Time | Servings | Calories (per serving) |
|---|---|---|---|---|
| 15 minutes | 45 minutes | 1 hour | 24 cookies | ~140 |
No-Bake Chocolate Peanut Butter Cookies Ingredients
The secret to incredible no-bake chocolate peanut butter cookies starts with quality ingredients – and here’s the beautiful thing: you probably have most of these in your pantry right now! I always use real butter and pure vanilla extract because trust me, those two ingredients make all the difference in the final flavor.
For the Cookie Base:
- 1/4 cup (4 Tbsp; 56g) unsalted butter
- 1 and 1/2 cups (300g) granulated sugar
- 1/2 cup (120ml) milk
- 1/4 cup (21g) natural unsweetened or dutch-process cocoa powder
For the Mix:
- 2/3 cup (170g) creamy peanut butter
- 1 Tablespoon (15ml) pure vanilla extract (yes, a full Tablespoon!)
- 3 cups (255g) old-fashioned whole rolled oats or quick oats
- 1/8 teaspoon salt
Essential Equipment for No-Bake Chocolate Peanut Butter Cookies
You don’t need a fancy kitchen to make incredible no-bake cookies! Here are the tools I reach for every time, plus my honest recommendations from years of testing in both my home kitchen and bakery.
| Equipment | Why You Need It | Check Price |
|---|---|---|
| Calphalon Classic 3-Quart Saucepan | Perfect heat distribution prevents scorching – essential for this recipe! | ⭐⭐⭐⭐⭐ Check on Amazon |
| OXO Good Grips 11-Inch Balloon Whisk | Makes whisking effortless and gets into pan corners beautifully | ⭐⭐⭐⭐⭐ Check on Amazon |
| Nordic Ware Natural Aluminum Baking Sheet | Sturdy enough to carry 24 cookies without bending – I’ve had mine for years! | ⭐⭐⭐⭐⭐ Check on Amazon |
| Silpat Silicone Baking Mat | Cookies release perfectly and cleanup is a breeze, trust me! | ⭐⭐⭐⭐⭐ Check on Amazon |
| OXO Good Grips Cookie Scoop (1 Tablespoon) | Gives you perfectly uniform cookies every single time | ⭐⭐⭐⭐⭐ Check on Amazon |
How to Make No-Bake Chocolate Peanut Butter Cookies: Step-by-Step
Okay, this is where the magic happens! I’m going to walk you through every single step. The key here is having all your ingredients measured and ready before you start – trust me on this one. These cookies come together fast, and you don’t want to be scrambling for ingredients mid-process!
1. Prepare Your Workspace (Before You Start)
Before you even turn on the stove, get everything ready. Line two baking sheets with parchment paper or silicone baking mats, and make sure there’s enough room in your refrigerator for both sheets.
This is what I call my “mise en place” moment – it’s a fancy French term that basically means “everything in its place.” I learned the hard way that skipping this step leads to chaos! Having your baking sheets ready means you can work quickly once the mixture is done, which is crucial for these cookies.
2. Combine and Melt the Base (3-4 minutes)
In a medium saucepan (about 3 quarts), combine the butter, sugar, milk, and cocoa powder over medium heat. Whisk constantly until the butter melts completely.
Here’s the thing – constant whisking at this stage prevents the cocoa powder from clumping and ensures everything melts together smoothly. You’re looking for a smooth, glossy mixture with no lumps of cocoa powder visible. The butter will melt first, then everything will start to come together into this gorgeous chocolate mixture. This usually takes me about 2-3 minutes.
3. Bring to a Boil and Time It (1 minute)
Continue whisking occasionally and bring the mixture to a full rolling boil. Once it reaches a boil (you’ll see big bubbles breaking the surface), stop whisking completely and let it boil for exactly 1 minute.
Now, I know the temptation to keep stirring – resist it! This is where most people go wrong. That one minute of undisturbed boiling is absolutely crucial. It allows the sugar to properly dissolve and reach the right temperature, which is what helps these cookies set up perfectly later. I always set a timer because I used to eyeball it and end up with cookies that were either too soft or too hard. One full minute of vigorous boiling – you can do this!
4. Add Peanut Butter and Vanilla (30 seconds)
Remove the saucepan from the heat immediately after the minute is up, then stir in the peanut butter and vanilla extract until completely combined.
The residual heat will melt the peanut butter beautifully, and you’ll see it transform into this silky, smooth, chocolate-peanut butter mixture that smells absolutely incredible. Your kitchen is about to smell amazing, I promise! Stir vigorously until you can’t see any streaks of peanut butter – this takes about 20-30 seconds of good stirring.
5. Incorporate Oats and Salt (30 seconds)
Stir in the oats and salt until everything is evenly coated with the chocolate-peanut butter mixture.
You want every oat covered in that gorgeous chocolate mixture. I like to fold them in gently but thoroughly, making sure I’m scraping the bottom and sides of the pan. The mixture will look thick and slightly glossy – that’s exactly what we want!
6. Rest the Mixture (5 minutes)
Allow the mixture to sit undisturbed for 5 minutes. This allows the oats to soak up some moisture.
This is where patience becomes your best friend. I know you’ll want to start scooping immediately – I did too for years! But this resting period is essential. It lets the oats absorb the liquid, which helps the cookies hold their shape and gives them that perfect chewy texture. I usually use these 5 minutes to double-check that my baking sheets are ready and to grab a cup of coffee!
7. Scoop the Cookies (5 minutes)
Using a 1-Tablespoon cookie scoop (or simply a spoon), drop a tablespoon of dough onto the lined baking sheets. If desired, slightly flatten down with the back of a spoon. Repeat with the rest of the dough.
I swear by my cookie scoop for this – it gives you perfectly uniform cookies every time, which means they all set at the same rate. Space them about an inch apart on your baking sheets. They don’t spread at all, so you can fit quite a few on each sheet. If you want that classic no-bake cookie look, gently press down on each mound with the back of your spoon. I usually get exactly 24 cookies from this recipe.
8. Refrigerate to Set (30-60 minutes)
Refrigerate the cookies for 30-60 minutes so they set completely. Remove from the refrigerator and enjoy!
This is the hardest part – waiting! The cookies need this time in the fridge to firm up and achieve that perfect chewy-but-firm texture. I usually aim for 45 minutes, but they’ll be fully set after 30 minutes if you’re really impatient (like Emma usually is!). Once they’re set, they’ll release easily from the parchment paper with no sticking.
Sophie’s Notes
Storage & Keeping Them Fresh These no-bake chocolate peanut butter cookies keep beautifully in an airtight container in the refrigerator for up to 1 week. I actually prefer them straight from the fridge – they have this perfect firm-yet-chewy texture that’s just incredible. For longer storage, you can freeze them for up to 3 months. Just layer them between sheets of parchment paper in a freezer-safe container. Thaw overnight in the refrigerator before serving, and they’ll taste just as good as the day you made them!
The Boiling Time Secret Here’s the thing about that 1-minute boil – it’s not negotiable. I learned this the hard way after making several batches that wouldn’t set properly. That minute of boiling allows the sugar mixture to reach the right temperature (around 230°F if you want to use a thermometer). Too little time and your cookies will be too soft and won’t hold their shape. Too much time and they’ll be crumbly and dry. Set a timer and trust the process – I promise it makes all the difference!
Peanut Butter Types Matter This recipe works best with non-natural peanut butters like Jif or Skippy – the kind that doesn’t separate. I’ve tested it with natural peanut butter too (the kind you have to stir), and it works, but you need to give it a really good stir before measuring, and let the mixture sit for 10 minutes in step 6 instead of 5 to allow it to thicken properly. If you’re nut-free, I’ve had great success with sunflower seed butter or Biscoff spread as substitutions. My friend’s daughter has a peanut allergy, and the Biscoff version is her absolute favorite!
Oat Options Explained I used to exclusively use quick oats for these cookies, but lately I’ve been using old-fashioned whole rolled oats, and honestly? I can’t tell much difference in the final texture! Both work beautifully. The quick oats give you a slightly smoother texture, while the rolled oats provide a bit more chew and texture. It really comes down to personal preference. Just don’t use steel-cut oats – they won’t soften properly, and you’ll end up with crunchy, unpleasant cookies. Take it from someone who tried it once and learned her lesson!
Butter Substitution Tip If you want to make these dairy-free, you can substitute coconut oil for the butter. Use refined coconut oil if you don’t want any coconut flavor. Like butter, coconut oil solidifies when cold, which is exactly what we need for these cookies to set properly. I’ve made them both ways, and the coconut oil version works just as well – David actually couldn’t tell the difference!
The Resting Period is Critical Don’t skip that 5-minute resting period after adding the oats! I can’t tell you how many times early on I’d get impatient and start scooping immediately. The result? Cookies that were too wet and wouldn’t hold their shape properly. Those 5 minutes allow the oats to absorb moisture from the mixture, which is what gives the cookies their structure. Use that time to clean up your workspace or prep your storage containers – it’ll go by faster than you think!
Troubleshooting: Too Soft or Won’t Set If your cookies aren’t setting up properly after an hour in the fridge, there are a few common culprits. First, check that you boiled the mixture for a full minute – this is the most common issue. Second, make sure you used the right type of oats (not steel cut). If they’re still too soft, pop them in the freezer for 15-20 minutes. They should firm up nicely. On the flip side, if they’re too crumbly, you may have boiled the mixture too long. They’ll still taste delicious, just crumble them over ice cream!
Make-Ahead Magic These are actually one of the best make-ahead cookies for gatherings! I make them 2-3 days before I need them and keep them in the fridge. The flavors meld together beautifully, and they stay perfectly fresh. For summer picnics or outdoor events, keep them in a cooler until serving time – they can soften if left out in warm temperatures for too long. Emma’s soccer team requests these for every end-of-season party, and I always make a double batch!
Fun Variations to Try Once you’ve mastered the basic recipe, there are so many fun ways to customize these! I’ve added mini chocolate chips, chopped peanuts, a pinch of cinnamon, or even a sprinkle of sea salt on top. For holidays, I sometimes drizzle them with melted white chocolate or dust them with powdered sugar. My personal favorite variation? Adding 1/2 cup of shredded coconut to the oat mixture for a chocolate-peanut butter-coconut combo that’s out of this world!
I can’t wait for you to try these no-bake chocolate peanut butter cookies! There’s something so satisfying about making cookies without turning on the oven – especially during those hot summer months when even thinking about baking feels exhausting. This recipe has saved me countless times when we needed a quick dessert, when Emma wanted to help in the kitchen, or when I just needed something chocolate and delicious without the wait. The combination of rich chocolate, creamy peanut butter, and chewy oats never gets old, and now it’s yours to make your own. Don’t forget to leave a comment below and let me know how they turned out! I read every single one, and I especially love hearing about the fun variations you come up with. Tag me on Instagram @sophiesweetkitchen – I’d love to celebrate your no-bake success with you! Happy baking, friends!
Recipe Card

No-Bake Chocolate Peanut Butter Cookies
Ingredients
For the Cookie Base:
- 1/4 cup 4 Tbsp; 56g unsalted butter
- 1 and 1/2 cups 300g granulated sugar
- 1/2 cup 120ml milk
- 1/4 cup 21g natural unsweetened or dutch-process cocoa powder
For the Mix:
- 2/3 cup 170g creamy peanut butter
- 1 Tablespoon 15ml pure vanilla extract
- 3 cups 255g old-fashioned whole rolled oats or quick oats
- 1/8 teaspoon salt
Instructions
- Prepare workspace: Line two baking sheets with parchment paper or silicone baking mats. Make sure there’s enough room in your refrigerator for the baking sheets.
- Combine and melt base: In a medium saucepan (about 3 quart), combine the butter, sugar, milk, and cocoa powder over medium heat. Whisk constantly until the butter melts completely.
- Bring to boil: Continue whisking occasionally and bring the mixture to a full rolling boil. Once boiling, stop whisking and allow to boil for exactly 1 minute.
- Add peanut butter and vanilla: Remove from heat immediately, then stir in the peanut butter and vanilla extract until completely combined and smooth.
- Add oats and salt: Stir in the oats and salt until everything is evenly coated with the chocolate-peanut butter mixture.
- Rest the mixture: Allow mixture to sit undisturbed for 5 minutes. This allows the oats to soak up moisture.
- Scoop cookies: Using a 1-Tablespoon cookie scoop (or spoon), drop tablespoon-sized portions of dough onto the lined baking sheets. If desired, slightly flatten with the back of a spoon. Repeat with remaining dough.
- Refrigerate: Refrigerate the cookies for 30-60 minutes until completely set. Remove from refrigerator and enjoy!
Equipment
- Store in an airtight container in the refrigerator for up to 1 week
- These taste best served cold directly from the refrigerator
- Once completely set, cookies can be frozen for up to 3 months
- Layer between parchment paper in a freezer-safe container
- Thaw overnight in the refrigerator before serving
- Butter: Substitute coconut oil (refined for no coconut flavor). Like butter, it solidifies when cold
- Peanut Butter: Works best with non-natural peanut butter (Jif or Skippy). For natural peanut butter, stir well and let mixture rest 10 minutes in step 6. For nut-free, use sunflower seed butter or Biscoff spread
- Milk: Use any milk – dairy or non-dairy (almond, oat, soy all work)
- Oats: Both old-fashioned rolled oats and quick oats work well. Do NOT use steel cut oats
- The 1-minute boil time is essential – do not skip or shorten it! This allows the sugar to reach the proper temperature for cookies to set
- Have all ingredients measured and ready before starting – this recipe moves quickly
- Don’t skip the 5-minute resting period after adding oats – this helps cookies hold their shape
- Use a cookie scoop for uniform size and consistent setting time
- Cookies won’t set: Most likely didn’t boil for full minute or used steel cut oats. Pop in freezer for 15-20 minutes to firm up
- Cookies too crumbly: Mixture was boiled too long. Still delicious crumbled over ice cream!
- Cookies too soft: Let rest longer before scooping, or chill for full 60 minutes