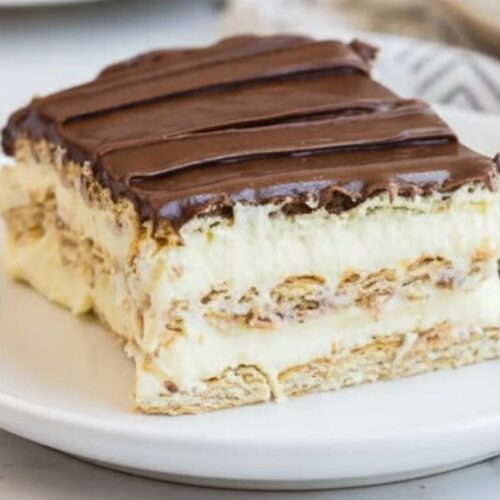
Classic No-Bake Chocolate Eclair Cake
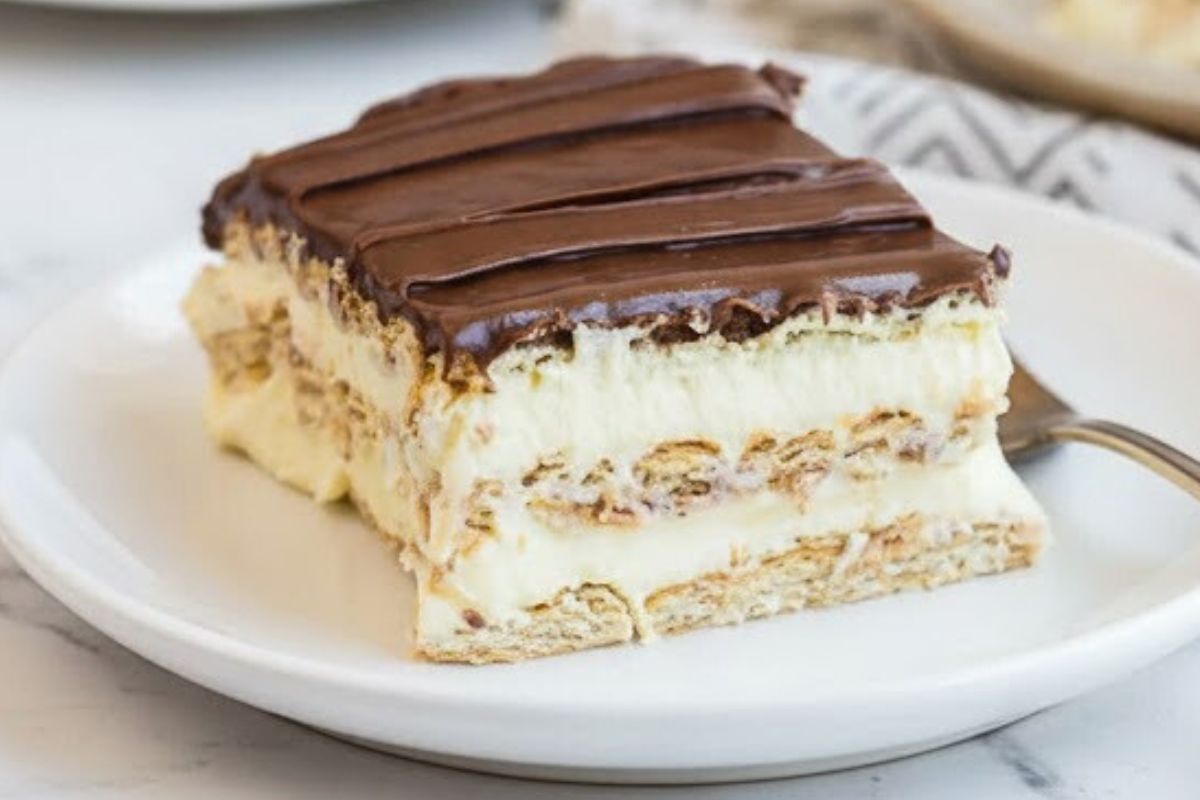
So, I’ll never forget the first time I tried eclair cake at a church potluck in the Midwest. I was visiting David’s family, and his aunt brought this unassuming pan that literally disappeared in minutes. When I asked for the recipe, she laughed and said, “Sophie, it’s so easy you won’t believe it!” She was right. No oven, no fancy techniques, just layers of graham crackers, creamy vanilla pudding, and rich chocolate frosting that somehow transform into something that tastes like an actual éclair. After years of making elaborate French pastries in my bakery, I have to admit – sometimes the simplest recipes are the most brilliant. The best part? You can have this stunning no-bake chocolate eclair cake assembled in about 10 minutes, then let your refrigerator do all the work. Trust me, if you can spread frosting, you can make this!
Jump to
| Prep Time | Cook Time | Total Time | Servings | Calories (per serving) |
|---|---|---|---|---|
| 5 minutes | 15 minutes | 20 minutes (plus 8 hours chilling) | 20 servings | ~264 kcal |
No-Bake Chocolate Eclair Cake Ingredients
The secret to this incredible no-bake chocolate eclair cake is keeping it simple – just five ingredients that you can find at any grocery store. Here’s everything you’ll need, and I promise, there’s nothing complicated about this list!
For the Creamy Filling:
- 2 (3.4-ounce) packages instant vanilla pudding mix
- 3½ cups milk
- 1 (8-ounce) container whipped topping, thawed
For the Layers:
- 1 box graham crackers
- 1 can dark chocolate frosting
Essential Equipment for No-Bake Chocolate Eclair Cake
You don’t need fancy equipment to make this stunning dessert! Here are the simple tools I reach for every time I make this crowd-pleaser.
| Equipment | Why You Need It | Check Price |
|---|---|---|
| Pyrex 9×13 Glass Baking Dish | Perfect for chilling and serving – plus you can see those beautiful layers! | ⭐⭐⭐⭐ Check on Amazon |
| OXO Good Grips Whisk | Makes whisking pudding completely smooth with no lumps, trust me! | ⭐⭐⭐⭐ Check on Amazon |
| Wilton Offset Spatula | My secret weapon for spreading frosting evenly without disturbing the layers | ⭐⭐⭐⭐ Check on Amazon |
How to Make No-Bake Chocolate Eclair Cake: Step-by-Step
Okay, this is where the magic happens! I’m going to walk you through every single step. Take your time with the layering – but honestly, this is easier than it looks, I promise!
1. Make the Pudding Mixture (2-3 minutes)
First, grab a medium bowl – you’ll want one that’s big enough to whisk comfortably.
In a medium bowl, whisk together pudding mix and milk until smooth. Fold in whipped topping.
Here’s the thing about pudding mix: you want to whisk vigorously for about 2 minutes until it’s completely smooth with no lumps. Then, gently fold in that whipped topping – I use a spatula and make sweeping motions from the bottom up to keep it light and fluffy. You’re looking for a pale, creamy mixture that’s thick but still spreadable. Don’t worry if you see a few small streaks of white – that’s totally normal and will blend in as it sits!
2. Create the First Layer (2 minutes)
Now for the fun part – building those gorgeous layers!
Line the bottom of a 9-inch x 13-inch pan with a single layer of graham crackers, breaking some if necessary to fill the layer. Pour half the pudding mixture over the crackers and spread evenly.
I like to arrange the crackers close together, breaking a few to fill in any gaps along the edges – think of it like a puzzle. Don’t stress about perfection here; mine are never perfectly aligned! Then, pour half of that creamy pudding mixture right over the crackers and use an offset spatula (or the back of a spoon) to spread it evenly. You’ll think the crackers might float up, but they won’t – trust me on this one!
3. Build the Middle Layer (2 minutes)
Time to repeat the process – you’re halfway there!
Top with another layer of crackers. Pour the remaining pudding mixture over the second layer of crackers and top with a third layer of crackers.
Add your second layer of graham crackers just like you did the first time. Then spread that remaining pudding mixture on top, making sure it reaches all the corners. Finally, add one more layer of crackers on top. I learned this the hard way, but those top crackers should be placed gently – if you press down too hard, the pudding squishes out the sides (not a disaster, just messier!).
4. Add the Chocolate Frosting (3-4 minutes)
Here’s my favorite trick for this step – it’ll make your life so much easier!
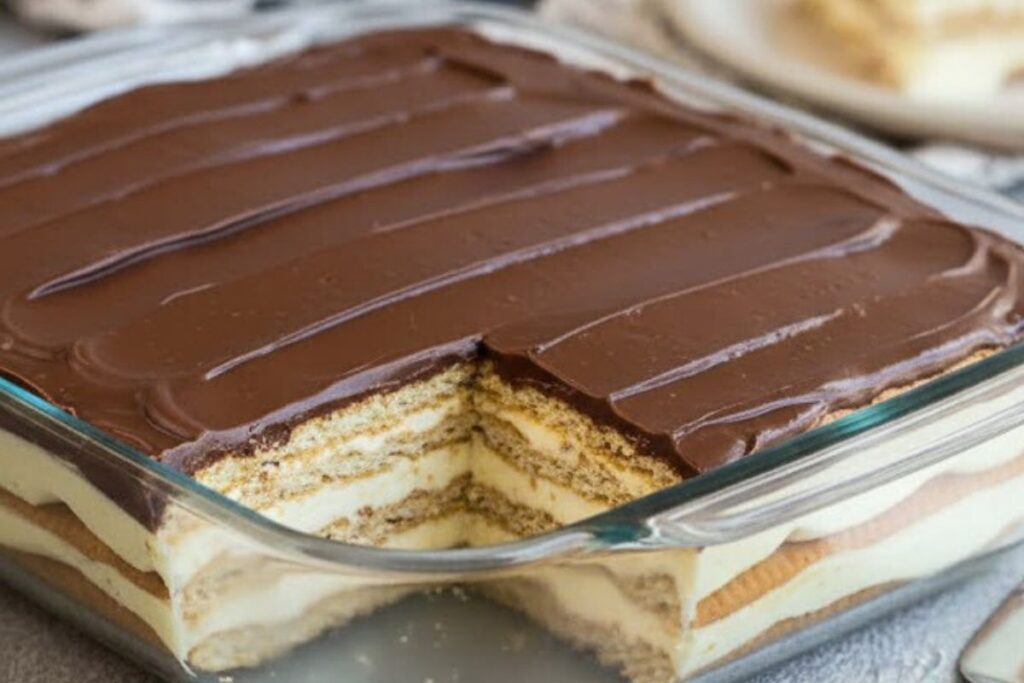
Carefully spread the frosting over the top layer of graham crackers. Cover and refrigerate at least 8 hours or overnight. Serve chilled and store any leftovers covered in the refrigerator.
Before spreading, I warm my tub of frosting in the microwave for about 20 seconds, then stir. This makes it so much easier to spread without disturbing those cracker layers underneath! Use an offset spatula or a butter knife and work gently from the center outward. Don’t panic if a few crackers shift – just nudge them back into place. Now comes the hardest part: waiting! Cover the pan with plastic wrap or foil and refrigerate for at least 8 hours, though overnight is even better. This is when the magic happens – those graham crackers soften and become cake-like, creating that perfect éclair texture. Your kitchen won’t smell like anything yet, but tomorrow? Pure chocolate vanilla heaven.
Sophie’s Notes
Storage & Texture Magic Store leftovers covered in the refrigerator for up to 4 days. Here’s the thing, though – this cake actually gets better as it sits! The crackers continue to soften most amazingly, transforming into something that tastes just like éclair pastry. I personally prefer this cake after it sits for at least 24 hours. It’s one of those rare desserts where patience truly pays off. After day three, the texture is absolutely perfect – soft, creamy, and completely indistinguishable from a fancy French pastry.
Make-Ahead Magic The cake can be made up to 2 days in advance, which makes it absolutely perfect for potlucks, holidays, or any time you need a stress-free dessert. I love making this on a Friday night and serving it at Sunday dinner. Those extra hours in the fridge just keep making it better! Just keep it covered tightly so it doesn’t absorb any refrigerator odors.
Freezer-Friendly Option Yes, you can actually freeze this! To freeze your no-bake chocolate eclair cake, wrap it tightly in a double layer of foil and plastic. Label it, date it, and freeze for up to 2 months. Thaw the cake overnight in the refrigerator before serving. I’ve done this before big family gatherings, and it works beautifully – though I’ll admit it never lasts long enough in my house to make it to the freezer!
The Instant Pudding Shortcut I know some of you might be thinking about making homemade pastry cream instead of using instant pudding. And listen, I respect that! If you prefer from-scratch, unprocessed ingredients, you could absolutely make homemade pastry cream to use instead. I’ve tested both ways, and while homemade is delicious, the instant pudding gives you that classic eclair cake texture everyone expects. For a dessert this easy, I don’t think you need to complicate it!
Whipped Topping Alternatives The frozen whipped topping is traditional for this recipe, but you can substitute homemade whipped cream if you prefer. I’ve done this for special occasions, and it works beautifully – just use 2 cups of heavy cream whipped to stiff peaks with 2 tablespoons of powdered sugar. The texture is slightly lighter and more delicate, but equally delicious. Just know that homemade whipped cream can deflate a bit faster, so this version is best served within 48 hours.
The Warm Frosting Trick This little trick will change everything for you! I warm my tub of prepared frosting in the microwave for 20 seconds, then stir. It spreads so much easier this way and you won’t disturb those cracker layers underneath. If you prefer homemade chocolate frosting, that works wonderfully too – just make sure it’s a spreadable consistency, not too thick. The dark chocolate frosting really gives you that authentic éclair flavor, but milk chocolate works in a pinch!
Serving Size Reality Check This recipe yields one 9-inch by 13-inch cake. I usually cut it into 20 pieces, but your actual servings will vary depending on how generous you are with your slices! For a dinner party, I cut smaller squares (about 2 inches by 2.5 inches) and get closer to 24 servings. For a family gathering where David’s brothers are involved? We’re lucky to get 15 servings out of it! Cut them at the table so everyone can choose their own size.
Common Mistake: Not Chilling Long Enough Here’s where most people go wrong with this recipe – they get impatient! I can’t tell you how many times I’ve had readers message me saying their cake was too crunchy. The secret is that full 8-hour chill time, minimum. Those graham crackers need time to absorb moisture from the pudding and transform into that soft, cake-like texture. If you cut into it after just 4 hours, you’ll still have crunchy crackers. Resist the temptation! Make it the night before and thank me later.
The Best Presentation Tip When you’re ready to serve, let the cake sit at room temperature for about 5 minutes before cutting. This makes it so much easier to slice cleanly! I use a sharp knife, wiping it clean between cuts for those picture-perfect slices. If you want to get fancy (and I do for special occasions), add a dollop of whipped cream and a few fresh berries on top of each slice. Emma loves when I dust the top with a little cocoa powder before serving – it makes it look extra fancy!
Make This Your New Go-To Dessert
I can’t wait for you to try this no-bake chocolate eclair cake! There’s something so magical about a dessert that requires zero baking but delivers such impressive results. This recipe has saved me countless times when I needed a crowd-pleasing dessert but didn’t have time to heat the oven. The creamy vanilla filling, those softened graham crackers, and that rich chocolate frosting – it all comes together into something that tastes like you spent hours in a French patisserie. My family goes crazy for this one, and I make it at least once a month during the summer when it’s too hot to bake. It’s become David’s birthday cake request three years running!
Don’t forget to let it chill for the full time – that’s where the magic happens. And please, drop a comment below and let me know how yours turned out! I’d love to hear if your family devours it as fast as mine does. Tag me on Instagram @sophiesweetkitchen – I check every single one, and I love celebrating your baking successes with you!
Happy baking, friends!
Recipe Card
Classic No-Bake Chocolate Eclair Cake
Ingredients
For the Creamy Filling:
- 2 3.4-ounce packages instant vanilla pudding mix
- 3½ cups milk
- 1 8-ounce container whipped topping, thawed
For the Layers:
- 1 box graham crackers
- 1 can dark chocolate frosting
Instructions
Step 1: Make the Pudding Mixture
- In a medium bowl, whisk together pudding mix and milk until smooth. Fold in whipped topping.
Step 2: Create the First Layer
- Line bottom of a 9-inch x 13-inch pan with a single layer of graham crackers, breaking some if necessary to fill the layer. Pour half the pudding mixture over the crackers and spread evenly.
Step 3: Build the Middle Layer
- Top with another layer of crackers. Pour the remaining pudding mixture over the second layer of crackers and top with a third layer of crackers.
Step 4: Add the Chocolate Frosting
- Carefully spread the frosting over the top layer of graham crackers. Cover and refrigerate at least 8 hours or overnight. Serve chilled and store any leftovers covered in the refrigerator.