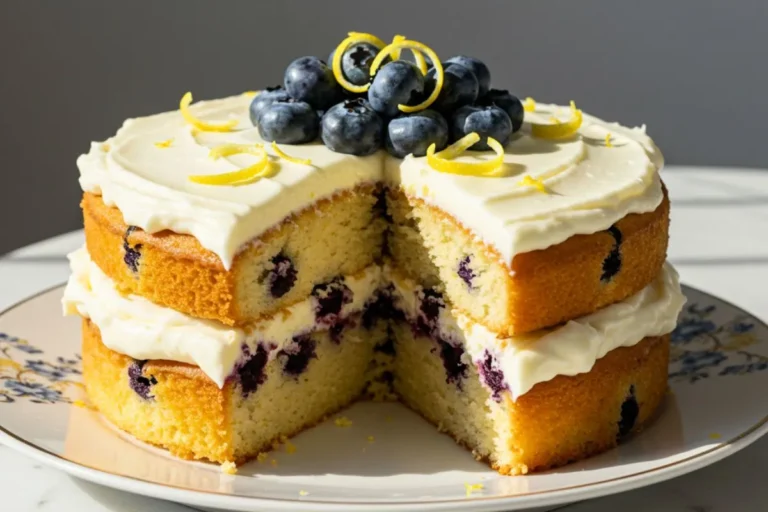
10 Heart-Shaped Cake Ideas Perfect for Any Celebration
There’s something magical about baking a heart-shaped cake that goes beyond Valentine’s Day. Over the years, I’ve learned that these sweet symbols of love work beautifully for anniversaries, bridal showers, birthdays, or even just a “thinking of you” Tuesday. My daughter Emma once told me that heart cakes taste better than regular ones—and honestly, I think she might be onto something!
Today, I’m sharing ten of my favorite heart-shaped cake ideas, ranging from beginner-friendly classics to show-stopping designs. Whether you’re looking for an easy heart-shaped cake for beginners or want to try something more adventurous, I’ve got you covered. I’ve tested each of these in my own kitchen (some multiple times—the broken heart cake took three attempts to perfect!), and I’m excited to walk you through them.
These romantic cake ideas aren’t just for couples, either. I’ve made heart cakes for my kids’ teachers, my best friend’s birthday, and even as a pick-me-up for David after a tough week. Because really, who couldn’t use a little extra love in cake form?
Jump to
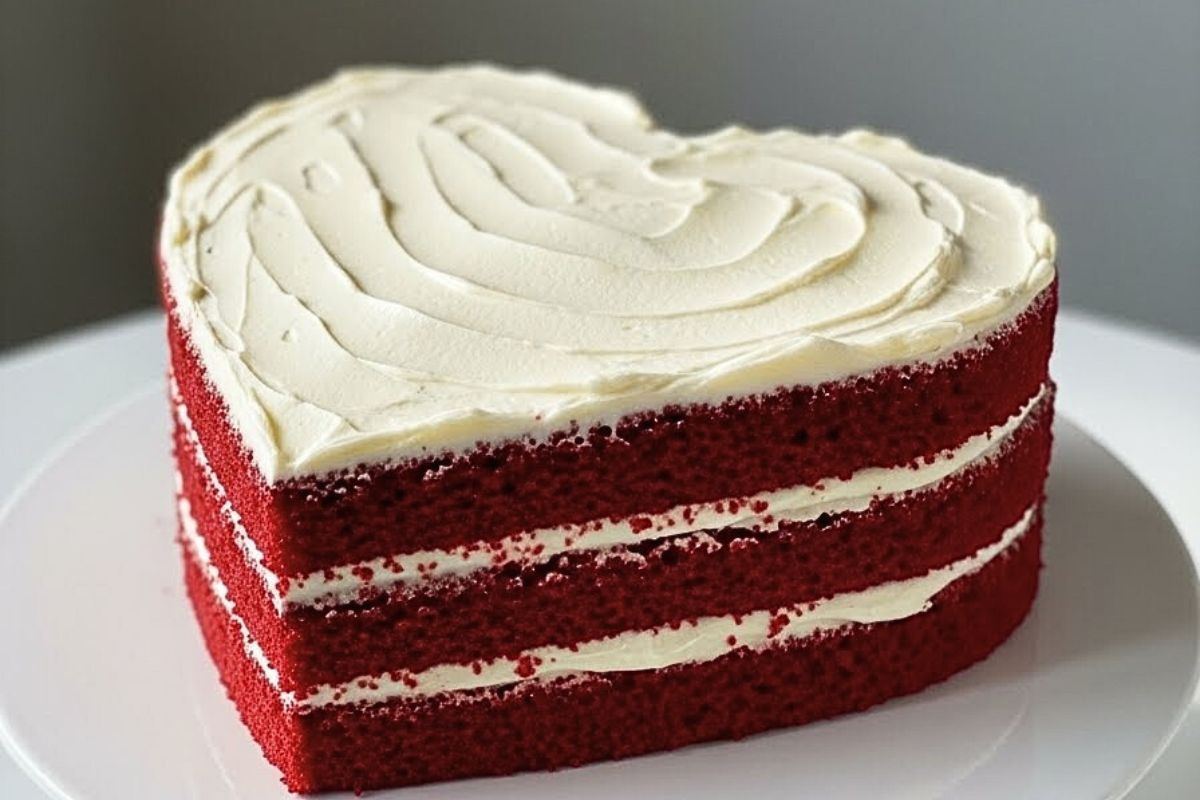
1. Classic Red Velvet with Cream Cheese Frosting
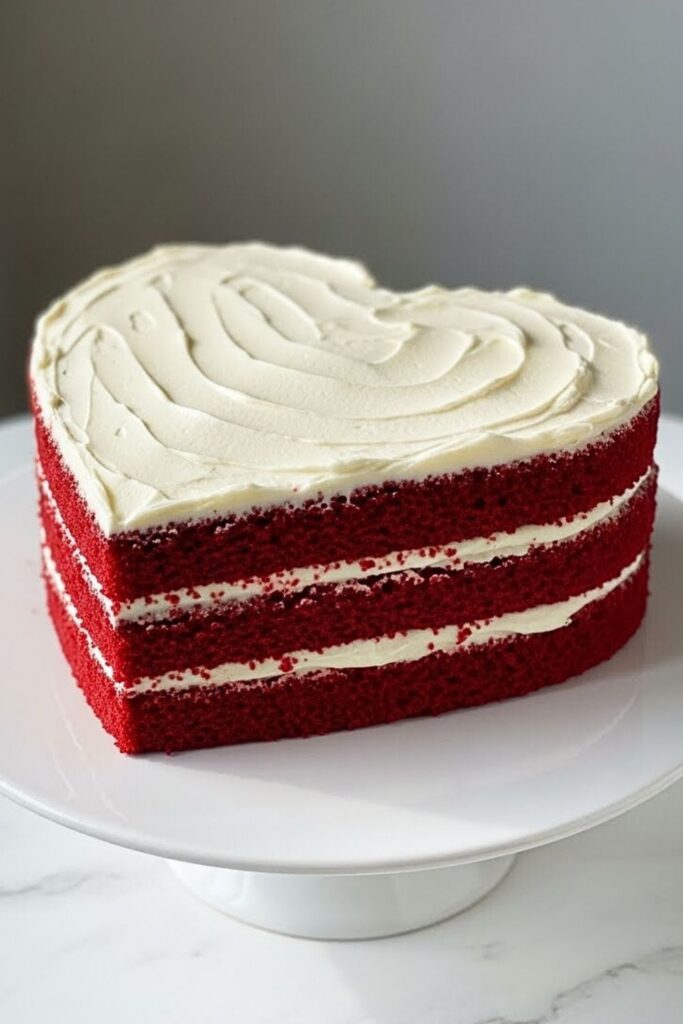
This is the heart-shaped cake for Valentine’s Day that started my love affair with shaped cakes. The deep red color against fluffy white frosting is simply stunning, and the tangy cream cheese balances the cocoa perfectly.
| Prep Time | 25 minutes |
| Bake Time | 30 minutes |
| Servings | 10-12 servings |
| Difficulty | Easy |
| Calories | ~380 per serving |
Essential Equipment:
- 9-inch heart-shaped cake pan – Creates the perfect shape without any trimming.
- Stand mixer or hand mixer – Makes achieving that velvety texture so much easier.
- Offset spatula – Essential for smooth, professional-looking frosting.
Ingredients:
For the Cake:
- 2½ cups all-purpose flour
- 2 tablespoons cocoa powder
- 1 teaspoon baking soda
- 1 teaspoon salt
- 1½ cups granulated sugar
- 1½ cups vegetable oil
- 2 large eggs
- 1 cup buttermilk
- 2 tablespoons red food coloring
- 1 teaspoon vanilla extract
- 1 teaspoon white vinegar
For the Cream Cheese Frosting:
- 16 oz cream cheese, softened
- 1 cup unsalted butter, softened
- 4 cups powdered sugar
- 2 teaspoons vanilla extract
- Pinch of salt
Instructions:
- Preheat your oven to 350°F and grease your heart-shaped pan generously—trust me, you don’t want this beauty sticking! I like to use both butter and flour for extra insurance.
- Whisk together flour, cocoa powder, baking soda, and salt in a medium bowl. In your mixer, beat sugar and oil until well combined, about 2 minutes.
- Add eggs one at a time, mixing well after each addition. The mixture should look smooth and glossy—this is what creates that signature velvety crumb.
- In a measuring cup, combine buttermilk, food coloring, vanilla, and vinegar. Now here’s where the magic happens: alternate adding the dry ingredients and buttermilk mixture to your batter, beginning and ending with dry ingredients. Mix just until combined—I learned the hard way that overmixing makes the cake dense!
- Pour batter into your prepared pan and bake for 28-32 minutes. You’ll know it’s done when a toothpick comes out with just a few moist crumbs. Let it cool in the pan for 15 minutes, then turn it out onto a wire rack.
- For the frosting, beat cream cheese and butter together until fluffy (about 3 minutes). Gradually add powdered sugar, then vanilla and salt. Beat until light and creamy—this usually takes me about 5 minutes total.
- Once your cake is completely cool, frost generously. I like to do a crumb coat first, chill for 30 minutes, then add the final layer for that bakery-perfect finish.
2. Chocolate Fudge “Broken Heart” Cake

This DIY heart-shaped cake is my go-to for dramatic presentations. You bake it whole, then strategically crack it open to reveal a surprise filling—it’s both fun to make and absolutely stunning to serve!
| Prep Time | 30 minutes |
| Bake Time | 35 minutes |
| Servings | 12 servings |
| Difficulty | Medium |
| Calories | ~420 per serving |
Essential Equipment:
- 10-inch heart-shaped pan – Slightly larger for the dramatic effect.
- Bench scraper – Perfect for creating clean crack lines.
- Piping bags – For filling the center with ganache or mousse.
Ingredients:
For the Cake:
- 2 cups all-purpose flour
- 2 cups granulated sugar
- ¾ cup cocoa powder
- 2 teaspoons baking soda
- 1 teaspoon baking powder
- 1 teaspoon salt
- 2 large eggs
- 1 cup strong coffee, cooled
- 1 cup buttermilk
- ½ cup vegetable oil
- 2 teaspoons vanilla extract
For the Filling:
- 1½ cups heavy cream
- 12 oz dark chocolate, chopped
- 2 tablespoons butter
- Fresh berries (optional)
For the Ganache:
- 1 cup heavy cream
- 8 oz chocolate, chopped
Instructions:
- Preheat oven to 350°F. Grease and flour your heart pan thoroughly—this cake is too precious to stick!
- Whisk together all dry ingredients in a large bowl. In another bowl, whisk eggs, coffee, buttermilk, oil, and vanilla until smooth.
- Pour wet ingredients into dry and mix until just combined. The batter will be thin—don’t panic! That’s exactly what creates the fudgy texture. I remember being so worried the first time, but it bakes up perfectly.
- Bake for 32-37 minutes until a toothpick comes out with a few moist crumbs. Cool completely in the pan, then carefully remove.
- For the filling, heat the cream until it just begins to simmer, then pour it over chopped chocolate. Let it sit for 2 minutes, then stir until silky smooth. Add butter and stir until incorporated. Chill until thickened but still pipeable.
- Make the ganache the same way, but use it while still warm for pouring.
- Here’s the fun part: use a sharp knife to score where you want your “crack” to be. Gently press down to create the broken effect—practice makes perfect, and even my messy attempts looked intentional! Pipe the filling into the crack, add berries if using, then drizzle with ganache.
3. Pink Champagne Heart-Shaped Bundt
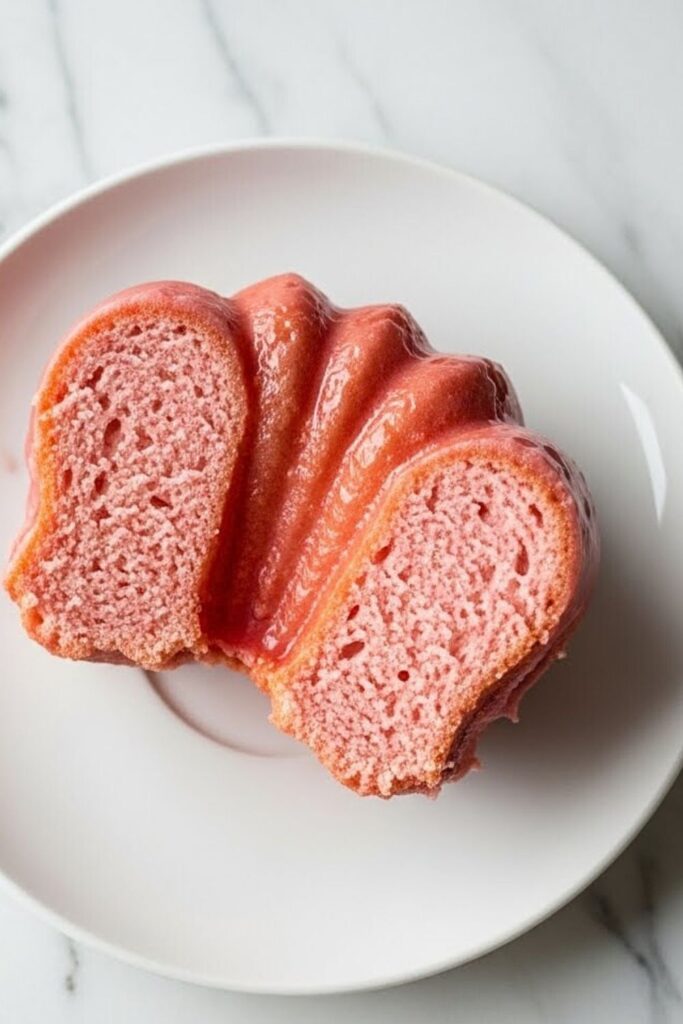
This easy heart-shaped cake is perfect for bridal showers or fancy celebrations. The champagne adds a delicate flavor and beautiful crumb that I absolutely adore. Plus, Bundts are forgiving for beginners!
| Prep Time | 20 minutes |
| Bake Time | 45 minutes |
| Servings | 14 servings |
| Difficulty | Easy |
| Calories | ~340 per serving |
Essential Equipment:
- Heart-shaped Bundt pan – The fluted design makes it look fancy with zero effort.
- Cooling rack – Essential for even cooling and glaze dripping.
Ingredients:
For the Cake:
- 3 cups all-purpose flour
- 1 tablespoon baking powder
- ½ teaspoon salt
- 1 cup unsalted butter, softened
- 2 cups granulated sugar
- 4 large eggs
- 1 cup champagne or sparkling wine
- ½ cup whole milk
- 2 teaspoons vanilla extract
- Pink gel food coloring
For the Glaze:
- 2 cups powdered sugar
- 3-4 tablespoons champagne
- Pink food coloring
- Edible pearls or sprinkles
Instructions:
- Preheat oven to 325°F. Grease your Bundt pan like your baking life depends on it—I use baking spray with flour, then brush on melted butter for extra insurance. Nonna Rosa taught me this trick!
- Whisk flour, baking powder, and salt together. Set aside.
- Cream butter and sugar until light and fluffy, about 4 minutes. This is where the texture magic happens, so don’t rush it!
- Add eggs one at a time, beating well after each. Mix in vanilla and enough pink coloring to achieve your desired shade—I usually use about ½ teaspoon of gel color.
- Combine the champagne and milk in a measuring cup. Alternate adding flour mixture and champagne mixture to the batter, starting and ending with flour. Mix just until combined.
- Pour into prepared pan and bake for 42-48 minutes. The cake should spring back when gently pressed, and a long skewer should come out clean.
- Cool in pan for 15 minutes—this is crucial for Bundts! Then carefully invert onto your cooling rack. Let cool completely before glazing.
- For the glaze, whisk powdered sugar and champagne until smooth and pourable. Add pink coloring if desired. Drizzle over cooled cake and decorate with pearls while the glaze is still wet.
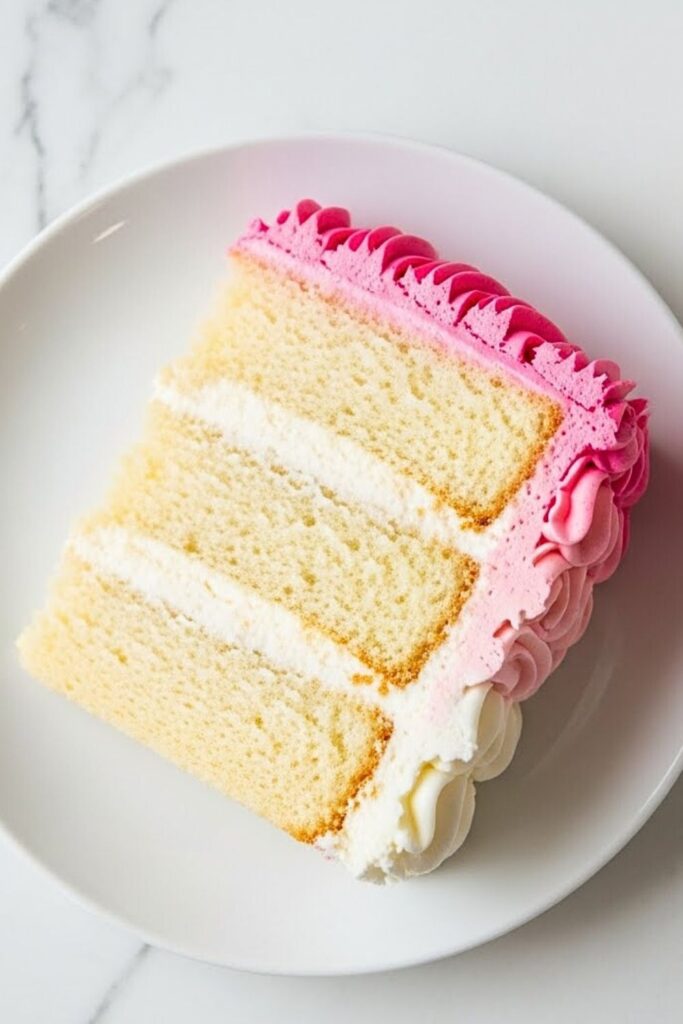
4. Strawberry Cream Layered Heart Cake
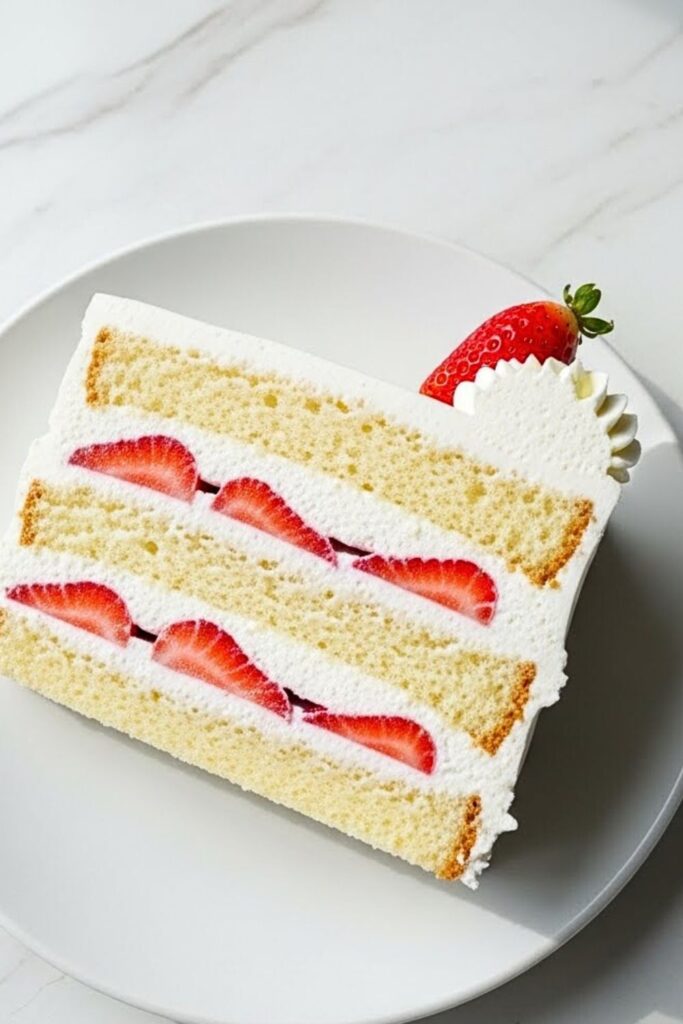
This romantic cake idea screams springtime celebration! Fresh strawberries and whipped cream between tender vanilla layers create something truly special. My family goes crazy for this one every year.
| Prep Time | 35 minutes |
| Bake Time | 25 minutes |
| Servings | 12 servings |
| Difficulty | Medium |
| Calories | ~360 per serving |
Essential Equipment:
- Two 9-inch heart pans – For perfect layers every time.
- Cake leveler or serrated knife – Creates perfectly flat layers.
- Turntable – Makes frosting so much easier, trust me on this one!
Ingredients:
For the Cake:
- 2¾ cups all-purpose flour
- 2½ teaspoons baking powder
- ½ teaspoon salt
- 1 cup unsalted butter, softened
- 1¾ cups granulated sugar
- 4 large eggs
- 1 cup whole milk
- 2 teaspoons vanilla extract
- ½ teaspoon almond extract
For the Filling and Frosting:
- 3 cups heavy whipping cream, cold
- ¾ cup powdered sugar
- 2 teaspoons vanilla extract
- 2 cups fresh strawberries, sliced
- Whole strawberries for topping
Instructions:
- Preheat the oven to 350°F and prepare both heart pans with butter and parchment paper. I always trace the heart shape on parchment—makes removal foolproof!
- Whisk flour, baking powder, and salt. In your mixer, cream butter and sugar until pale and fluffy, about 5 minutes. You’ll know it’s ready when the mixture almost doubles in volume.
- Add eggs one at a time, mixing well after each. Beat in vanilla and almond extracts.
- Alternate adding flour mixture and milk, beginning and ending with flour. Mix just until no streaks remain—overmixing is the enemy of tender cake!
- Divide batter evenly between pans and bake for 23-27 minutes. Cool in pans for 10 minutes, then turn out onto racks.
- For the frosting, beat cold heavy cream with powdered sugar and vanilla until stiff peaks form. Here’s where most people go wrong—don’t underbeat! It should hold its shape firmly.
- Level your cake layers if needed. Place the first layer on your serving plate, spread with whipped cream, arrange sliced strawberries, then top with more cream. Add a second layer and frost the entire cake.
- Decorate with fresh strawberries. I like to slice some in half and arrange them around the edges—so pretty and tastes amazing!
5. Vanilla Bean “Shag” Heart Cake
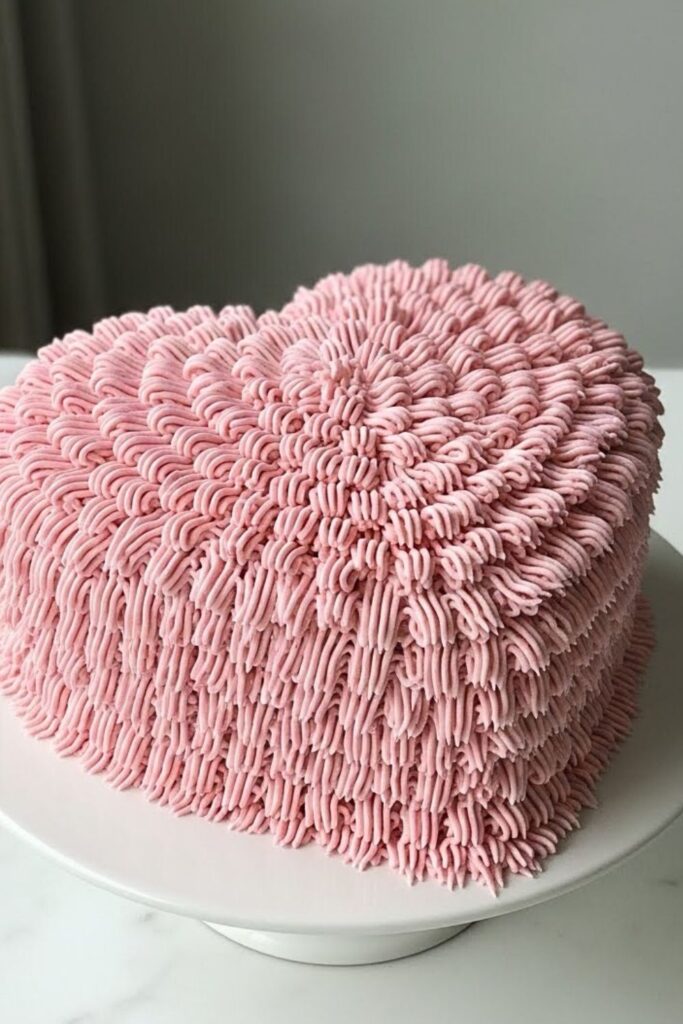
This textured beauty uses a grass piping tip to create the most Instagram-worthy fuzzy effect. Don’t let the technique intimidate you—after years of perfecting this, I promise it’s easier than it looks!
| Prep Time | 40 minutes |
| Bake Time | 30 minutes |
| Servings | 10 servings |
| Difficulty | Medium |
| Calories | ~390 per serving |
Essential Equipment:
- 9-inch heart pan – Standard size works perfectly.
- Grass piping tip (#233) – Creates that signature shag texture.
- Large piping bag – You’ll need room for lots of frosting!
Ingredients:
For the Cake:
- 2½ cups all-purpose flour
- 2½ teaspoons baking powder
- ½ teaspoon salt
- ¾ cup unsalted butter, softened
- 1¾ cups granulated sugar
- 3 large eggs
- 1 cup whole milk
- Seeds from 2 vanilla beans (or 2 tablespoons vanilla extract)
For the Buttercream:
- 2 cups unsalted butter, softened
- 6 cups powdered sugar
- ¼ cup heavy cream
- Seeds from 1 vanilla bean
- Gel food coloring (optional)
Instructions:
- Preheat oven to 350°F. Prepare your heart pan—I use the butter-and-flour method for this one.
- Whisk together flour, baking powder, and salt. Set aside.
- Cream butter and sugar until light and fluffy, about 4 minutes. Add eggs one at a time, then vanilla bean seeds.
- Alternate adding flour mixture and milk, mixing just until combined. The batter should be smooth and smell incredible—those vanilla beans make all the difference!
- Pour into prepared pan and bake for 28-32 minutes. Cool completely before frosting.
- For the buttercream, beat butter until pale and fluffy, about 5 minutes. Gradually add powdered sugar, then cream and vanilla seeds. Beat until light and smooth. Add coloring if desired—I love soft pastels for this design.
- Here’s my technique: fit your piping bag with the grass tip and fill with frosting. Starting from the bottom edge of the cake, hold the bag perpendicular to the cake and squeeze while pulling up slightly. The frosting should create little “tufts.” Work your way around and up the cake in rows. It usually takes me about 20 minutes, but the result is so worth it!
6. Heart-Shaped Brownie Pizza with Berry Toppings
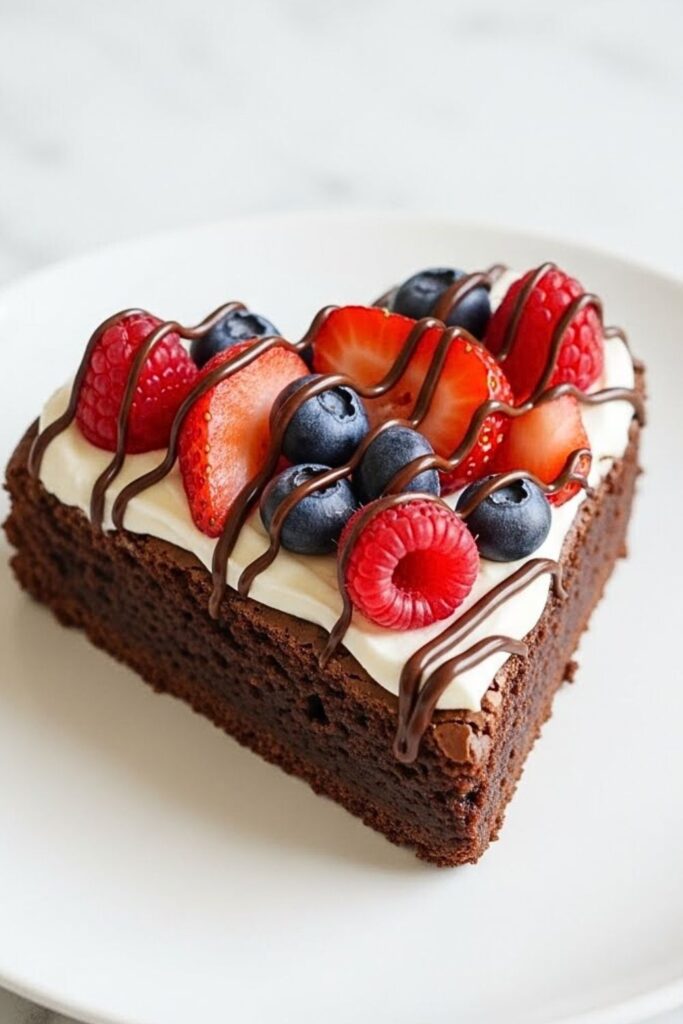
This easy heart-shaped cake idea for beginners is actually a giant brownie disguised as a cake—and it’s absolutely genius for casual celebrations or kids’ parties!
| Prep Time | 15 minutes |
| Bake Time | 25 minutes |
| Servings | 12 servings |
| Difficulty | Easy |
| Calories | ~310 per serving |
Essential Equipment:
- 12-inch heart-shaped pizza pan or tart pan – Creates the perfect pizza shape.
- Offset spatula – For spreading brownie batter evenly.
Ingredients:
For the Brownie Base:
- 1 cup unsalted butter, melted
- 2 cups granulated sugar
- 4 large eggs
- 1⅓ cups cocoa powder
- 1 cup all-purpose flour
- 1 teaspoon salt
- 1 teaspoon vanilla extract
For the Toppings:
- 8 oz cream cheese, softened
- ¼ cup powdered sugar
- 1 teaspoon vanilla
- Fresh strawberries, sliced
- Fresh blueberries
- Fresh raspberries
- Mint leaves for garnish
- Chocolate drizzle (optional)
Instructions:
- Preheat oven to 350°F. Line your heart pan with parchment paper—this makes serving so much easier!
- In a large bowl, whisk melted butter and sugar together. Add eggs one at a time, whisking well after each.
- Sift in cocoa powder, flour, and salt. Stir just until combined—you want fudgy, not cakey, so don’t overmix! Add vanilla and give it one last stir.
- Spread batter evenly in your prepared pan. The layer should be about ½-inch thick. Bake for 22-26 minutes. The center should still look slightly underdone—it’ll firm up as it cools. I learned this lesson after overbaking my first attempt!
- Let cool completely in the pan. Meanwhile, beat cream cheese, powdered sugar, and vanilla until smooth and fluffy.
- Once the brownie is cool, spread cream cheese mixture over the top, leaving a small border around the edges like a pizza crust.
- Arrange berries in a beautiful pattern—I like to create sections like pizza slices! Add mint leaves and drizzle with melted chocolate if desired. Slice into wedges and serve.
7. Vintage-Style Lambeth Heart Cake
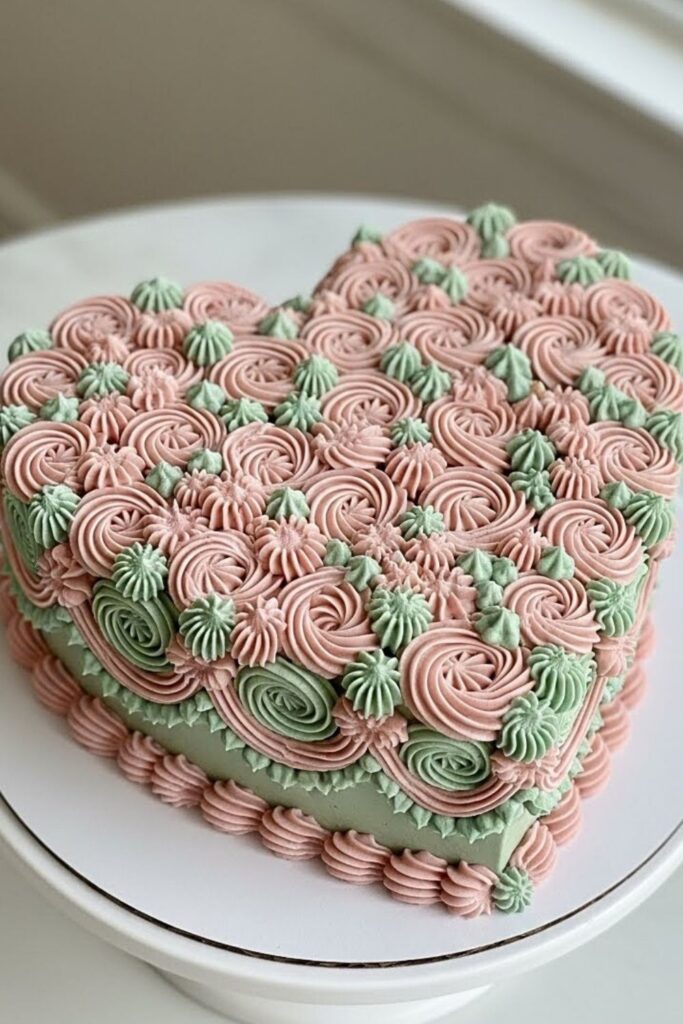
This romantic cake idea brings back the elegant piping style from the 1950s. The simple “c” motion creates gorgeous, textured designs that look incredibly impressive but are actually quite forgiving!
| Prep Time | 45 minutes |
| Bake Time | 30 minutes |
| Servings | 12 servings |
| Difficulty | Medium |
| Calories | ~400 per serving |
Essential Equipment:
- 9-inch heart pan – Your reliable workhorse for this design.
- Multiple piping tips – Tips #16, #21, and #104 for various techniques.
- Piping bags and couplers – Makes switching tips easy.
Ingredients:
For the Cake:
- 2½ cups all-purpose flour
- 2 teaspoons baking powder
- ½ teaspoon salt
- 1 cup unsalted butter, softened
- 1¾ cups granulated sugar
- 4 large eggs
- 1 cup buttermilk
- 2 teaspoons vanilla extract
For the Swiss Meringue Buttercream:
- 5 large egg whites
- 1¼ cups granulated sugar
- 1½ cups unsalted butter, softened and cubed
- 2 teaspoons vanilla extract
- Gel food coloring in vintage shades (dusty rose, sage green, butter yellow)
Instructions:
- Preheat the oven to 350°F and prepare your heart pan. Make your favorite vanilla cake using the ingredients listed above—I find buttermilk creates the perfect crumb for supporting all that beautiful piping.
- For the buttercream, place egg whites and sugar in a heatproof bowl over simmering water. Whisk constantly until sugar dissolves and mixture reaches 160°F.
- Transfer to your mixer and beat on high until stiff, glossy peaks form and the bowl is cool to the touch—this usually takes me about 8-10 minutes.
- Reduce speed to medium and add butter one cube at a time. The mixture might look curdled at first—don’t panic! Keep mixing, and it’ll come together into silky perfection. Add vanilla and beat until smooth.
- Divide the buttercream into bowls and tint with your chosen colors. I love soft, muted vintage tones for this style.
- Here’s the fun part: Using tip #21, pipe “c” shaped motions all over the cake in overlapping rows. Change colors as you go, creating a beautiful vintage tapestry effect. Add rosettes with tip #16 and ruffles with tip #104.
- The beauty of Lambeth piping is that it’s very forgiving—there’s no “wrong” way to do it! I like to tell my students that even my messy attempts look intentionally artistic.
8. Pastel Ombré Petal Heart Cake
This dreamy DIY heart-shaped cake features delicate buttercream petals in graduating shades. It’s stunning for baby showers, Easter, or spring birthdays!
| Prep Time | 50 minutes |
| Bake Time | 28 minutes |
| Servings | 10-12 servings |
| Difficulty | Medium |
| Calories | ~380 per serving |
Essential Equipment:
- 9-inch heart pan – For that classic heart shape.
- Petal piping tip (#104) – Creates those gorgeous ruffled petals.
- Turntable – Essential for this technique!
Ingredients:
For the Cake:
- 2½ cups all-purpose flour
- 2 teaspoons baking powder
- ½ teaspoon salt
- ¾ cup unsalted butter, softened
- 1½ cups granulated sugar
- 3 large eggs
- 1 cup buttermilk
- 2 teaspoons vanilla extract
- ¼ teaspoon almond extract
For the Buttercream:
- 2 cups unsalted butter, softened
- 6 cups powdered sugar
- ⅓ cup heavy cream
- 2 teaspoons vanilla extract
- Gel food coloring (your choice of ombré colors)
Instructions:
- Preheat the oven to 350°F and prepare your heart pan. Make the cake following the standard creaming method with the ingredients listed.
- Bake for 26-30 minutes until a toothpick comes out clean. Cool completely.
- Make your buttercream by beating butter until pale and fluffy, then gradually adding powdered sugar. Mix in cream and vanilla until light and smooth.
- Divide buttercream into 4-5 bowls. Leave one white, then create graduating shades of your chosen color. I love pink, lavender, or mint for this design!
- Crumb coat your cake with the white buttercream and chill for 30 minutes—this step makes the petal work so much easier, trust me on this one!
- Starting at the bottom with your darkest shade, hold your petal tip with the wide end at the base and the narrow end pointing up. Pipe overlapping petals in a row around the entire cake.
- Switch to the next lighter shade and repeat, working your way up the cake. The petals should overlap slightly both horizontally and vertically. Finish with white or your lightest shade at the top.
- This usually takes me about 40 minutes total, but the result is absolutely worth every second! The smell alone will have your neighbors knocking.
9. Dark Chocolate Ganache Heart with Gold Leaf

For elegant celebrations, this heart-shaped cake for Valentine’s Day (or any fancy occasion) is my secret weapon. The mirror-like ganache and edible gold create a serious wow factor with minimal effort.
| Prep Time | 30 minutes |
| Bake Time | 35 minutes |
| Servings | 14 servings |
| Difficulty | Medium |
| Calories | ~450 per serving |
Essential Equipment:
- 10-inch heart pan – Larger size for impressive presentation.
- Cooling rack over baking sheet – For catching ganache drips.
Ingredients:
For the Cake:
- 2 cups all-purpose flour
- 2 cups granulated sugar
- ¾ cup cocoa powder
- 2 teaspoons baking soda
- 1 teaspoon baking powder
- 1 teaspoon salt
- 2 eggs
- 1 cup strong brewed coffee
- 1 cup buttermilk
- ½ cup vegetable oil
- 1 teaspoon vanilla
For the Ganache:
- 2 cups heavy cream
- 20 oz dark chocolate (60-70% cocoa), finely chopped
- 2 tablespoons corn syrup (for shine)
- Edible gold leaf sheets
Instructions:
- Preheat oven to 350°F. Prepare your heart pan thoroughly—dark chocolate cakes can be stubborn about sticking!
- Whisk all dry ingredients together in a large bowl. In another bowl, whisk eggs, coffee, buttermilk, oil, and vanilla.
- Pour wet ingredients into dry and mix just until combined. The batter will be very thin—that’s what creates the incredibly moist, fudgy texture!
- Bake for 32-38 minutes. Let cool completely—and I mean completely! Any warmth will ruin your ganache finish.
- For the ganache, heat the cream until it just begins to simmer. Pour over chopped chocolate and let sit for 3 minutes. Stir gently from the center outward until completely smooth. Stir in corn syrup.
- Let ganache cool until it reaches about 90-95°F—I use a candy thermometer for this. It should be pourable but not hot.
- Place your cake on a cooling rack over a baking sheet. Pour ganache over the center and let it flow naturally over the edges. Don’t touch it—the magic is in letting it settle on its own!
- While ganache is still slightly tacky, carefully apply gold leaf using a dry brush. It’ll stick where you want it and create the most elegant finish. After years of testing, I’ve found this is what separates good bakers from great ones!
10. White Chocolate & Raspberry Mousse Heart
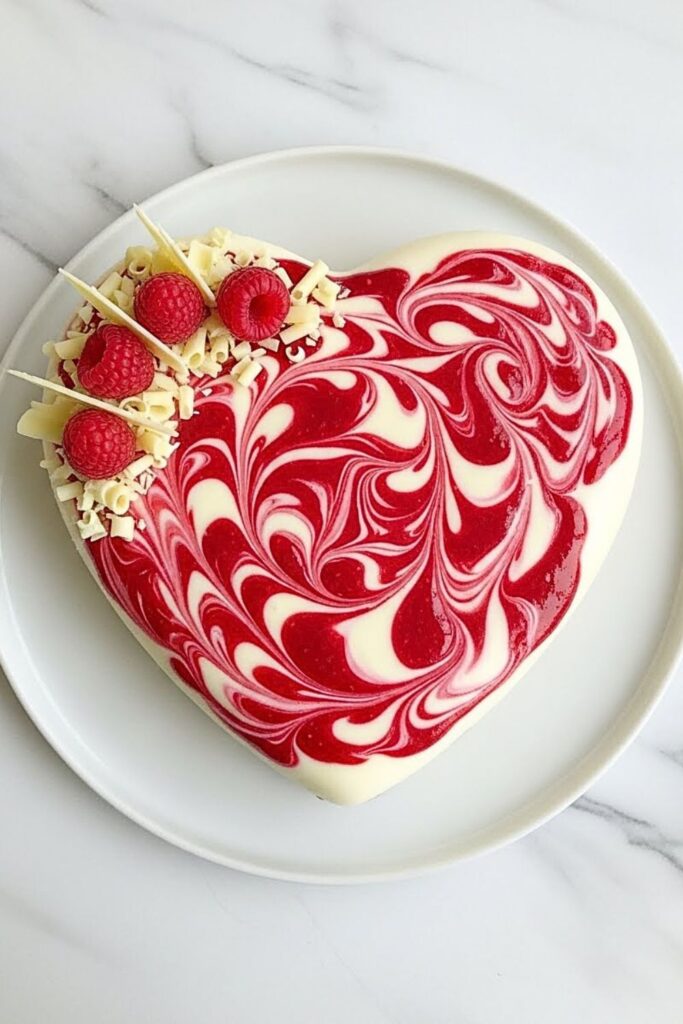
This show-stopping, easy heart-shaped cake is lighter than traditional layer cakes and perfect for warm-weather celebrations. The mousse is incredibly forgiving, making it ideal for beginners!
| Prep Time | 45 minutes (plus 4 hours chilling) |
| Bake Time | 20 minutes |
| Servings | 12 servings |
| Difficulty | Medium |
| Calories | ~340 per serving |
Essential Equipment:
- 9-inch heart-shaped springform pan – Essential for clean removal.
- Fine mesh strainer – For smooth raspberry coulis.
Ingredients:
For the Cake Base:
- 1 cup all-purpose flour
- 2 tablespoons cocoa powder
- ½ teaspoon baking powder
- ¼ teaspoon salt
- 2 large eggs
- ½ cup granulated sugar
- ¼ cup vegetable oil
- 1 teaspoon vanilla
For the White Chocolate Mousse:
- 12 oz white chocolate, chopped
- 3 cups heavy cream, divided
- 1 teaspoon vanilla extract
- 2 tablespoons powdered sugar
For the Raspberry Layer:
- 3 cups fresh raspberries
- ½ cup granulated sugar
- 2 tablespoons lemon juice
Instructions:
- Preheat oven to 350°F. Line the bottom of your springform pan with parchment.
- Make a simple sponge cake: whisk flour, cocoa, baking powder, and salt. In another bowl, beat eggs and sugar until thick and pale, about 5 minutes. Fold in oil and vanilla, then gently fold in dry ingredients.
- Pour into prepared pan and bake for 18-22 minutes. Cool completely.
- For the mousse, melt white chocolate with ½ cup cream over a double boiler. Let cool slightly.
- Beat the remaining 2½ cups of cream with vanilla and powdered sugar until stiff peaks form. Fold one-third of the whipped cream into the melted chocolate to lighten it, then gently fold in the remaining cream. Take your time here—rushing this step can deflate all those beautiful air bubbles!
- For the raspberry layer, cook raspberries, sugar, and lemon juice over medium heat until berries break down, about 10 minutes. Strain through a fine mesh to remove seeds. Cool completely.
- Assembly time! Place your cooled cake in the springform pan (keep it in there). Spread half the mousse over the cake. Drizzle with half the raspberry coulis and swirl gently with a knife. Add the remaining mousse, smooth the top, then create a marbled effect with the remaining coulis.
- Refrigerate at least 4 hours or overnight. The waiting is the hardest part, but I promise it’s worth it! Before serving, run a hot knife around the edges and carefully remove the springform ring. Top with fresh raspberries and white chocolate shavings.
Tips & Notes for Success
Planning Ahead: After years of baking heart cakes for every occasion, I’ve learned that preparation makes all the difference. Most of these cakes can be baked a day ahead, wrapped tightly in plastic wrap, and stored at room temperature or refrigerated, depending on the frosting. This actually helps the flavors develop and makes frosting easier—I swear by this technique!
Working with Heart-Shaped Pans: Heart pans can be trickier than round pans because of the point at the bottom. I always grease mine extra well, especially in that pointed section. My foolproof method: brush melted butter into every corner, dust with flour, tap out excess, then line the bottom with parchment cut to shape.
Achieving Professional Results: The secret ingredient? Patience. Let your cakes cool completely before frosting—I know it’s tempting, but warm cake + frosting = disaster. For the most professional look, always do a crumb coat (thin layer of frosting), chill for 30 minutes, then add your final coat. This little trick will change everything for you!
Temperature Matters: Room temperature ingredients are crucial for even mixing and smooth batters. I take my eggs, butter, and dairy out about 2 hours before baking. If you forget (we’ve all been there!), Place eggs in warm water for 10 minutes and microwave butter in 5-second bursts.
Troubleshooting Common Issues:
- Cake sticking to the pan? Make sure you grease every single corner, especially in heart-shaped pans. Let the cake cool for exactly 15 minutes before attempting to remove—too soon or too late both cause problems.
- Frosting too soft? Pop it in the fridge for 15 minutes. Too stiff? Add a tablespoon of milk or cream at a time.
- Uneven layers? Invest in a cake leveler or use a serrated knife and a gentle sawing motion. I like to flip my cakes upside down and frost the flat bottom as the top—instant smooth surface!
Making It Your Own: Don’t be afraid to customize these recipes! Swap vanilla for almond extract, add citrus zest, or fold in different mix-ins. Some of my best creations came from happy accidents in the kitchen. Emma once dumped mini chocolate chips into my vanilla batter, and it became a family favorite!
More Related Recipes
Looking for more cake inspiration? Check out these favorites from my kitchen:
- 12 Beginner-Friendly Valentine’s Cake Ideas (With Recipes)
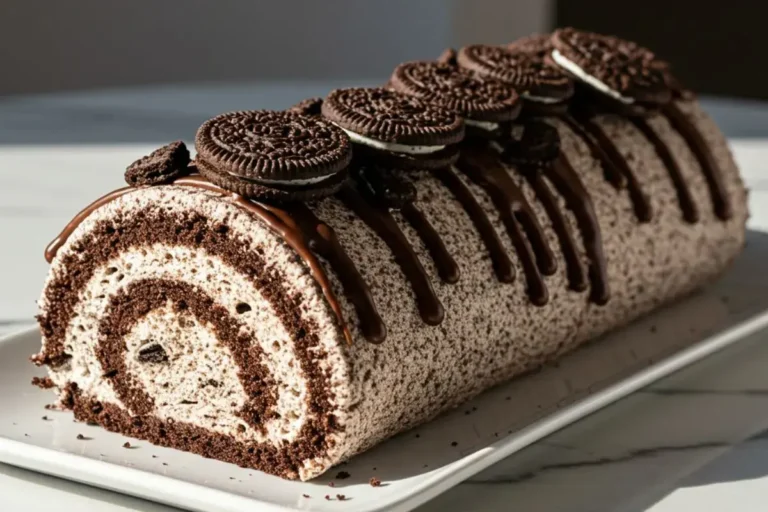
- 12 Best Swiss Roll Recipes Perfect for Fall & Holiday Season
- 15 Simple & Easy-to-Make Birthday Cakes
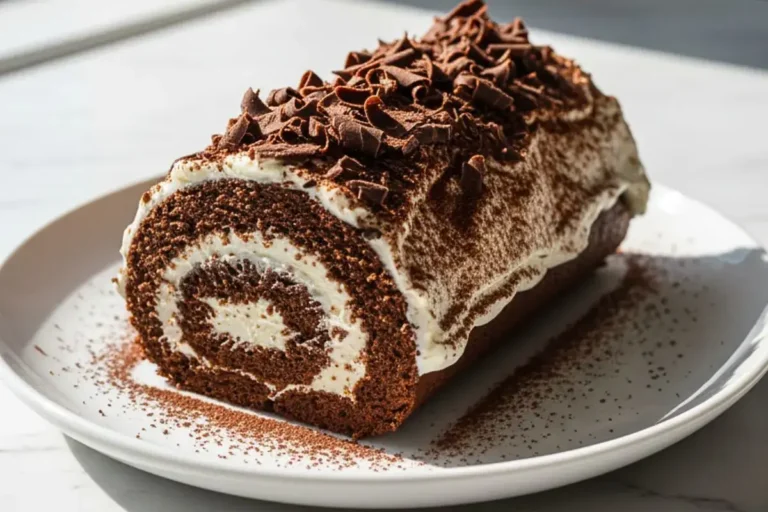
- Classic Tiramisu Cake
Conclusion
These ten heart-shaped cake ideas prove that baking from the heart doesn’t have to be complicated. Whether you’re going for the classic romance of red velvet, the drama of a broken heart cake, or the elegance of gold-leafed ganache, there’s a design here for every skill level and celebration.
I’ve been perfecting these recipes for years, and now they’re yours to create memories with! Start with the easier options like the brownie pizza or Bundt cake, then work your way up to the more intricate designs. Remember, even my “disasters” have been delicious—and that’s what really matters.
Pick your favorite, gather your ingredients, and let’s get baking! Your kitchen will smell like heaven, and whoever you’re baking for will feel incredibly loved. Trust me on this one—after eight years as a professional baker and countless heart cakes later, these recipes never fail to bring smiles!