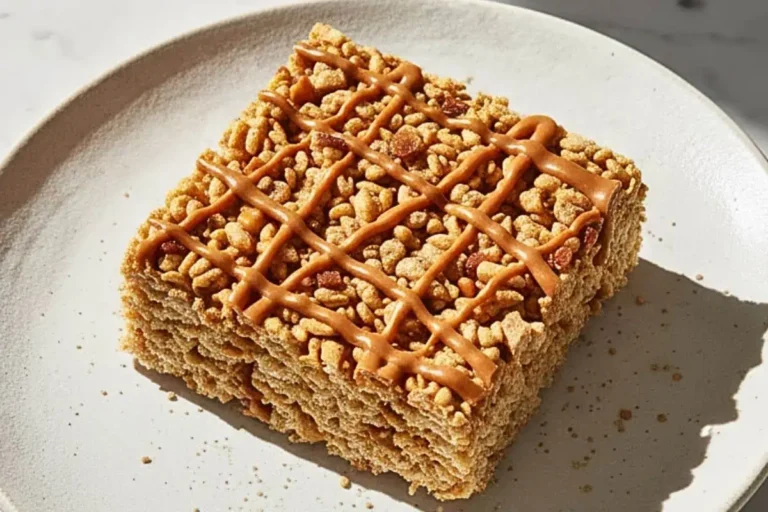
Chocolate Energy Balls: Healthy No-Bake Treat in 15 Minutes
There’s something undeniably comforting about the chocolate energy balls recipe that comes together in just 15 minutes, especially when it’s packed with wholesome ingredients that make you feel good. I remember the first time I whipped up a batch of these in my Portland kitchen, with my golden retriever, Butter, patiently waiting for any stray oats to hit the floor. It was a chilly winter afternoon, and I was craving something sweet yet nourishing to power through a busy day at Sophie’s Sweet Haven.
After years of tweaking, I’ve landed on this recipe that’s become a staple for my family—and my blog readers! Trust me on this one, these no-bake chocolate energy balls are as delicious as they are easy, and I’m excited to share the magic with you.
Jump to
Recipe Information Table
| Details | Information |
|---|---|
| Prep Time | 15 minutes |
| Cook Time | None (No-bake) |
| Total Time | 15 minutes |
| Servings | 12 balls |
| Estimated Calories | 150 kcal per ball |
| Course | Snack, Dessert |
| Cuisine | American, Healthy |
Essential Ingredients for Perfect Chocolate Energy Balls
Let’s talk ingredients, because quality is everything when it comes to chocolate energy balls. I’ve learned this the hard way after a few batches that were, let’s just say, less than stellar. Here’s what you’ll need and why each component matters.
- Rolled Oats (1 cup): Old-fashioned rolled oats give these balls their hearty texture. I prefer rolled over instant oats because they hold up better and add a nice chew. If you’re gluten-free, make sure to grab certified gluten-free oats.
- Almond Butter (½ cup): This is the glue that holds everything together, adding creaminess and healthy fats. I use smooth, unsweetened almond butter, but peanut butter works too if that’s what you have. Just make sure it’s natural, with no added oils or sugars.
- Honey or Maple Syrup (¼ cup): For natural sweetness, I lean toward honey because it pairs so well with chocolate. Maple syrup is a great vegan alternative, and I’ve found it gives a slightly deeper flavor. Adjust to taste if you like things less sweet.
- Unsweetened Cocoa Powder (¼ cup): This is where the rich, chocolatey flavor comes from. I splurge on high-quality cocoa powder—it’s worth it for that deep, indulgent taste. Dutch-processed cocoa works beautifully for a smoother finish.
- Chia Seeds (2 tbsp): These little powerhouses add a nutritional boost and a subtle crunch. You can swap for flaxseeds if you prefer, but I love the omega-3s chia brings to the table.
- Vanilla Extract (1 tsp): A splash of vanilla enhances the chocolate and adds warmth. Trust me, don’t skip this—it’s like the secret handshake of baking.
- Dark Chocolate Chips (¼ cup, optional): For an extra hit of chocolate, I toss in some mini dark chocolate chips. They’re optional, but my kids, Emma and Lucas, insist they’re non-negotiable!
- Pinch of Salt: A tiny bit of salt balances the sweetness and makes the flavors pop. I forgot this once, and let’s just say the batch was missing that “wow” factor.
You can find most of these at your local grocery store or farmers market (my favorite Saturday haunt). If you’re missing something, don’t stress—substitutions like peanut butter for almond butter or agave for honey work just fine.
Step-by-Step Chocolate Energy Balls Recipe
Now, here’s where the fun begins. This chocolate energy balls recipe is so simple, you’ll wonder why you haven’t been making these forever. I’m standing right here in my kitchen with you, guiding you through each step. Let’s do this!
- Combine Dry Ingredients: In a large mixing bowl, toss in 1 cup of rolled oats, ¼ cup of unsweetened cocoa powder, 2 tablespoons of chia seeds, and a pinch of salt. Stir them together with a wooden spoon. I like to take a moment to inhale that chocolatey aroma—it’s like a preview of what’s to come!
- Mix Wet Ingredients: In a separate small bowl, combine ½ cup of almond butter, ¼ cup of honey (or maple syrup), and 1 teaspoon of vanilla extract. Here’s where most people go wrong: make sure your almond butter is at room temperature so it blends smoothly. I’ve had to wrestle with cold, stubborn nut butter before, and it’s not fun. Stir until it’s silky and well-combined.
- Bring It All Together: Pour the wet mixture into the dry ingredients. Use a spatula or your hands (I always go hands-on—it’s more fun!) to mix everything until it forms a cohesive, slightly sticky dough. If you’re adding dark chocolate chips, fold in ¼ cup now. Don’t worry if it looks a bit messy at first—mine always does!
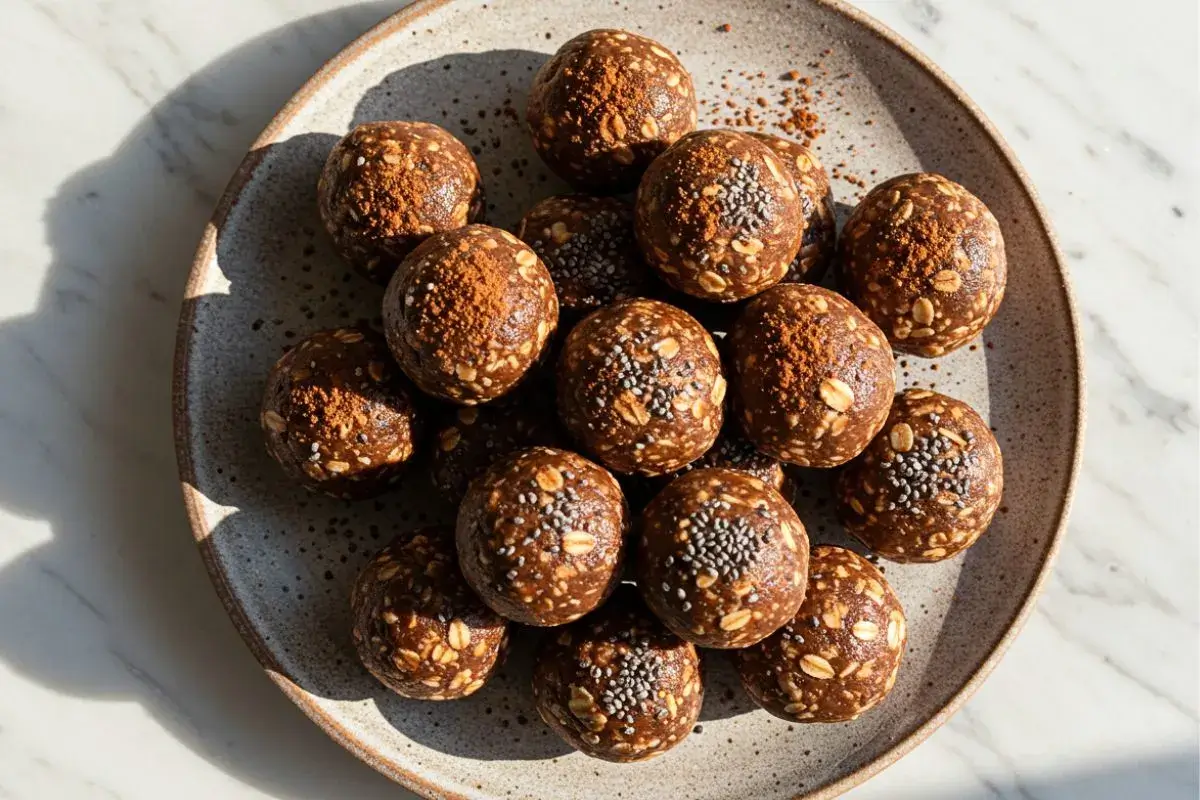
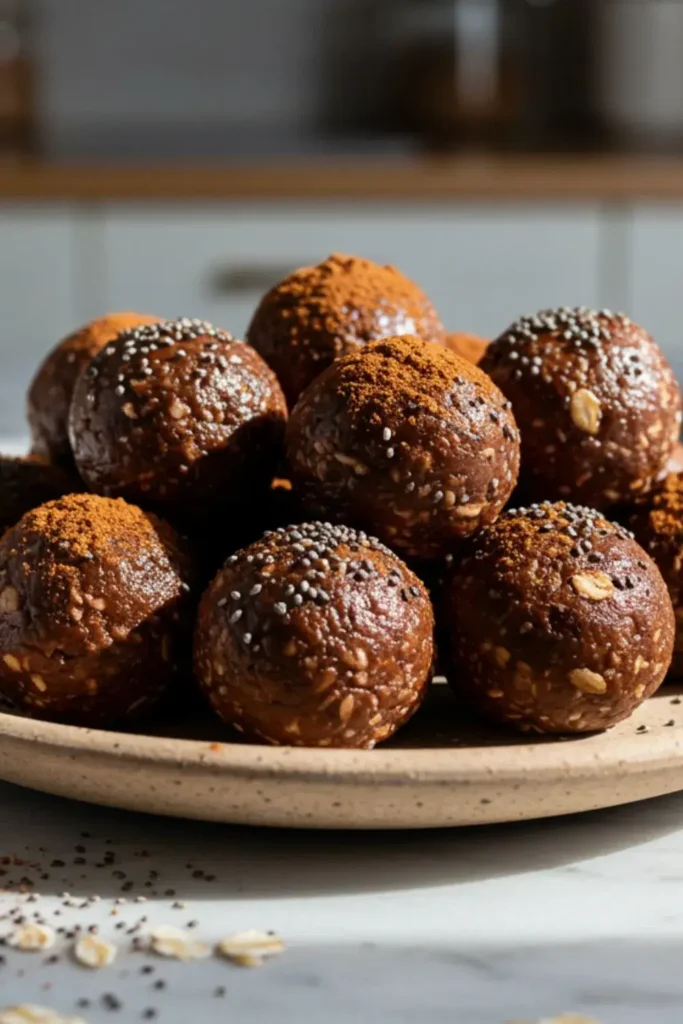
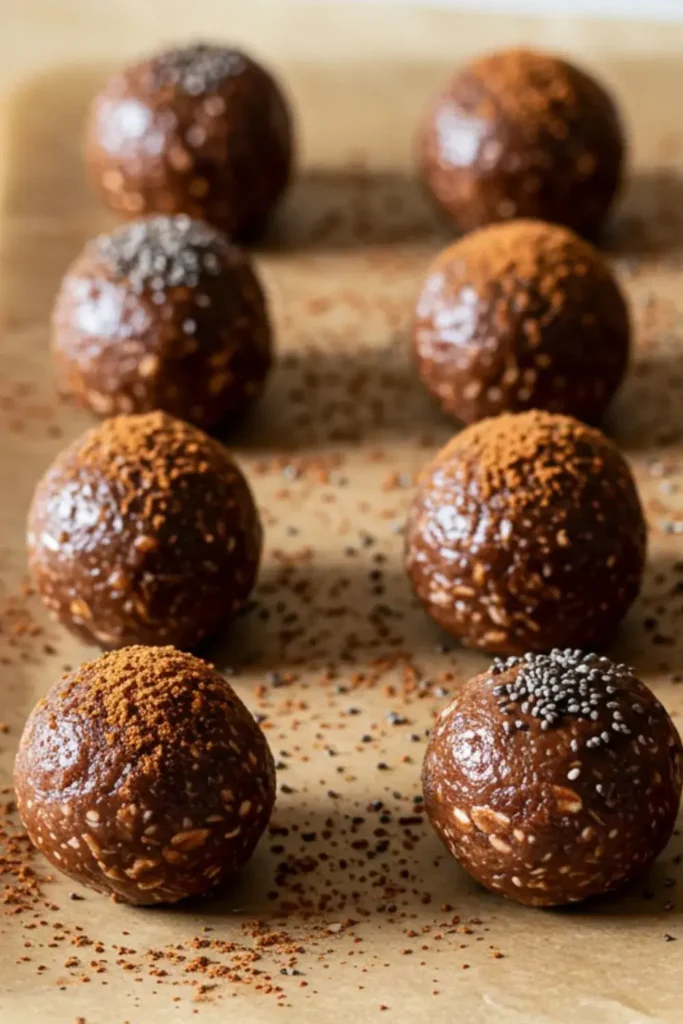
- Shape the Balls: Scoop out about 1 tablespoon of the mixture and roll it between your palms to form a ball. I usually get about 12 balls, each roughly the size of a golf ball. If the mixture sticks to your hands, lightly wet them with water. This usually takes me about 8-10 minutes, depending on how many times Butter distracts me by begging for a taste.
- Chill and Set: Place the balls on a parchment-lined baking sheet or plate and pop them in the fridge for at least 10 minutes to firm up. I’ve found this step makes them hold their shape better, especially if you’re in a warm kitchen. If you’re impatient like I was during my first batch, you can eat them right away, but they’re better chilled.
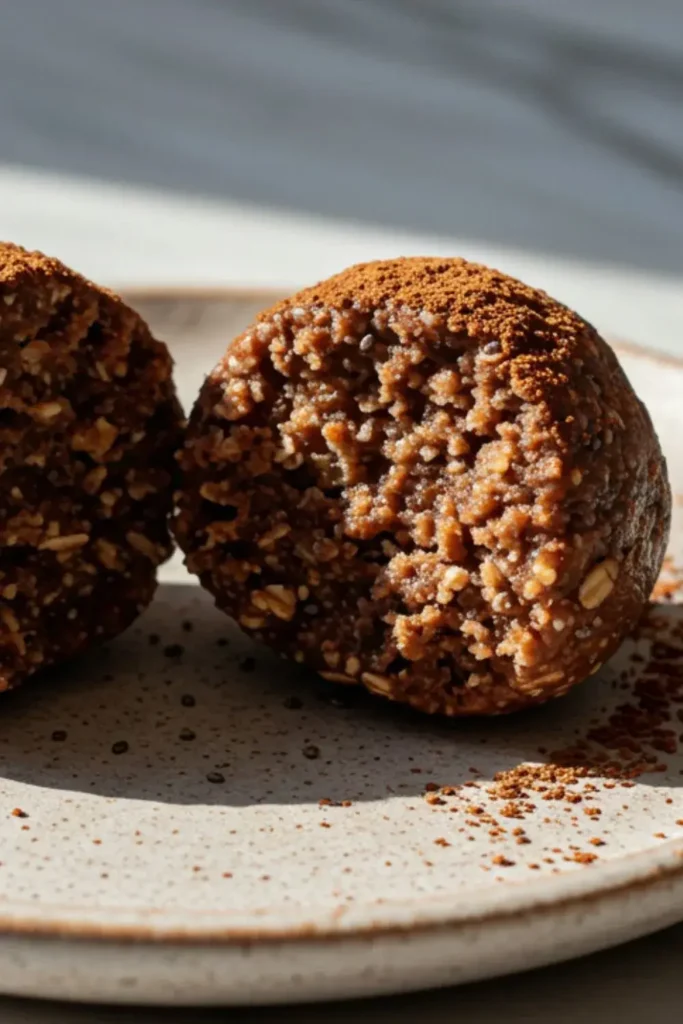
- Enjoy! Once set, your chocolate energy balls are ready to enjoy. The texture is chewy with a rich, chocolatey bite that’s just sweet enough. The smell alone will have your neighbors knocking!
Pro Tips for Chocolate Energy Balls Success
After years of testing, I’ve picked up a few tricks to make your energy bites absolutely perfect:
- Toast the Oats: For an extra layer of flavor, lightly toast your oats in a dry skillet over medium heat for 3-4 minutes before mixing. It brings out a nutty depth that pairs beautifully with the chocolatey flavor.
- Check Your Nut Butter: If your almond butter is too thick, warm it slightly in the microwave (10-15 seconds) to make mixing easier. I learned this after a wrist workout, trying to blend a cold batch!
- Customize the Sweetness: Taste the mixture before rolling. If you want it sweeter, add an extra tablespoon of honey, but go slow—too much can make the balls sticky.
- Don’t Skip the Chill: I know it’s tempting, but chilling really helps the balls hold their shape. If you’re in a rush, 5 minutes in the freezer works too.
- Use a Cookie Scoop: For uniform balls, a small cookie scoop is a game-changer. It’s how I keep things consistent when I’m making these for the bakery.
Variations and Customizations for Chocolate Energy Balls
One of the best things about this chocolate energy balls recipe is how versatile it is. Here are a few ways to make it your own, inspired by my experiments and customer requests at Sophie’s Sweet Haven:
- Coconut Bliss: Roll the finished balls in shredded coconut for a tropical twist. It adds a nice crunch and looks pretty, too.
- Nutty Crunch: Swap half the oats for finely chopped almonds or walnuts for extra texture. My husband, David, loves this version with his morning coffee.
- Mocha Vibes: Add 1 teaspoon of instant espresso powder to the mix for a coffee-chocolate combo. It’s my go-to when I need an extra pick-me-up.
- Fruity Pop: Mix in 2 tablespoons of dried cranberries or raisins for a sweet-tart contrast. This is a hit with my kids!
- Spiced Up: A pinch of cinnamon or cayenne adds warmth or a subtle kick. I discovered this during a winter baking spree, and it’s perfect for winter comfort snacks.
Feel free to play around and find your perfect combo. Baking is about creating memories, not just following a recipe!
Storing and Serving Your Chocolate Energy Balls
These no-bake chocolate energy balls are a dream for meal prep. Store them in an airtight container in the fridge for up to 2 weeks—though, trust me, they rarely last that long in my house! You can also freeze them for up to 3 months; just layer them between parchment paper to prevent sticking. I like to pop a few in a small container for hikes or busy mornings at the bakery.
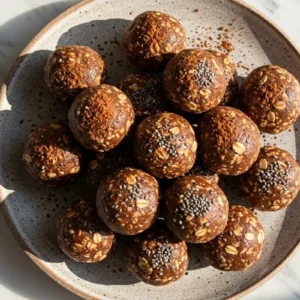
Serve them straight from the fridge for a firm, chewy texture, or let them sit at room temperature for a softer bite. They’re perfect as a healthy snack for kids’ lunchboxes, post-workout fuel, or a guilt-free dessert with a cup of tea. For a fun presentation, arrange them on a platter with a sprinkle of cocoa powder or chopped nuts.
Chocolate Energy Balls: No-Bake Healthy Snack
Ingredients
- 1 cup rolled oats
- ½ cup smooth almond butter unsweetened
- ¼ cup honey or maple syrup
- ¼ cup unsweetened cocoa powder
- 2 tbsp chia seeds
- 1 tsp vanilla extract
- ¼ cup mini dark chocolate chips optional
- Pinch of salt
Instructions
- Combine oats, cocoa powder, chia seeds, and salt in a large bowl.
- Mix almond butter, honey, and vanilla in a small bowl until smooth.
- Combine wet and dry ingredients, add chocolate chips if using, and mix into a sticky dough.
- Roll into 12 balls using a tablespoon measure.
- Chill in the fridge for 10 minutes to set.
- Store in an airtight container and enjoy!
Equipment
- Large mixing bowl
- Small mixing bowl
- Wooden spoon or spatula
- Measuring cups and spoons
- Parchment paper
- Baking sheet or plate
FAQ
How do I make chocolate energy balls gluten-free?
Use certified gluten-free oats to ensure they’re safe for gluten-sensitive folks. Double-check your chocolate chips, too, as some brands may have cross-contamination.
Can I make these vegan?
Absolutely! Swap honey for maple syrup or agave, and use dairy-free chocolate chips. I’ve made this version for vegan customers, and it’s just as delicious.
Why are my energy balls too sticky?
This usually happens if there’s too much liquid. Add a tablespoon or two of extra oats and mix again. I’ve had to fix this in my own kitchen a few times!
Can I use a different nut butter?
Yes, peanut butter or cashew butter works great. Just stick to natural versions without added oils. I once tried sunflower seed butter for a nut-free option, and it was surprisingly tasty!
How long do these take to set?
About 10 minutes in the fridge does the trick, but if you’re in a hurry, 5 minutes in the freezer works too. I learned this during a last-minute party prep!
Are these energy balls kid-friendly?
Definitely! My kids, Emma and Lucas, love them. You can skip the chia seeds if your kids are picky about texture, and they’ll still be a hit.
Conclusion
These chocolate energy balls are proof that healthy can be indulgent, quick, and oh-so-satisfying. Whether you’re whipping up a batch for a winter comfort snack or a post-workout boost, this recipe is a keeper. I love how it brings back memories of cozy afternoons in Nonna Rosa’s kitchen, where the smell of chocolate and the joy of creating something delicious always went hand in hand. So, grab your ingredients, roll up your sleeves, and make these your own. I’d love to hear how they turn out—trust me, your kitchen’s about to smell amazing!