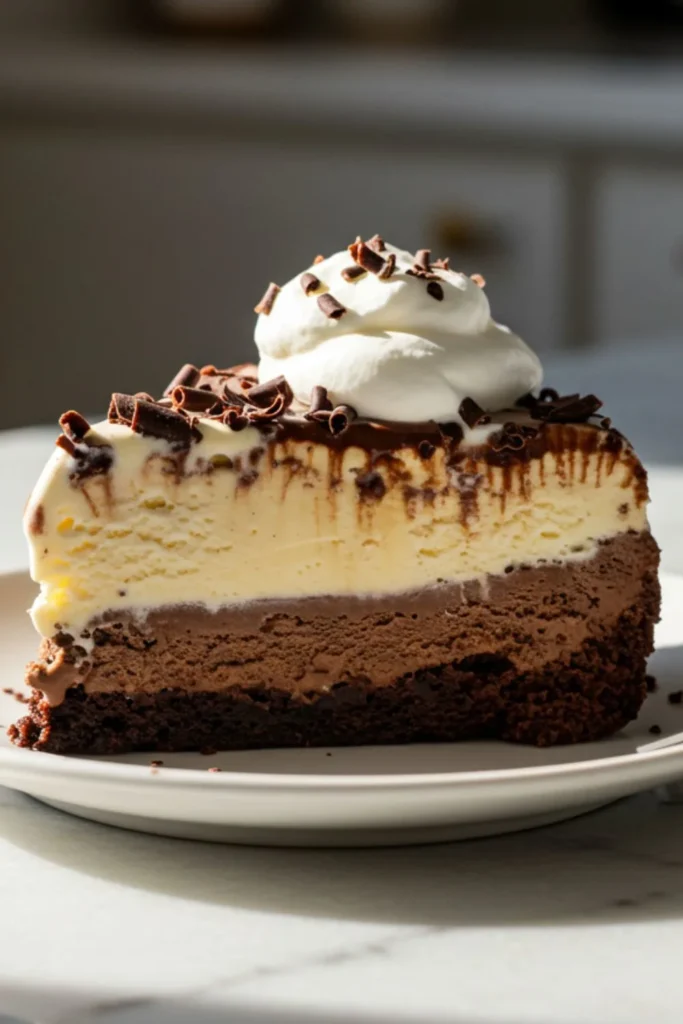
Brownie Ice Cream Cake – The Ultimate Frozen Dessert

There’s something undeniably magical about a Brownie Ice Cream Cake wafting its chocolatey aroma through your kitchen. I remember the first time I made one for my niece’s summer birthday party – the look on her face when I brought out this towering, frozen masterpiece was worth every minute spent layering it. After nearly two decades of baking and countless dessert experiments, this Brownie Ice Cream Cake has become my go-to for celebrations or those moments when you just need a showstopper.
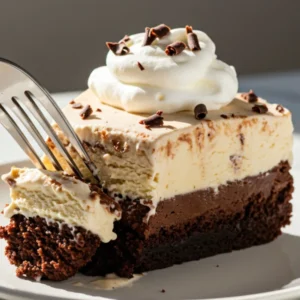
It’s the perfect marriage of fudgy brownie, creamy ice cream, and a glossy chocolate ganache that feels like a hug in dessert form. Whether you’re a novice baker or a seasoned pro, I’m excited to share this recipe that’s guaranteed to impress your family and friends with every chilled, decadent bite.
Table of Contents
Recipe Information
| Details | Information |
|---|---|
| Prep Time | 30 minutes |
| Baking Time | 25 minutes |
| Freezing Time | 4 hours (or overnight) |
| Total Time | About 5 hours |
| Servings | 12 slices |
| Estimated Calories | 450 kcal per slice (varies by ice cream flavor) |
Essential Ingredients for Perfect Brownie Ice Cream Cake
Let’s talk ingredients, because quality makes all the difference in a Brownie Ice Cream Cake. Over the years, I’ve tweaked this recipe to get it just right, and here’s what you’ll need:
- For the Brownie Layer:
- Unsalted Butter (¾ cup, melted): Butter gives the brownie its rich, fudgy texture. I’ve tried oil, but it just doesn’t compare.
- Granulated Sugar (1 ½ cups): For sweetness and that classic crackly brownie top. Don’t skimp here!
- Large Eggs (2): These bind the brownie and add moisture. Room temperature works best for even mixing.
- Vanilla Extract (1 tsp): A splash enhances the chocolate flavor. Pure vanilla is worth it.
- All-Purpose Flour (¾ cup): Just enough to give structure without making the brownie cakey.
- Unsweetened Cocoa Powder (½ cup): I prefer Dutch-processed for a deeper flavor, but natural works too.
- Salt (¼ tsp): Balances the sweetness and brings out the chocolate notes.
- Semi-Sweet Chocolate Chips (½ cup): For extra gooeyness. You can swap for dark chocolate if you like it intense.
- For the Ice Cream Layer:
- Ice Cream (1.5 quarts): Vanilla is classic, but coffee, chocolate, or even mint chip are divine. Soften slightly before spreading. I’ve tested store-bought and homemade, and both work beautifully.
- For the Chocolate Ganache:
- Heavy Cream (½ cup): The base for a smooth, pourable ganache.
- Semi-Sweet Chocolate (8 oz, chopped): Use good-quality chocolate bars or chips. I’ve found that higher cocoa content (60-70%) elevates the flavor.
- For the Whipped Cream:
- Heavy Cream (1 cup, cold): Cold cream whips up fluffier.
- Powdered Sugar (2 tbsp): For a touch of sweetness without graininess.
- Vanilla Extract (½ tsp): Adds warmth to the whipped cream.
- Optional Toppings:
- Chocolate shavings, sprinkles, or crushed nuts for extra flair.
Substitutions? If you’re out of butter, margarine can work for the brownie, but it’s not quite as rich. For a gluten-free version, swap the flour for a 1:1 gluten-free baking blend. I’ve also used dairy-free ice cream and coconut cream for the ganache with great results for vegan friends.
Step-by-Step Brownie Ice Cream Cake Recipe
Now, let’s get to the fun part – building your Brownie Ice Cream Cake! I’ll walk you through each step as if we’re in the kitchen together. Trust me, I’ve made every mistake (like forgetting to line the pan – oops!), so I’ll guide you to avoid those pitfalls.
- Prepare Your Pan:
- Preheat your oven to 350°F (175°C). Line a 9-inch springform pan with parchment paper and lightly grease the sides. This makes unmolding a breeze. I learned the hard way that a regular cake pan is a nightmare to work with here.
- Make the Brownie Layer:
- In a large bowl, whisk together melted butter and granulated sugar until smooth. Add the eggs and vanilla extract, mixing until fully combined. (Pro tip: Don’t overmix – you want fudgy, not tough.)
- Sift in the flour, cocoa powder, and salt. Stir gently until just combined, then fold in the chocolate chips. The batter should be thick and glossy.
- Spread the batter evenly into the prepared pan. Bake for 20-25 minutes, or until a toothpick inserted in the center comes out with a few moist crumbs. Let it cool completely in the pan – this takes about an hour. Rushing this step once led to a cracked brownie base, so be patient!
- Add the Ice Cream Layer:
- Let your ice cream soften at room temperature for 10-15 minutes until it’s spreadable but not melted. Scoop it onto the cooled brownie base and spread evenly with a spatula. I like to work quickly to keep it from getting too soft.
- Smooth the top and cover with plastic wrap, pressing it directly onto the ice cream to prevent ice crystals. Freeze for at least 2 hours, or until firm.
- Prepare the Chocolate Ganache:
- Heat the heavy cream in a small saucepan over medium heat until it just begins to simmer (don’t boil!). Pour it over the chopped chocolate in a heatproof bowl. Let it sit for 1 minute, then stir until smooth and glossy. Let it cool slightly until it thickens but is still pourable.
- Remove the cake from the freezer, release the springform, and transfer to a serving plate. Pour the ganache over the top, letting it drip slightly down the sides for that wow factor. Return to the freezer for 30 minutes to set.
- Whip the Cream and Decorate:
- In a chilled bowl, whip the cold heavy cream, powdered sugar, and vanilla extract until soft peaks form. Pipe or spread over the set ganache. I love using a star tip for pretty swirls.
- Add optional toppings like chocolate shavings or sprinkles. Freeze the whole cake for another hour (or overnight) to ensure clean slices.
- Serve:
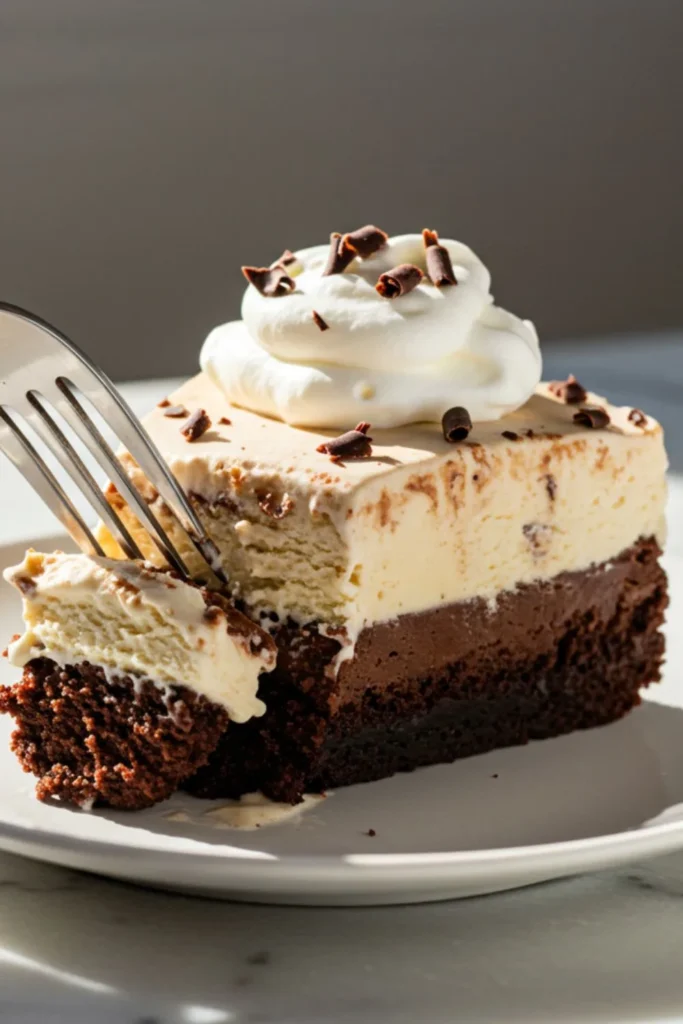
- Let the cake sit at room temperature for 5-10 minutes before slicing. Use a sharp knife dipped in hot water for clean cuts. Serve immediately and watch the smiles!
Pro Tips for Brownie Ice Cream Cake Success
After years of perfecting this Brownie Ice Cream Cake, here are my top tips:
- Use a Springform Pan: It’s a game-changer for easy removal. I once tried a regular pan and ended up with a crumbled mess.
- Don’t Rush Cooling: Let the brownie cool completely before adding ice cream to avoid a soggy base.
- Work in a Cool Kitchen: Ice cream melts fast, so keep your workspace cool. I’ve had to refreeze mid-layering on hot summer days!
- Taste Your Ganache: If it’s too bitter, add a teaspoon of sugar to the cream before heating.
- Freeze Between Layers: This keeps everything neat and prevents mixing. Patience is your friend here.
Variations and Customizations for Brownie Ice Cream Cake
One of the joys of a Brownie Ice Cream Cake is how versatile it is. Here are some variations I’ve tried:
- Flavor Swap: Use coffee ice cream for a mocha vibe or strawberry for a fruity twist. My kids love cookies-and-cream ice cream for extra crunch.
- Add Crunch: Mix crushed Oreos or toffee bits into the ice cream layer before freezing.
- Boozy Twist: For adults, drizzle a tablespoon of Baileys or Kahlúa over the brownie before adding ice cream. I did this for a friend’s party, and it was a hit!
- Nutty Delight: Fold chopped pecans or almonds into the brownie batter for extra texture.
- Vegan Version: Use plant-based butter, dairy-free ice cream, and coconut cream for the ganache. I tested this for a vegan potluck, and no one guessed it wasn’t traditional.
Storing and Serving Your Brownie Ice Cream Cake
To keep your Brownie Ice Cream Cake fresh, wrap it tightly in plastic wrap and store it in the freezer for up to 1 month. I like to slice it first and wrap individual pieces for easy grab-and-go treats. If the ganache hardens too much, let the cake sit at room temperature for a few minutes before serving to soften slightly. For serving, I always have extra whipped cream or hot fudge on hand for drizzling – it makes every slice feel indulgent. This cake is perfect for birthdays, barbecues, or even a quiet night in. My family tradition is to serve it with fresh berries on the side for a pop of color and flavor.
Brownie Ice Cream Cake – The Ultimate Frozen Dessert
Ingredients
Brownie Layer:
- Unsalted butter: ¾ cup melted
- Granulated sugar: 1 ½ cups
- Large eggs: 2
- Vanilla extract: 1 tsp
- All-purpose flour: ¾ cup
- Unsweetened cocoa powder: ½ cup
- Salt: ¼ tsp
- Semi-sweet chocolate chips: ½ cup
Ice Cream Layer:
- Ice cream any flavor: 1.5 quarts
- Chocolate Ganache:
- Heavy cream: ½ cup
- Semi-sweet chocolate chopped: 8 oz
Whipped Cream:
- Heavy cream cold: 1 cup
- Powdered sugar: 2 tbsp
- Vanilla extract: ½ tsp
Optional Toppings:
- Chocolate shavings sprinkles, or crushed nuts
Instructions
- Preheat oven to 350°F; line and grease a 9-inch springform pan.
- Mix brownie batter (butter, sugar, eggs, vanilla, flour, cocoa, salt, chocolate chips); bake 20-25 minutes; cool completely.
- Soften ice cream, spread over cooled brownie, and freeze 2 hours.
- Heat cream, pour over chocolate for ganache, cool slightly, pour over cake, and freeze 30 minutes.
- Whip cream with sugar and vanilla, pipe/spread on top, add toppings, and freeze 1 hour.
- Let sit 5-10 minutes before slicing and serving.
Equipment
- 9-inch springform pan
- Parchment paper
- Mixing bowls
- Whisk or electric mixer
- Spatula
- Small saucepan
- Heatproof bowl
- Piping bag (optional)
- Sharp knife
FAQ
Can I make this Brownie Ice Cream Cake ahead of time?
Absolutely! It’s best made a day or two in advance to let the layers set properly. Just keep it well-wrapped in the freezer.
What if I don’t have a springform pan?
You can use a regular 9-inch cake pan lined with parchment, but removing it will be trickier. Run a knife around the edges and invert carefully.
Can I use boxed brownie mix?
Yes, but homemade is worth the effort for flavor. If using a mix, bake it in the springform pan and follow the box instructions.
How do I prevent ice crystals on the ice cream?
Press plastic wrap directly onto the ice cream surface before freezing to minimize air exposure.
Can I make this gluten-free?
Swap the flour for a 1:1 gluten-free baking blend. I’ve used Bob’s Red Mill with great success.
Conclusion
There’s nothing quite like slicing into a Brownie Ice Cream Cake and watching the layers reveal themselves – it’s a dessert that feels like a celebration in every bite. I’ve shared this recipe with countless friends, and it’s become a staple at my family gatherings, from summer picnics to holiday parties. With its fudgy brownie base, creamy ice cream, and luscious ganache, it’s a treat that brings people together. So grab your ingredients, channel your inner baker, and create a masterpiece that’ll have everyone asking for seconds. Happy baking!